Butterfly Crown - Clay
LOTR Home | Up | Wire Intro | Joining Tips | Wire Circlets | Crown Tips | Making It Real | Galadriel's Circlet Pattern | Butterfly Crown - Tin | Butterfly Crown - Clay | Copper Foil Arwen Crown | Dwarf Beard Crimps | Cleaning Silver Jewlry | Weta Techniques
Pattern Modification & Tips | Fabric Techniques | Fabric Embellishment | All About Armor | Leather Working | Vambraces to Gloves | Weapon Tips | Shoe Tips | Metalwork and Crowns | Working with Clay | Casting Belt Buckle | Casting Small Props | Pipe Making Tips

LOTR Home
The Hobbit
News 'n'  Exhibits
Characters
Quick Costumes
Making 'Em
Buy It
Resources
Community
Search Us
Contact Us

v ----- Advertisement -----v

^ -----Advertisement ----- ^


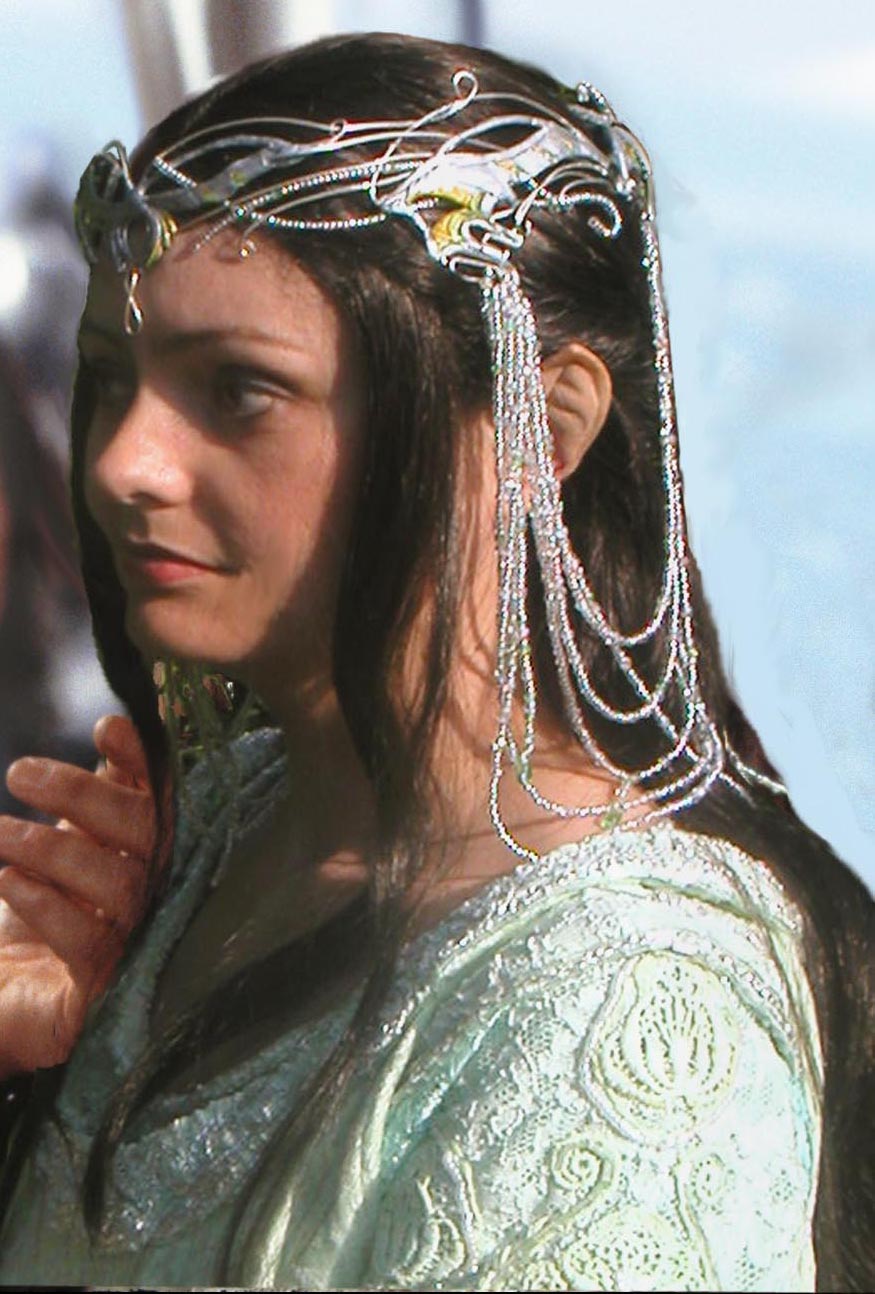
Arwen's Butterfly Coronation
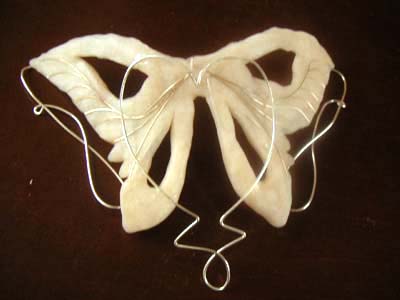
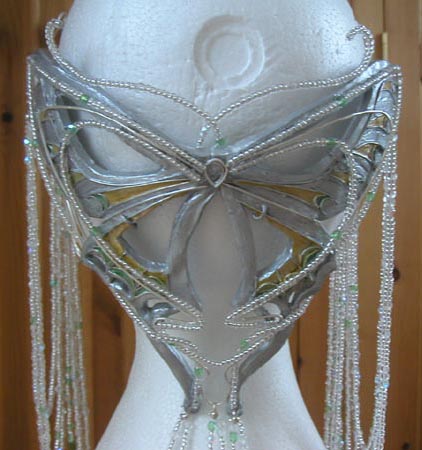
 Crown

Clay, wires, solder, paint and beads

== by Michelle P.


Not all version of the crown need to use fancy tools and large amounts of money.  This uses clay as the base. 

The beads do not need to be crystal and semi-precious stone, unless they're in your budget, or you find a good sale.

The joints are soldered.  However, you could make this using a metal epoxy... JB weld or something like it.


The Pattern

The clay would be the thicker pieces.  Also, you will need to not have as much "air" in the design. Sketch some of the design in the clay vs. just cutting all the holes.

Get the pattern and adjustment instructions <here>


I started off making four pieces of the crown out of Fimo, and I stuck in some wire accents.

Butterfly back The large clay piece is being supported by wire so that it does not break
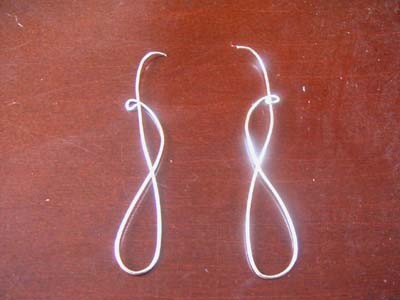
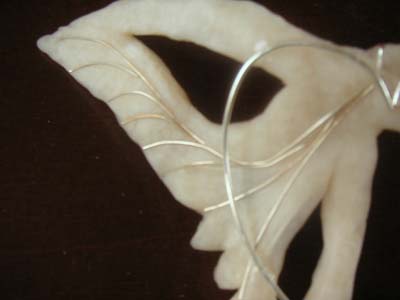
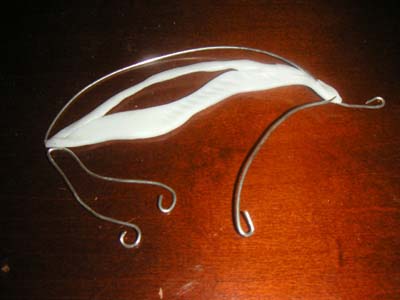
One half of the front piece of the crown. More of the wire curls

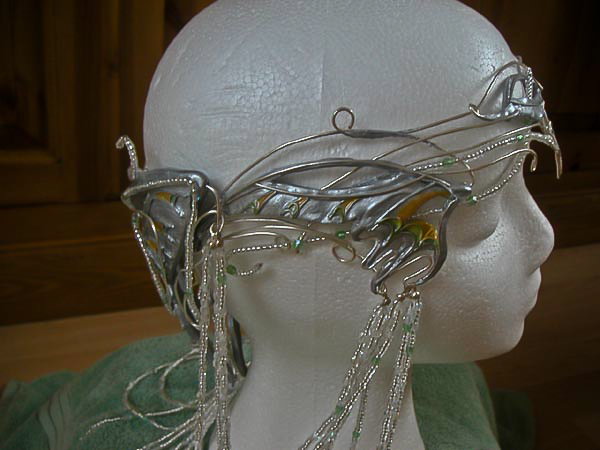
2. It took a day to put the pieces together. I started off by attaching the front to the two side pieces with a little solder, and then I attached the two side pieces to the back butterfly with the wire from them.

3. I then used a thinner gauge wire to thread beads onto, and I stuck the ends with a little superglue to keep them in place.

4. I then threaded the wire in and out of the crown, building up the design. I used two colors of glass  beads iridescent, and pale green, but I used about five different types….They were the same ones I used on the drapes too, but I used a few more green ones on the drapes than on the main crown.

5. I then painted my crown with silver acrylic paint (called mythril silver from Games workshop), and then added the gold and green accents. I then varnished over the top to give it a nice shine like enamel.

6. Next, I cut some coated beading thread/silk two at a time( so that each side was equal), and then threaded the beads onto it.( I have to add that on my first attempt I used thin nylon/fishing thread, but the drops did NOT hang properly). I beaded the lengths first, then I attached them to my crown with silver attachments

7. I then added my beaded drops to the crown with little silver attachment clips.

8. In all the crown took me about a week to make (working solidly at it), as it was very fiddly to make and time consuming with all those beads.
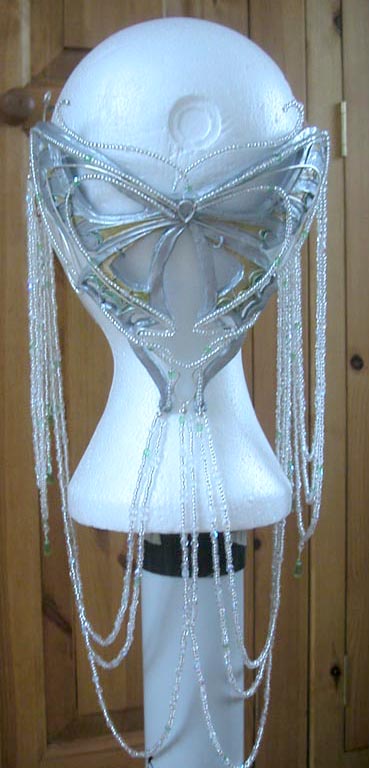
9. Finished Crown


  Also check out how to make the butterfly crown from tin sheets


v ----- Advertisement -----v

^ -----Advertisement ----- ^


LOTR Home | Up | Wire Intro | Joining Tips | Wire Circlets | Crown Tips | Making It Real | Galadriel's Circlet Pattern | Butterfly Crown - Tin | Butterfly Crown - Clay | Copper Foil Arwen Crown | Dwarf Beard Crimps | Cleaning Silver Jewlry | Weta Techniques

LOTR Home | Pattern Modification & Tips | Fabric Techniques | Fabric Embellishment | All About Armor | Leather Working | Vambraces to Gloves | Weapon Tips | Shoe Tips | Metalwork and Crowns | Working with Clay | Casting Belt Buckle | Casting Small Props | Pipe Making Tips


This page was last updated 04/22/08