Copper Foil to make a Crown - Arwen's
 Human
Crown Human
Crown
by Nurindel
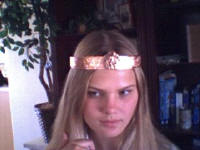
While the shape isn't entirely accurate, I'm still very pleased
with the overall effect- and it only took a little over an hour to
make!
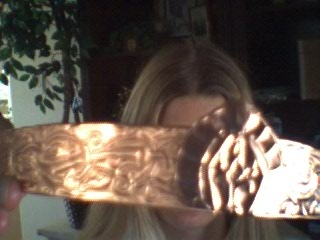
No, really! What I did was buy a sheet of thick copper foil at
Hobby Lobby; it was about 12" by 8" and came in a tube (cost was appx.
$6). This sort of foil, which is much thicker than tin foil, is normally
used by crafters to make such things as picture frames with embossed
designs. Inside the tube with the metal were both an embossing stick and a
sheet of pattern suggestions.
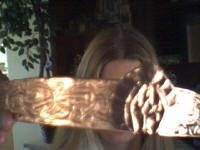
It just so happened that one of these pattern suggestions was absolutely
perfect for the design on the crown! While a bit more complex than the
actual design, it did have a very Old English style pattern of vines,
flowers, leaves and even thistles (!!!). I scanned it and printed it about
25% larger, taped it onto the copper, and used the stick to press the
pattern into the metal. I embossed about two feet total (1 foot lengths-
metal was not long enough to wrap around my head), 1.4 inches wide. This
took about 50 minutes (from 12 to 1 in the morning; couldn't sleep!).
 After
the embossing was done, I cut out the strips with a one inch allowance to
either side of the design, and then folded the excess back so that the metal
would be three layers thick. I used the remaining metal to fashion the
'keystone' tip of the crown, embossed it freehand, and cut it out with
ordinary scissors. The two lengths that were to go around my head fit one
inside the other very tightly, so no need to glue that. But the
keystone I hot glued onto the front. After
the embossing was done, I cut out the strips with a one inch allowance to
either side of the design, and then folded the excess back so that the metal
would be three layers thick. I used the remaining metal to fashion the
'keystone' tip of the crown, embossed it freehand, and cut it out with
ordinary scissors. The two lengths that were to go around my head fit one
inside the other very tightly, so no need to glue that. But the
keystone I hot glued onto the front.
The copper was really pink, as shiney copper is- and this was certainly
shiney! Since the above pictures were taken, I've spray painted the crown
gold, but I don't like the look of it and will be searching for a more
antique metallic paint to use. Also, did end up going a bit crooked with the
embossing when my tape slipped (!), but it was simple to go back and add in
some vines and flowers where the pattern bowed upwards and left a blank
space on the strip.
v ----- Advertisement -----v
^ -----Advertisement ----- ^
LOTR Home | Up | Wire Intro | Joining Tips | Wire Circlets | Crown Tips | Making It Real | Galadriel's Circlet Pattern | Butterfly Crown - Tin | Butterfly Crown - Clay | Copper Foil Arwen Crown | Dwarf Beard Crimps | Cleaning Silver Jewlry | Weta Techniques
LOTR Home | Pattern Modification & Tips | Fabric Techniques | Fabric Embellishment | All About Armor | Leather Working | Vambraces to Gloves | Weapon Tips | Shoe Tips | Metalwork and Crowns | Working with Clay | Casting Belt Buckle | Casting Small Props | Pipe Making Tips
This page was last updated
04/22/08
|