Amy - Virginia, USA
 Arwen's
Mourning Gown - for $2.50
Arwen's
Mourning Gown - for $2.50
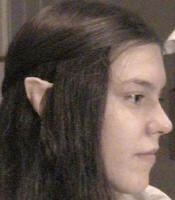
I have always loved Arwen's Mourning gown, from the first time I saw
fuzzy spy shots of it before the movie came out. To me, it embodies --
as well as an outfit can -- the loss that Arwen accepts when she
gives up her immortality. She is mourning not only the loss of her
husband but, in a way, her own death.
I am a penny pincher to the extreme and, for those of you on a budget,
there is still hope! I made this entire costume for only $2.50. I do
realize, though, that not all of you have the resources I have and the
price tag on yours might be a bit steeper. I already had the red fabric
for the trim, the embroidery floss, the clay, and the paint used for this
dress. The fabric that I did have to buy, I got from the thrift store: the
skirt is made out of a 2 yard piece that I bought for .99 cents there. The
fabric for the shirt I got from my local fabric store at 1.00 a pound. (It
is a fabric remnant bin where all the old scraps from nearly empty bolts
are thrown and sold by weight rather than yardage.)

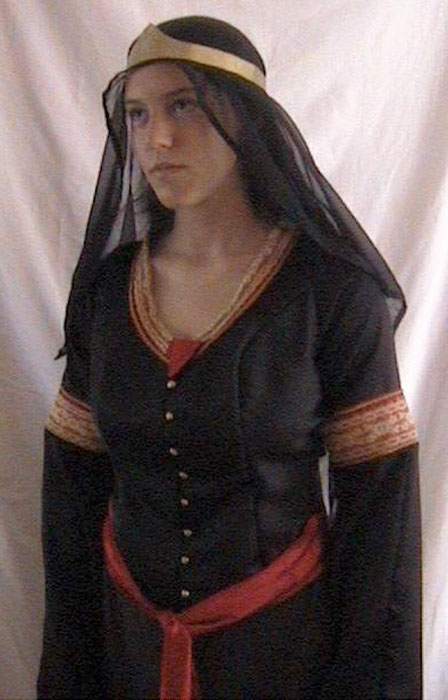
The dress itself is actually fairly basic. It is your average Elven build
with the belled sleeves and the long, flowing skirt. The
real attraction to this outfit is the trim. I went through a quest similar
to that of the Fellowship with that trim: long, drawn-out, frustrating,
and tiring! Then, of course, to save a buck, I had to make things even
more difficult with the buttons and other details.
My dress is two part, meaning that it is a skirt/shirt combo. I cut the
skirt freehand as I find patterns to be nearly impossible to understand. I
purchased the fabric at the thrift store, a black cotton knit. It is a
very simple skirt with just two U-shaped panels sewn together at the sides
with an elastic waist band. The back U-shaped panel is a bit longer so
that it has a 2-foot train behind it, while the front one extends only to
the floor.
The belt is simply a strip of satin 100" x 2.5" sewn into a tube and
pressed. It is topstitched all around the edges and tapers off into a
point at the ends. It is tied around the waist.
The veil is a 45"x 36" piece of georgette chiffon hemmed all around the
edges and it can be secured to one's head with a crown.
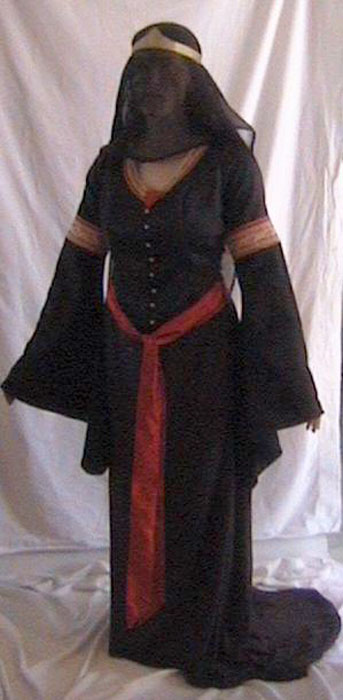
 My
crown is made from cardboard, strengthened with craft glue. I cut the
pieces of cardboard in the shape of a crown, and then I cut a second set.
I then glued them together for extra strength. Then, I took some pearl
fabric paint and put a relief of the Gondorian emblem on it and a vine
with leaves encircling it. It was then painted with gold acrylic paint.
My
crown is made from cardboard, strengthened with craft glue. I cut the
pieces of cardboard in the shape of a crown, and then I cut a second set.
I then glued them together for extra strength. Then, I took some pearl
fabric paint and put a relief of the Gondorian emblem on it and a vine
with leaves encircling it. It was then painted with gold acrylic paint.
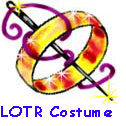
Then, there was the shirt. The actual construction of it I did not mind. I
made a princess seamed pattern to work from for non-stretchy fabric and
went for it. The fabric that I used is a wonderful bridal Windsor satin
from the remnant bin. I was tempted to go for the velvet, but it was WAY
over my budget! The satin was great though, and it did not give me the
headache that working with velvet would have caused.
It is a button-up in the front, (Arwen's actually has a false opening
in the front and an invisible zipper down the back) with loops made out of
black ribbon for the buttons to go through. 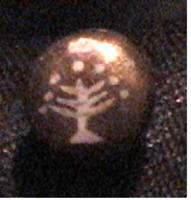
I am very happy with the buttons. I knew early on that I wanted to take
a slight departure from the original, and instead of putting the flower
shape in them, I wanted instead to put the gondorean crest on each one. I
could not have painted on plastic buttons as the paint would have
resisted. So, I went to work sculpting each tiny button out of polymer
clay with a wire curl inside each one for support. The wire extends out of
the clay and into a loop at the back where it is sewn onto the gown. Each
button is 3/8" in diameter, and each one was painted gold, and in
white acrylic paint features the white tree, seven stars, and high crown.
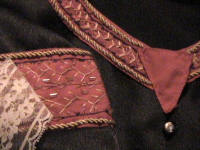
As
if all that was not enough, I did not do the easy thing and buy trim to
attach to the neckline and arms. Instead, I decided to take some red
cotton fabric and sew it to the desired spots, then decorate through
embroidery. Each stitch was hand-done and all of the bead work is done by
hand, as well. After all that trouble, though, I realized that with all
the gold thread I used, the trim still appeared to be red from a distance.
So, I dug around in my scrap drawer and found some 2" wide hem facing. I
dyed it gold with food coloring and it can be slipped on over the red trim
is desired. (I do not have it on permanently, as I could never cover up
all of the
embroidery).
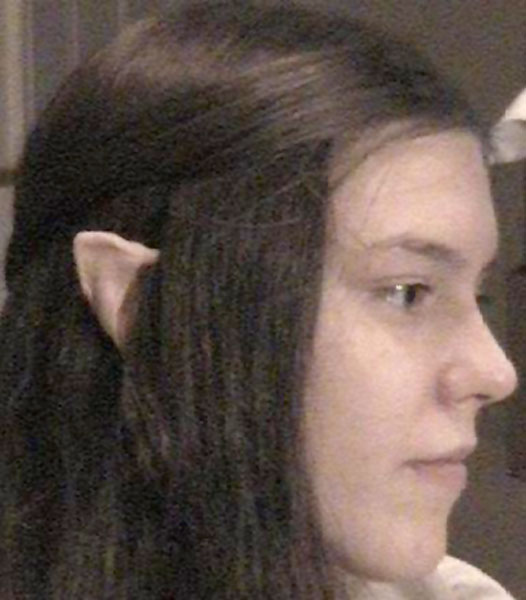
The elf ears I sculpted out of the same polymer clay used for the buttons,
and they are attached with sticky tack.
This is my currant masterpiece and I hope that this helped all of you that
are making this gown for yourself!

Also check out Amy's other outfits