
![]()
![]()
|
|
|
|
|
|
Amy - Virginia, USAArwen's Chase Outfit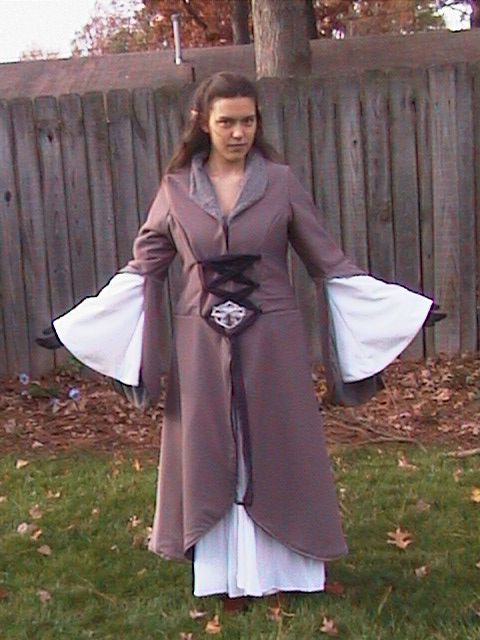 This
is one of my first creations. I saw some beautiful dove grey
gabardine fabric at the thrift store. It was a two-yard chunk for .99!
So I bought it, not knowing what I wanted to do with it. After the
fabric sat on my bedroom floor for two weeks, inspiration finally
struck. It was a great color and weight for Arwen's chase outfit! But
the last thing I needed was yet another dress. So, I decided to do my
best in converting it into a lined coat. It worked great, but I must
say that at that time I was not ready to tackle something so
complicated. It took what seemed an eternity and lots of frustration,
but when it was done it was definitely worth it. This
is one of my first creations. I saw some beautiful dove grey
gabardine fabric at the thrift store. It was a two-yard chunk for .99!
So I bought it, not knowing what I wanted to do with it. After the
fabric sat on my bedroom floor for two weeks, inspiration finally
struck. It was a great color and weight for Arwen's chase outfit! But
the last thing I needed was yet another dress. So, I decided to do my
best in converting it into a lined coat. It worked great, but I must
say that at that time I was not ready to tackle something so
complicated. It took what seemed an eternity and lots of frustration,
but when it was done it was definitely worth it.
There are 8 kinds of fabric in the coat and I used 4 colors of thread,
plus Sculpey Clay for the buckle and 8 hooks and eyes. There is also 1
snap on the buckle and lightweight interfacing in the bodice. The body of
the coat is lined with a heavy black polyester, and at the collar and the
sleeve petals, a grey cotton knit. The white sleeve is made from a
bleached gabardine on the outside and they are lined with a light weight
flannel. The loops for the scarf in the front are made from black cotton
sewn into a long strip and cut into the right lengths. The scarves are
made from navy chiffon georgette.
I made my own pattern for this. Word to the wise: Do not attempt something
like a complex lined coat when you are a beginner. ESPECIALLY if you are
going to make the pattern. There will be many tears. I went onto Alleycat
and spent a lot of time looking over rolled collar ideas and eventually
made the bodice pattern. Once I had finished making the entire bodice, I
was feeling better. The sleeves and the skirt part were not nearly as bad,
though at times I still had to keep myself from burning the whole thing.
The sleeves are a simple pattern, I just made a tight upper sleeve and
attached a flared bell sleeve to it at the elbow. Then, I made a U-shaped
piece for the petal and sewed it right on top of the place where the upper
and lower sleeve meet. All of the pieces are lines, so there are a total
of 6 pieces of fabric in each sleeve.
 The
bodice is princess-seamed with loops for the scarves sewn into the front.
It has hook and eyes going all the way down the front. The skirt was
fairly painless, just 4 panels of fabric sewn together at the side but
left open in the front and back. Beneath that is a broomstick skirt that I
bought at the thrift store. I cut off the waist band and cut it down the
front so that it was a large rectangle. Then I gathered it at the top and
sewed it in between the bodice and skirt. The
bodice is princess-seamed with loops for the scarves sewn into the front.
It has hook and eyes going all the way down the front. The skirt was
fairly painless, just 4 panels of fabric sewn together at the side but
left open in the front and back. Beneath that is a broomstick skirt that I
bought at the thrift store. I cut off the waist band and cut it down the
front so that it was a large rectangle. Then I gathered it at the top and
sewed it in between the bodice and skirt.
I cut the chiffon into long strips and hemmed them, making several long
scarves. I sewed two of them together to make the front sash and the other
two I sewed in the back to pull in the extra fullness.
Then came the part that I was already experienced at, sculpting! I broke
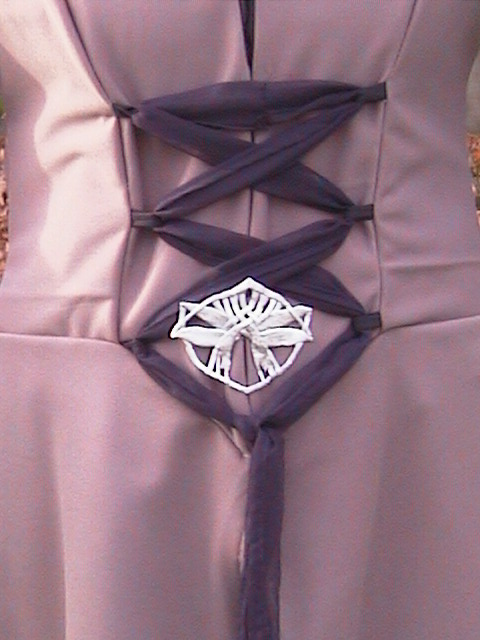 out my Super flex Sculpey Clay and started working. Super flex is a gem of
a clay that I found and have now been spoiled by. It is just like working
with a normal polymer clay except that when you bake it, it remains
bendable. So it will keep its shape, but it can take a beating and still
be all right.
out my Super flex Sculpey Clay and started working. Super flex is a gem of
a clay that I found and have now been spoiled by. It is just like working
with a normal polymer clay except that when you bake it, it remains
bendable. So it will keep its shape, but it can take a beating and still
be all right.
The scar I put on my face with a bright red lipstick and gone over very
lightly with a black ink pen for depth.
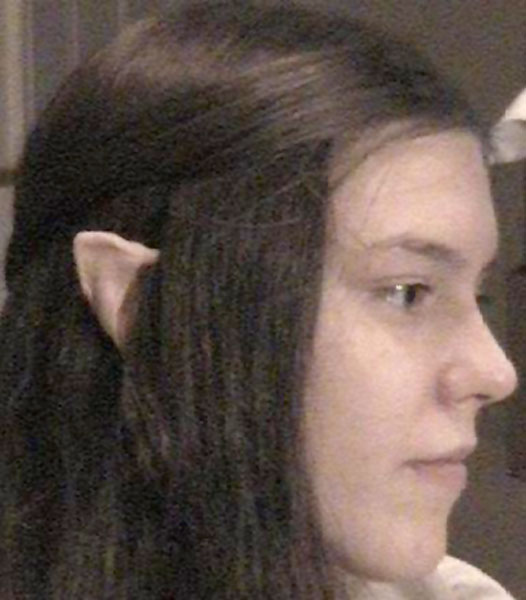 The
ears are made from the same Sculpey that the buckle is made from. It took
a while to shape them right and them shape them to fit my ear, but it
turned out a great success in the end and I can stick them on with a bit
of sticky tack. The
ears are made from the same Sculpey that the buckle is made from. It took
a while to shape them right and them shape them to fit my ear, but it
turned out a great success in the end and I can stick them on with a bit
of sticky tack.
My hair was brushed thoroughly and the sides were then pulled back and
braided.
DONE!!!!!! The coat looks great and I can throw it on over my normal
street clothes on a cold day for that elven flare, or do my hair, ears and
scar for the complete costume!
Also check out Amy's other outfits
This page was last updated 11/21/09
|