|
|
|
|
|
v ----- Advertisement -----v
^ -----Advertisement ----- ^
|
Altering Wig TipsIndexExpanding a wig capIs the wig size too small for your head? Measure around your head following your hairline and going up over your ears. Then measure front to front, and then ear to ear. A medium size wig would fit a person with a 21 1/2 to 22 1/2 inch measurement around the head, 14 1/4 to 14 3/4 inches front to back, and 13 1/2 to 13 3/4 inches ear to ear. I think the Showgirl wig only comes in one size, but if that's the problem, you'll know what to look for next time. Some wigs, by the way, are adjustable up to one inch. Look inside for two Velcro tabs on each side behind the ear and try adjusting that way. If your hair is very dark and you have "peach fuzz" that shows beyond the hairline of the wig, like in front of the ears, you could use your preferred method of hair removal (ouch!), but I'd be scared to do it on the forehead area -- although in the 1940's women used to wax their foreheads to get a "widow's peak" like a certain famous dark haired movie star. This is a very dangerous last resort. Not recommended... but listed as information. You can stretch a wig a bit by carefully (VERY carefully) poking holes in the elastic around the head with small manicure scissors. You just want to slightly weaken the elastic by breaking a few strands. Too much and the wig will be ruined. Keep the scissors closed and poke into the elastic. Feel the stretch, and continue evenly spacing around the head. Go slowly and try the wig on after each adjustment to feel your way on this. (Do this only after everything else has failed and you've given up on the wig.) == Jeanette Widening out a wig capIf the circumference around the head is the problem, not the size of the wig cap.. and the wig doesn't have tabs you can loosen at the base of the neck... You can take the step of splitting the back of the wig about 1 inch up AND sewing a strip of elastic in there. Problem... you will probably have to cut across a weft, so you'd need to finish the edges and make sure the weft that is not cut. Is thick enough to hide that seam... you may find yourself moving a bit of hair... or just using some hair spray. == Cat Combining wigs and wig bits to make a custom wigThis will eventually be a set of articles, but here are just some rough tips to start The basics, two cheep wigs to make one
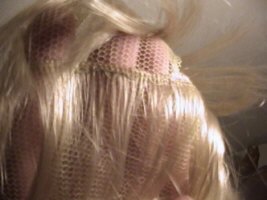
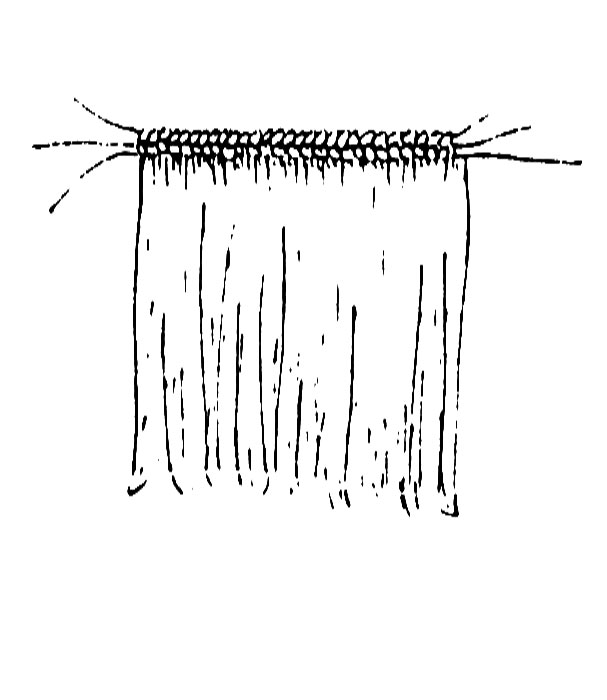
Tools"Teflon" pressing clothThe number one item you need when you get into wig modification is a . It is clear (so you can see exactly what you are doing) and distributes heat so that you can get just enough heat onto the synthetic hair to start to melt it, without actually melting it. You use it it iron down any wefts you create. If you can't find one at your local fabric store, google one up. Don't just get high-temp plastic, make sure it's Teflon... or you could end up with goo all over your iron. Yes, some web sites will say a wet towel can be used instead. Let's put it this way... if you make a mistake doing this - iron too hot, iron held too long in one place -- the cooled goo just peels off the Teflon sheet but you throw away the towel. A good seam ripperJust a standard sewing ripper, but you want one with a good point and a new sharp cutting edge in the center. The wefts must be separated from the extra wig and it is very important to just separate the wefts (long strips of hair) from the wig cap and not break the stitching in the wefts themselves.
TipsA better hair line (or, how to straighten and press hair)If you're not going the insane pro way of making hair lace for the front of a wig, you're going to want to add a hair weft on the underside of your wig cap and bring it out and over. The hairline weft should be about twice as thick as a standard weft, so you may want to double your weft if you have enough hair in your second wig. (This varies by wig you are using to make a new one.) If you are making your own wefts, 1 and a half to 2 times the thickness of your regular wefts is good. Keep it just thick enough that the edges don't show though. When hair is sewn under the hair lines and pulled back around it often ends up very puffy. The hair can be "ironed" so that it lays flat.... instead of looking too "puffy". This needs practice... so work on an extra piece of hair.... You MUST have a pressing cloth... and a Teflon cloth is much better to use (you might get lucky and something else works... but the goo cleanup is up to you at that point). Turn your iron up to a high setting... don't go all the way up to cotton unless you need to. Put the hair under the pressing cloth and apply pressure just for a few moments. Remove the iron and the cloth, check to see if the "bend" is stating to take. (Don't touch right away; you're literally doing a partial melt of the hair.) IF you're not getting anywhere at your current setting, go ahead and ramp it up. Don't turn your iron up too fast (and never forget your pressing sheet) or you will have a mess. Getting rid of the frizzy or too much curlA version of the ironing technique can tame down a wig that is too frizzy, but the technique is a tad different... You want to stretch and hot iron the weft in advance is possible, but it can be done on a wig that is already sewn. If the wig is done, pin up everything other than the weft you're working with and keep it away from your iron. You want to iron the weft and pull at the same time. The pressing cloth stays between them at all times. The pulling is what takes some of the wildness out of the cheep fizzed hair. Again, this takes practice. I wouldn't go it with a good wig... but the cheep acryl wigs can be modified and mutilated fairly well. WarningsIroning the hair can be very dangerous. You've got a very hot iron and hot hair (melting plastic) as well as lots of messy wefts of hair around waiting to attack anything that moves. Lock up the cats and the dogs when trying these things and be very careful not to get burned. NEVER touch your iron to the hair directly w/o some kind of a pressing cloth, even if you have the iron on a very cool setting. Can we say goo. An older wig that is frizzed got that way from over combing or brushing and/or too much heat. It may be lost. However, you can try the heat and pull ironing method to get it out, but realize that you may just be making a bigger mess if the fibers are too abused. Hair LaceIf you have time and patience, there is a way to get a professional front. You can alter the front and add a small strip of hair lace and knot hair into it. We're not going to get into details on the techniques now, but here are some full wigmaking links. They show techniques and explain terms. All you want to do is replace the front of the wig. In the most simple terms... Chop of the hard rim, finish the edge softly, add hair lace for the scalp line. Knot hair in. Links on the whole process:
Links out on the web
Section editor: Cat v ----- Advertisement -----v
^ -----Advertisement ----- ^
This page was last updated 04/22/08 |
|||||||||