

|
|
|
|
|
|
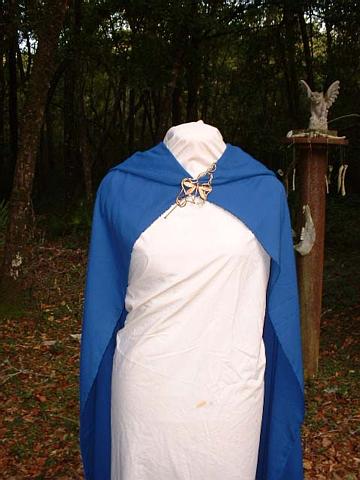
The Fellowship Cloak Pattern
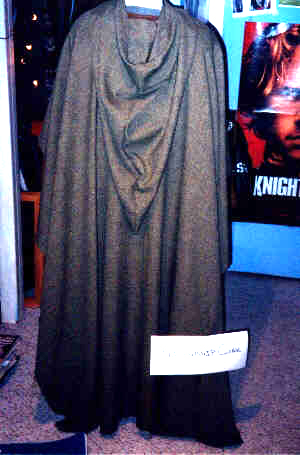
= = or at least Ann’s idea of it Observations(or why the choices where made for the pattern) The cloak at first glance seems to be a simple semi-circular cloak. Very much like the Moroccan Burnoose pattern we talked about at first. However, like many things in this movie—things are not as they seem. It’s not a standard semi-circular cloak with a cut-out neckline. The movie cloaks fit back smoothly over the shoulders—they don’t close in front.
A semicircular cloak—even if pinned back over the shoulders, would show some folds. Also—look at the pictures from the back. A standard semicircular cloak has the most drape over the shoulders (where the cloth hangs on the bias rather than the straight grain). These have the draping more concentrated hanging from the shoulder blades.
Here is a mock up from the pattern below. See how it sits smooth and lays the same way. Remember, you need to use a thin fabric, preferably loose weave. This will help shape it over the shoulders
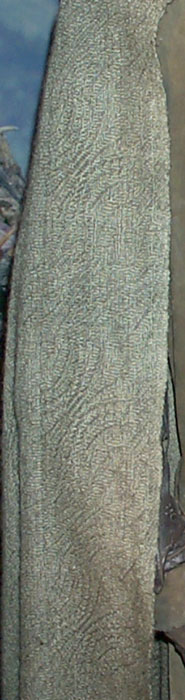
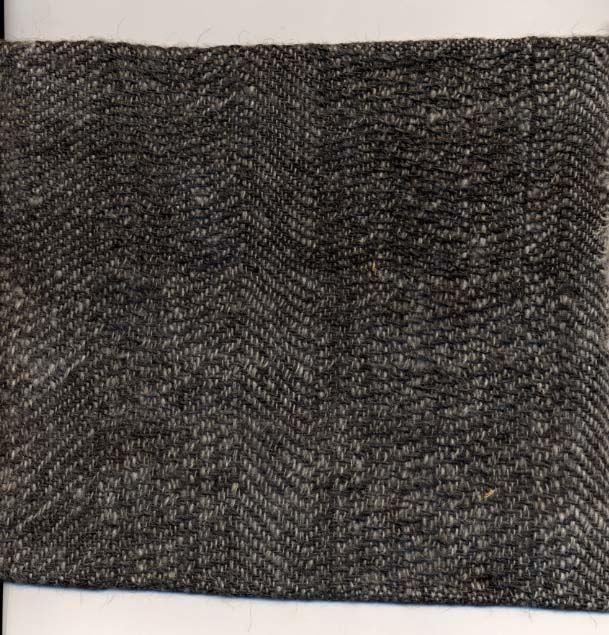
Want more research info? Check out the cloak's main page. Material RequirementsHere’s what I worked out based on average height. You’ll need about 4 1/2 yards of 54" to 60” wide material (you might get by with 4—but best to be on the safe side - yes, this includes hood.). This works best with fabric that is not too thick. The actually fellowship cloaks are woven thin enough to see though. Color: While they do appear green in many scenes, they are described as gray. The artisan that wove the fabrics states it is gray.
The CloakStandard version. For Gandalf's pattern, click <here> .
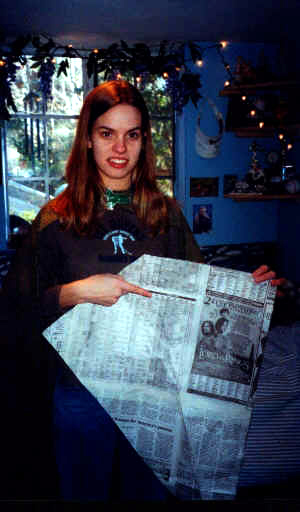
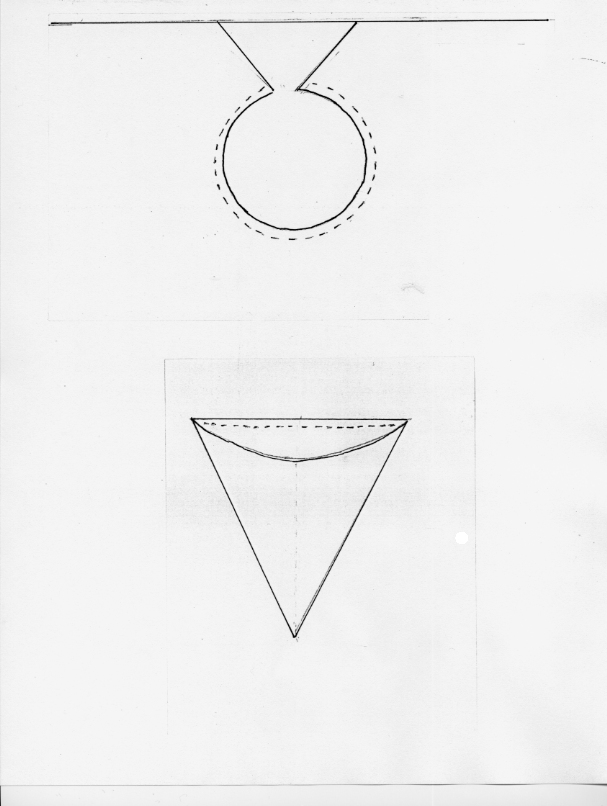
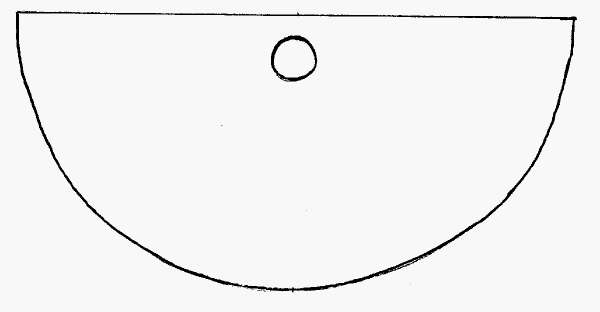
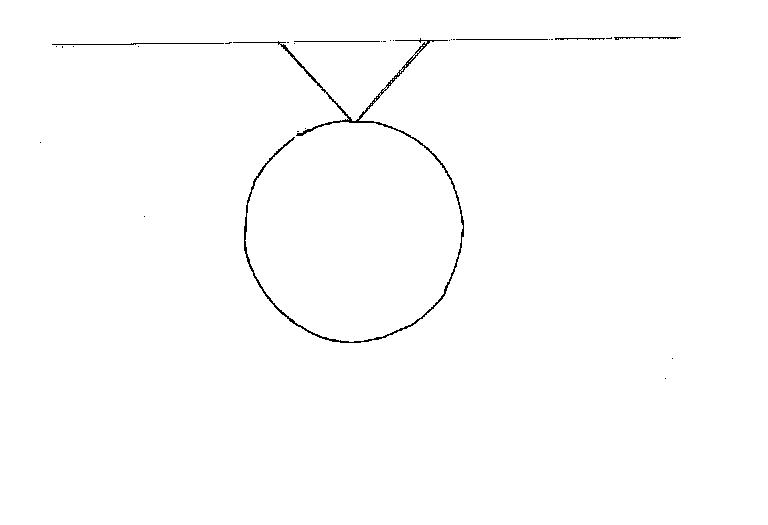
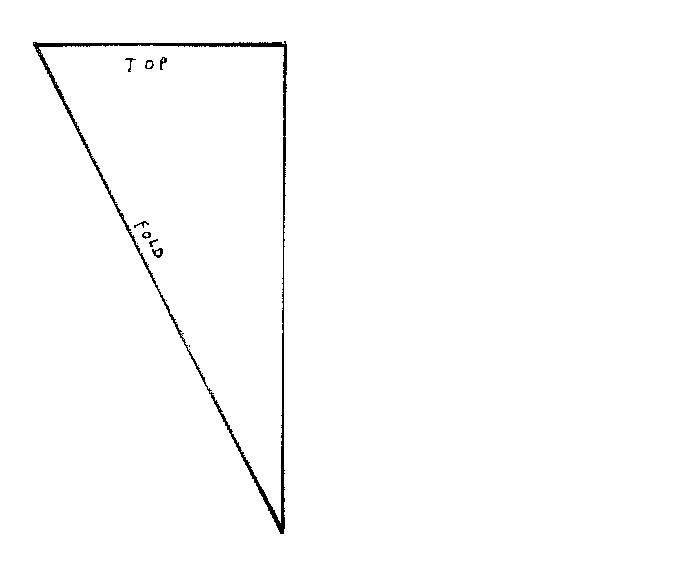
Cut a semicircle with a radius about 10” longer than you want the cloak to be (if you use the full 60” width the straight line will be 120” long). Remember many of the cloaks are much shorter, stopping at mid calf. Add enough around the edges to turn under the hem twice. So, if it's going to be a 3/4 inch turn, add 1 1/2 inches x 2 or 3" beyond the desired length. The Neck Hole
|
 |
 |
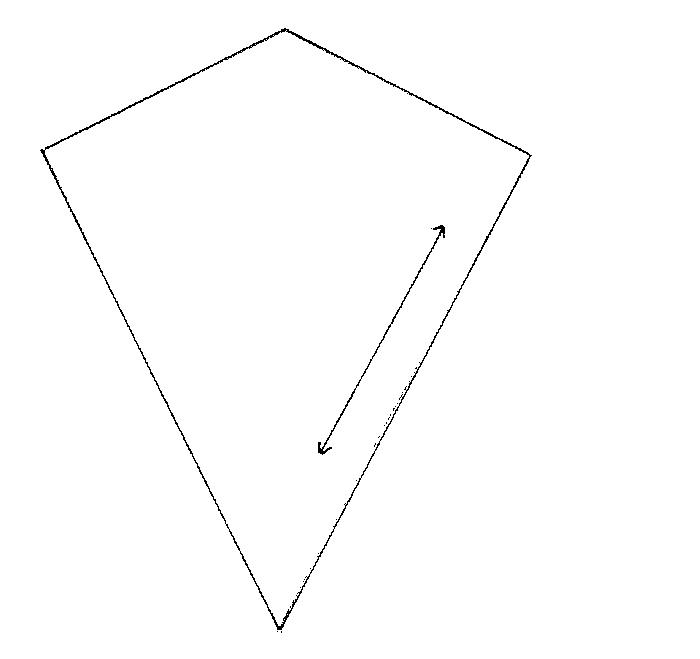
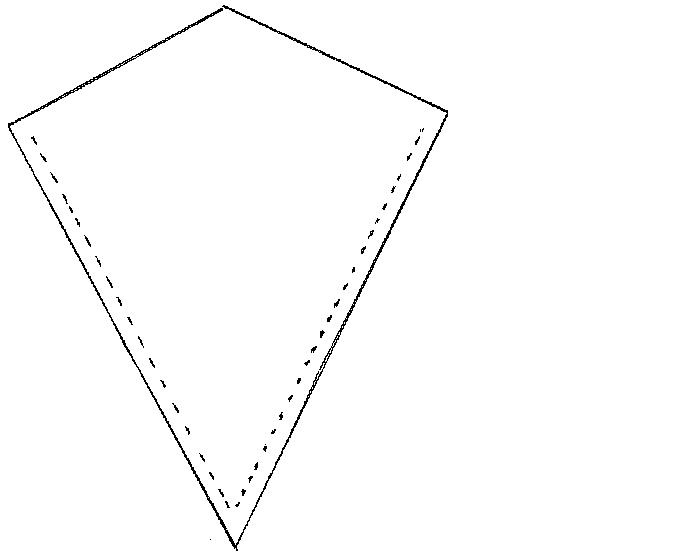
| The kite pattern modified for more room around the face. | What it looks like draped then. (Thanks to Meaghan for the pics.) |
Now you have to sew the two hoods together. Time to pick your outer side and your lining side. (Which you pick shouldn't matter, we just need to refer to them separately.
Lay the cloak down, right side of the fabric up. Mark the dead center back of the circle. This mark will match up with the center seam of the outer hood piece. Lay the hood down, right side of the fabric, to the right side of the hood.
Pin from the center out to each of the sides. This will take a little easing since you are matching straight line of hood to the curve of the neck. (See picture you're pinning the dashed lines together. ) You will need to push the lining piece out of the way as you get near the front edge. (Don't sew the lining piece... leave it free.)
Leave enough open to turn under the front edge and finish it later. (It's helpful to mark that point with pins or chalk so you don't sew past it.)
Sew together.
The hood lining is ready to be tacked down. Turn under the seam allowance of the second layer and hand stitch it over the raw edges of the seam for a beautifully clean finish.
Note: this does make a very small hood in front... but if you've seen them wearing them up, that's what they look like.
Need more instruction for attaching the hood... see our page Attaching a Hood
(OK, this is a bit weird, but once you have your hooded cloak in front you, and you're ready to finish the front edge it will make sense.)
The front of the cloak where the neck meets the front should be reinforced with a bit of stabilizing fabric. (This can be piece of seam binding, a strip of canvas or anything else about about 2-3 inches or so long that will take up the strain of the clasp... so your main fabric will not tear.
When your hood is finished, you're going to not quite have a straight line in front to finish the front of the cloak (because you cut that hold out for the neck). You are going to have to trim the fabric near the neck so you have that straight line (after you turn the front edge under twice.)
Hand baste that little bit of stabilizing fabric right at the neck so it runs down the front edge (so ya don't loose that scrap of fabric).
*New* from the ROM exhibit in Toronto: The front edge of the cloak are raw salvage, i.e. it's the woven edge of the fabric. It is not turned in or finished any further. To clarify further... all is raw salvage edge but the first 3" or so. This is carefully turned under and is only visible under very high resolution pictures because it is finished soooooooo carefully.
Put your cloak on a hanger and let it hang for a few days. Most fabrics will stretch out quite a bit.
If you did not measure the pattern for the length you wanted it, do it now. Most of the cloak stop about mid-calf on the characters. Add enough on to the edge to turn it under twice. (About 1 1/2 inches.)
Lay the cloak back down with your original pattern (with the length correct) and trim it up to an even half circle again.
The hem needs to be turned under twice then it is top stitched down. (About 3/4 inches.)
To do a really clean edge, serge or zig-zag the raw edge. This is
easier if you run a line of machine basting along the hemline--in sections
of about 8" . Pull this thread to pucker up the wool slightly, then hit it
with a blast of steam. Wool--especially a loosely-woven wool like this, is
very malleable and can be shaped a lot with steam and pressing. After the
bottom edge has been shrunk a little it will be easier to turn up.
If you're not using wool you can use the same slightly-gathering
trick, but you might have a few puckers on the inside of your
seam line.
If you're not trying to do the cloak exactly and want a quicker finish... trim the cloak to the exact length you want. Get some double folded bias tape or fold over braid and just stitch it around the bottom edge. It won't quite look the same, but it's as easy to put on as just putting the braid around the edge and top stitching it down.
 |
 |
| Edge of the cloak from the Legolas standee. Note the rough turn over and stitch down | CU of the edge stitch. (thanks to Dan G for photos) |
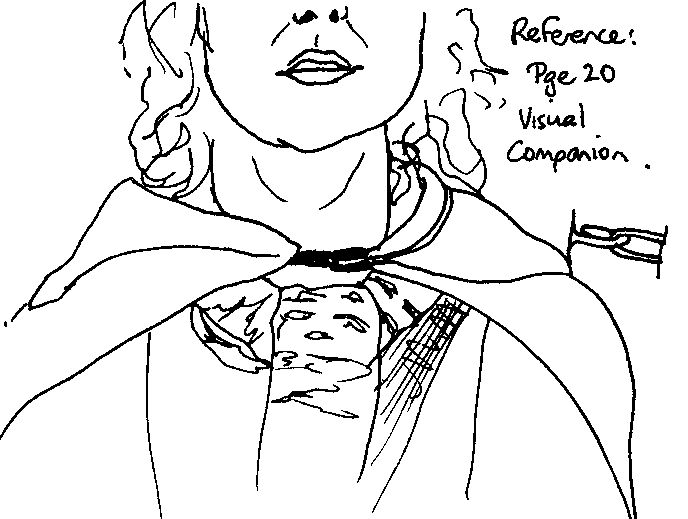
The cloak is hooked with a large industrial black hook and eye closure. It is covered by the leaf clasp.
Check it out the only picture we have scene. It is in the LotR: FotR Visual Companion, page 21. Pippin is weaning the fellowship cloak without the leaf pin/clasp over the top. We have not found this pic on line yet.
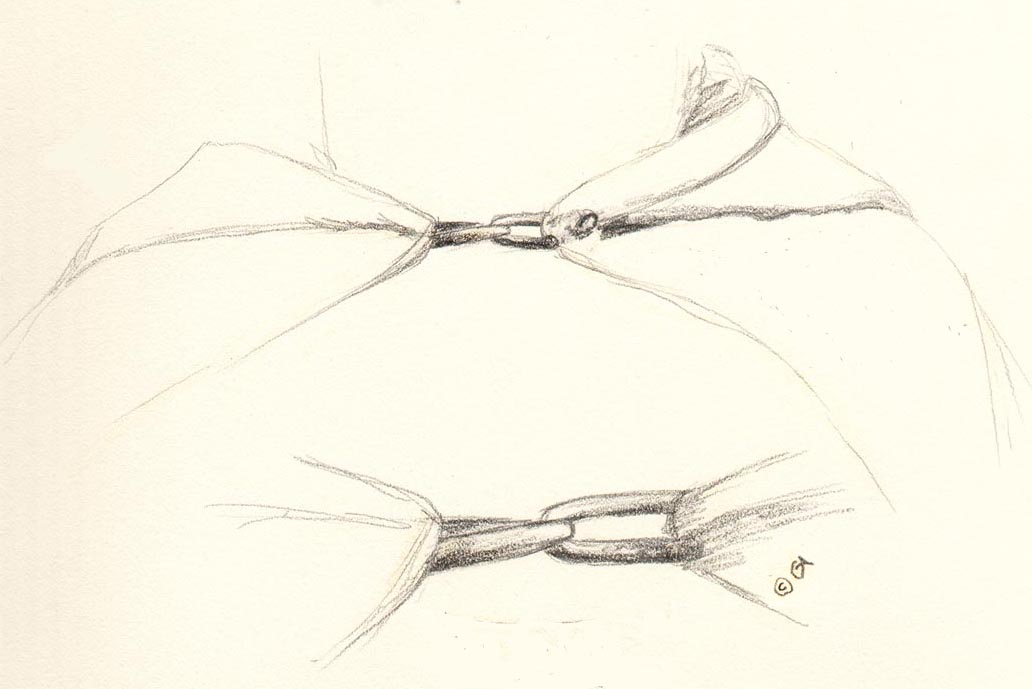
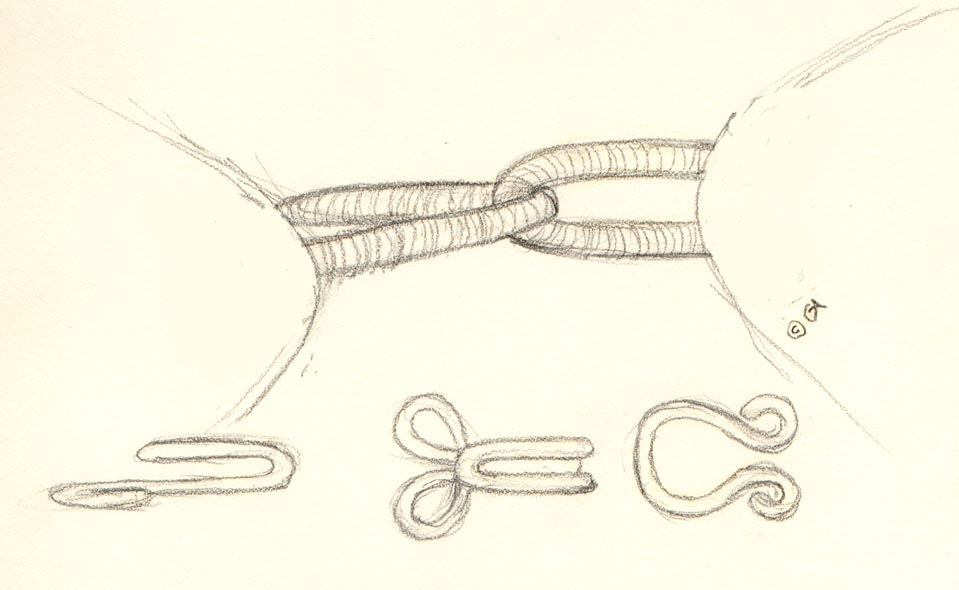

The hook looks like it is attached at the seam line of where the cloak joins the hood (and where we added that reinforcing strip).
If you cannot find one of these giant hook and eyes, you can use various skirt hooks that you can pick up easily at any fabric store. It really doesn't matter, since this is hidden.
The leaf "Claps" just pins over top... and no actual stress is put on the leaf pin.
OK, you're ready to join the fellowship on their adventures now!
=== Instructions by Ann and Cat, with
feedback from the group
=== Art by Ann, Firnrothiel, and Naomi
This page was last updated 04/22/08

