|
|
|
|
|
|
How to Attach a Hood to a Cloak
|
|||||||||||||||||
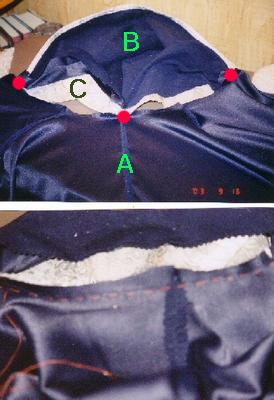 |
A Cloak Body (inside) B Hood Lining (pushed out of the way) C Hood (inside)
Pin center and ends to allow for even easing. Note red basting thread has eased the hood to the cloak body, hood lining is still pushed out of the way! |
The hood is now sewed to the cloak neckline, but the neck of the lining is not . The rear outside view of the cloak hood can be checked for even gathering. Once I am satisfied the ease* is as good as I can get it, I sew the seam flat with a zigzag stitch. While zig-zagging the seam allowance is not necessary unless you are working on fabric that unravels very easily (like the real Stansborough wool!), it will flatten it a bit.
 |
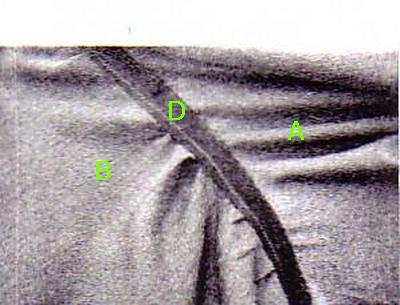
Note that lining is still unattached to cloak body!
seam can be seen on the inside of cloak B Hood Lining D Finished neck seam - with Lining (B) still not attached.
A Cloak Body (outside) B Hood (outside)
|
Then you can pull the lining down and fold under, hand stitch or use bias tape to attach liner and cover stitching. (The blue liner to blue cloak does not photograph well, so I am using a interior shot of my Fellowship hood. Also note that the Fellowship cloak hood has much more material to ease.)
 |
Time to attach the liner to the inside of the cloak
body. Hide that ugly seam! A Cloak body (inside) B Hood Lining D neck seam of lining joined with bias tape
|
The rear view of the hood, I'm using fishing weights in the tip of the hood to help straighten it while it hangs before hemming.
 |
 |
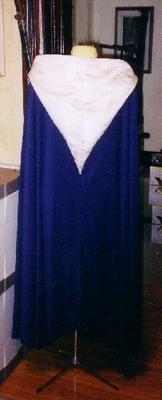
| Front view of the still unfinished cloak. But the hood is done!! | |
Easing is simply the term used to make two pieces fabric fit together when one is a little larger than the other. A common method is used with sleeve caps before pining them into the armhole: stitch-2 widely spaced parallel stitches to gather the material evenly then baste the pieces together.
It is also possible to ease while machine sewing-some folks find this easier-set machine for straight stitch of 4, place longer of the fabric (hood) under the shorter (cloak neckline) and against the feed teeth. Then as you sew, the feed teeth ease the lower longer fabric into the top shorter fabric. This takes some practice, use muslin till you get the hang of it. If you only need to "ease" a little, you can just stretch the smaller piece to match the larger and pin frequently!
This page was last updated 04/22/08