
![]()
![]()
|
|
|
|
|
v ----- Advertisement -----v
^ -----Advertisement ----- ^
|
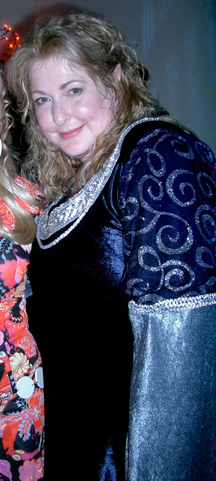
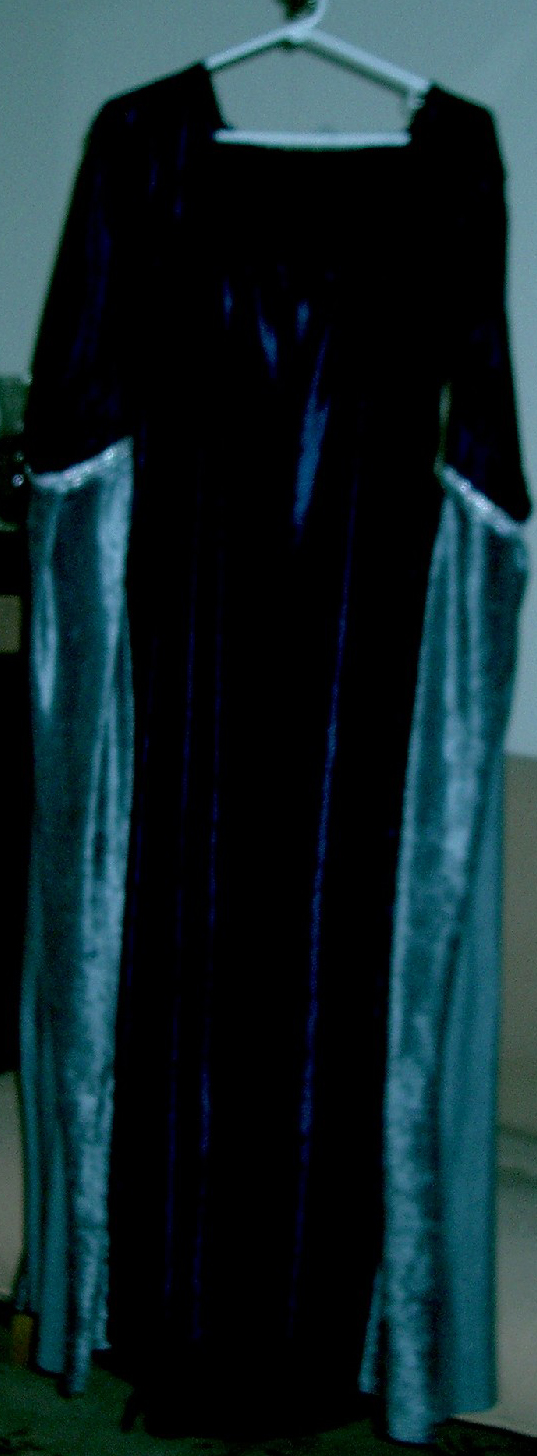
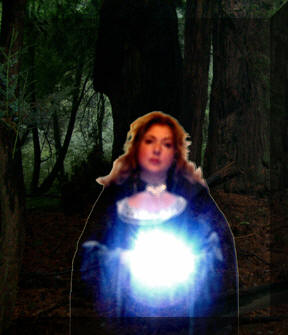
FeliceArwen's Travel Dress and Cloak
So after reading a whole bunch of the contributions and suggestions I came up with a concept on how to make the costume...this means I was not using a pattern. By the way the costume was a big hit. People were stopping me on the street to find out where I got the costume...I was elated! The first stop was the fabric store. I bought 5 yards of dark purple velvet. I don't know the formal name for the fabric but it is stretchy not the more stiff version of real velvet. I bought 2 yards of silver gray fabric which was the same nature as the purple fabric for the lower sleeves. When I selected the purple fabric I really thought it was very dark blue. So I bought 1 yard of navy blue silk for the upper sleeves. I couldn't find material which I thought would mimic the design of the sleeves...well there was one but it was 27 dollars a yard and I wasn't prepared to invest that much money. I thought I would paint or sew a design in silver on the upper sleeves. I also bought 1 yard of silver braid trim, 1 yard of silver roll braid, and 2 yards of another braid trim. Later I purchased 2 more silver jewel trim rolls which were each 2 yards. I really could have used 6 more inches of the braid. The purple fabric was 60 inches from edge to edge. I draped it a number of different ways before deciding how to make the first cut. I decided to cut two rectangles... 25" x 60". One for the front and one for the back. I turned the good sides in and sewed in 6 inches on either side of the top leaving a hole for my head. If I were to do it again I would have made the top 22" wide and at the waist I would have flared it as much as possible... Anyways...after sewing the shoulders I tried it on so see how it was hanging. I have a round derriere and noticed that the back was not touching the floor as desire and there was extra length in the front. I decided not to trim the back of the collar at all. I was concerned about making the dress too low cut to be worn and decided to cut an arc which was 8 inches deep in the front. I figured I could always make it deeper later but once you cut that's it. I found the center and carefully cut. I tried it on again and decided I could address the shortage in the back by offsetting the armpits.
The picture above shows the offset. I came up with the measurements for the collar and how deep to sew for the armholes by measuring some clothing I had at home. I pinned the offset while the garment was draped over me in the mirror in the bathroom. Unfortunately, no one else was around to help out with this part of the project. I sewed starting 9.5" from the shoulder down 6 inches. I picked the 6 inches as a waistline based on my figure and where my hips begin. The plan was to insert triangles of fabric from the waist to the ground. I made a mistake at this point. I didn't want to have to hem the bottom so I pinned the triangles in from the hem up. I do not recommend doing this that way. The proper way to do it would be to pin from the point/waist of the triangle first down to the floor (my Mom informed me after the fact.) Also a consideration is the bulk of the fabric paired with your hips. Looking at patterns in the store they avoided adding bulk to the hips by inserting fabric expansions elsewhere in the dress... With the body of the dress in place, I started on the upper part of the sleeves. One of the related alleyscratch.com websites recommended cutting rectangles 10"s wide. I wanted to gather the sleeves and make then a little puffy, so I cut the silk to 22". I had enough extra fabric and tried painting it which did not come out well. I instead used some plain fabric. If I were to do it again I would have made the 22" much less and the 10"s probably to 8" instead. I sewed the sleeves together so they were circles or tubes. Figuring out the proper way to attach the tubes to the dress took a while. I pinned everything before hand sewing. I also was concerned about the delicate nature of the silk and used double sided bias tape for the sleeve to body seams.
For the lower sleeves, after a lot of research I felt I disagreed with the consensus that the sleeves were large ovals. They looked to touch the floor when Arwen's arms were at her side. The inside seam was sewed to her wrist. I measured the bottom of the silk with a yardstick to the ground. That was the depth of the cut. I am not sure exactly what that cut was as it appears I did not write it down. I sewed the 18" side of the angled fabric for the inside seam 5 inches. I didn't think that would be to the wrist but was enough to give the sleeves body (later I went back and sewed the gray material sleeve seam to my wrist using the mirror pin method.) I then pinned and sewed the navy silk and gray velvet together with the good sides together and inside seams matching.
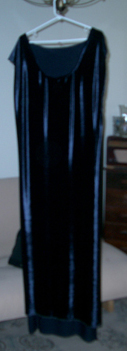
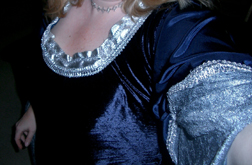
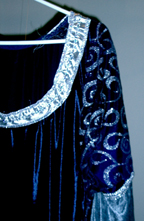
After assembling the sleeves I sewed the trim on top of the seam. I began to work on the neckline trim, first attaching double-sided bias tape around the entire collar. This really helped stabilize the garment.. This was the most difficult part of the whole costume. It was difficult to attach the wide braid so it would lay down. I actually sewed it on with all the trim on top but wasn't happy with the way it was laying down. As pictured below. I decided it was not as low cut as I wanted and that the trim needed to be reapplied. I ripped it off and started over. I cut another inch depth. Then I pinned the braid around the inner part of the collar very loosely. I then pinned the bottom of the braid. I tried it on several times to try to get it with the proper tension. Around now, I went on a mission to find some additional silver trim and hoped to find some additional fabric for the upper sleeves. It was becoming more and more evident that the dark velvet fabric was actually purple as it stretched. I always kept it on a hanger when I wasn't working on it. I would guess it stretched at least two inches during the hanging. I got very lucky and found some silver and purple fabric on sale for 3.99 a yard. I bought one yard. It was really a light see through knit and very delicate. I had also decided that the inside seam of the blue silk was too long so I gathered it. Once I found the purple and silver knit I cut it to the same size as the original sleeve. I worked very carefully with this fabric as it was much more delicate than any of the previous fabrics. I double folded each edge and basted it together. I sewed the tube like seam first. The I attached the shoulder of the sleeves together. After that was completed I carefully sewed the knit into the trim. At the fabric store I found this great trim which was jewel like...sort of like having tinsel threaded through it. After attaching the braid I sewed one jewel trim along the outer and inner edge and a third through the center. After ironing the front dropped at least half an inch. For the final fitting stuff I decided that the area between the beginning of the side triangle and the arm pit could be taken in for a more flattering fit. I did it gradually and ended up taking it in about 4 inches (2 on each side.) The weight of the bottom kept it from being too form fitting. I probably could have taken it in another inch for a tighter fit but it was pretty good at that point.
After attaching to core trim and ironing it was time to add the mobile roll trim. The idea was to duplicate the double edge of the original dress. I also did not have enough braid to make it all the way around the entire collar. I had ended the wide braid trim at the shoulder seams. I cut them at an angle so the points of the angle were along the inside of the collar. I took some of the extra trim from the sleeves and pinned it along the backside of the collar and on top of the pinned roll trim. I tucked the ends under to prevent fraying. I carefully stitched it on using silver thread. Truthfully, I probably could have skipped this part since my hair covered the edge but I like the finished edge. I then tacked the roll in a couple of places to keep it more or less in place but it was able to move at the bottom of the loop. For the cape...I had cut the hood based on the measurements recommended on alleyscratch. I had about two yards of the purple fabric left and after much thought decided to gather the top edge. I then basted it to one of two small rectangles I had cut and stitch witcheried the edges under. I basted and gathered the base of the hood and basted it to the cape/rectangle combo. I finished the seam by adding a second rectangle on top. I sewed together the triangle entirely from the inside. Since the entire weight of the cape depended on the edge I felt it was important to enforce as much as possible. Apparently I did a good job because several people stepped on the cape and nothing ripped.
I left 2 inches of tabs on either side of the rectangles for the broach to close the cape. After the cape was completed I noticed that the Arwen cape was clasped much lower. I was still happy with the length of the collar. Here is the final products...
Anyways...Thanks to all the contributors at alleyscratch. Making and wearing the costume was all sort of fun.
v ----- Advertisement -----v
^ -----Advertisement ----- ^
This page was last updated 11/21/09
|