|
v ----- Advertisement -----v
^ -----Advertisement ----- ^
|
Armor Cheats and FakesNot everyone is going to hand hammer out their own armor in the own forge in their back yard. So, for the rest, here's some tips from cardboard on up. Please feel free to contribute tips, more detailed write ups and pictures! Index on Fake Armor
Don't forget Real Armor Links Gauntlets and Vambraces have their own page Cardboard, duct tape and fiberglass resinYou could probably do this armor like my husband and I did our armor for "The Malachite Throne" in 1994. Make the base for each piece of your armor using cardboard and duct tape. Build up details with more cardboard, foam core, cording, hot glue, or whatever. (We covered our armor in felt just so we would get a good adherence in the next step.) Then go to your local Wal-Mart and get the fiberglass resin used for car body repairs (you'll obviously find it in the automobile section) and coat your creations. Let them dry. Then paint them the desired color, dry-brush or airbrush in the desired details, etc. Our helmets were made from plastic batting helmets, with modifications made over them in the manner described above. Some of our shoulder and body armor was cast in fiberglass into molds made of clay, or (in the case of Ricky's shoulder armor) from real snapping turtle shells. Our arm and leg cuffs were cardboard tubes covered in felt and fiberglass-coated. We split them up the back and punched holes in them so they laced on. They had limited flexibility after they were fiberglassed. This method is really inexpensive to do.
Cardboard and paper macheStart with sheet cardboard to block out your shapes, whatever they may be. I use masking tape, but duct tape would work. Cardboard like from old boxes is good, or use that cheap poster board available in supermarkets. Cut and bend this to shape, and papier mache' the whole thing inside and out, adding sculptural details as needed before the final layer of paper (twisted cord makes a pretty armour edge). If you need to bolt plates together but allow them to move in the finished suit, build in washers around the papier mache' holes for strength. I find papier mache' much more useful than latex for most things I do. You can build it over a really strong frame, and bolt electric motors, fan units, metal connectors, or other heavy things right to it. You can build a wearing-harness into the inside of it. You can run electrical conduits or heating ducts right inside it as you build. And you can use anything you want - shells, plastic scrap, animal bones, plastic fake woodcarvings, etc. - for sculptural detailing, as long as it's firmly attached (under the last layer of paper is good). If you build it thick enough, you can file, sand, and drill it just like particle board. And it's strong enough that you can build mechanical joints, like jaws and armour plate joints, right into it. The drawbacks include the fact that it doesn't move like latex, making it unsuitable for prosthetics that look like animal skin/flesh, and the fact that it isn't waterproof unless you seal it with something. Advantages include that it's non-toxic, cheap, and tough/strong when finished. You can screw or wire things onto the finished surface. Most glues will stick to it. You can paint it with almost anything. And it's relatively easy to repair if it does get damaged.
Fake AgingI used to age my war game miniatures, after painting, with a quick wash
of my brush cleaner. It was usually thin and grayish brownish, so the high
spots got a little of that, and it usually had particles of something dark
in it, and the cracks, crevices, and other low spots got that as the thin
You might try Rub 'n Buff, in either black or silver. Won't give it the
"buried in the dirt for years" kind of dirtiness, but it does add
weathering. People over at The Dented Helmet (Fett costuming board) swear by
it. What I like to do, before I paint, is brush on a light coat of Mod Podge with a sponge brush, then lightly stipple texture it, and let it dry. Then when you paint over it with a metallic paint, it has a subtle hammered-metal appearance. I also second the Liquid Leaf recommendation. That stuff is brilliant. And for aging, brush in black acrylic paint and then wipe it with a cloth. The paint will fill in the recessed areas and also "dirty" up your helm a bit. == Kel http://www.jedielfqueen.com/lotr/costumes/eomer/weathering/weathering.htm
Vinyl FlooringVinyl flooring is somewhat flexible and can be used as a substitute for
thicker leather if your project isn't too complicated. It comes in different
thicknesses, which have different properties, ie differing flexibility. But
generally, it doesn't fold too well, and you'd have to rivet or sew the
pieces together with an overlap instead of making a seam like you would with
fabric (good sides together, sew, turn good sides out). But it does NOT
breathe and would be very uncomfortable on bare skin. Clothing vinyl has a
fabric backing which makes it a bit less plasticy feeling because it wicks
away some of the moisture, but it still generally doesn't breathe all that
much. (See: Boots from Vinyl
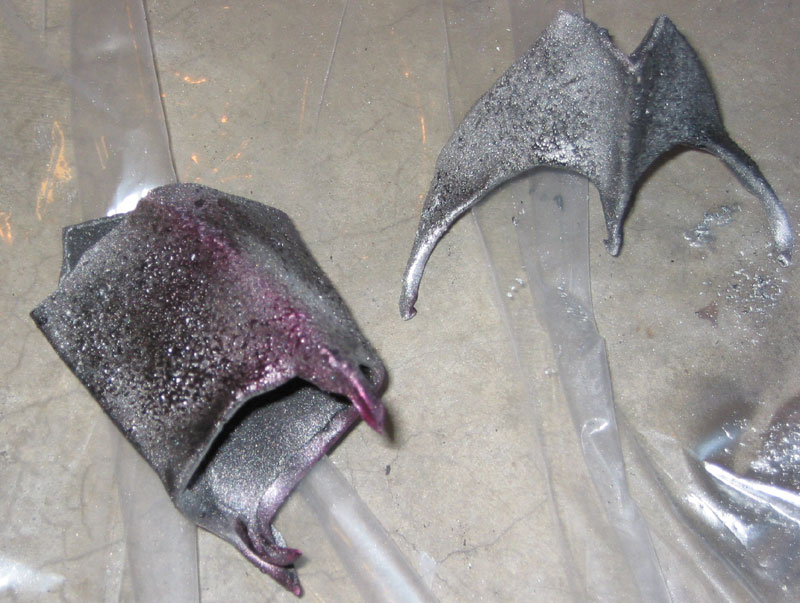
Flooring in the scrapbook.) Pollyfoaming an Orc
|
|||||||||
 |
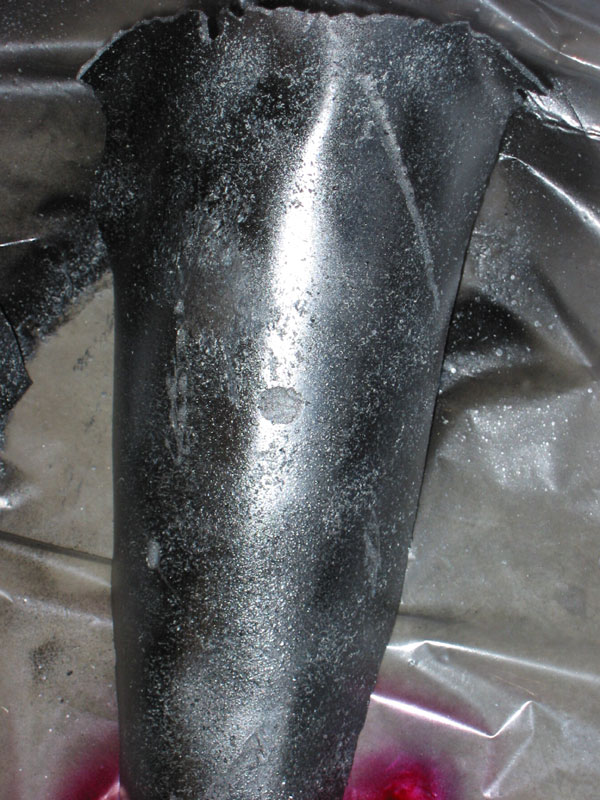 |
| Orc armor pieces with mixed paint types | Texture added. |
Even though I used the spray paint on PVC and craft foam in those photos, I have used it on paper/cardboard in the past too and it looked pretty similar.
== Jen / Laughing Magpie
>>I still want to line the inside with something to make it a bit more sturdy and give it SOME weight.
What about 3 strips of metal, one around the rim and the other two crossed over the center? To me, strength plus some-but-not-too-much-weight equals steel! You can get sheets of 22-gauge steel at Lowe's, or those smaller hobby sheets, etc. Brass or copper would probably work, too. Doesn't have to be very thick, and while my instinct would be to rivet the crossed bands where they meet the rim, they really don't even have to overlap if you just epoxy them right into the helmet. That way, the weight you want is actually strengthening the whole helmet, and giving a good anchor point for any lining and chinstrap. (Back in my early Medievalist days, we all made spangenhelms or "band helmets" this way, with heavier steel and usually 4 panels of leather riveted in to fill the spaces.) Just gluing washers or something inside will cause the weight to add stress in some areas, which could be bad.
== Matthew A.
Example of helmet done in fun foam: http://www.jedielfqueen.com/lotr/costumes/eomer/helmet/helmet.htm
(used in Rohan helmets, especially Eomer's Helmet)
v ----- Advertisement -----v
^ -----Advertisement ----- ^
This page was last updated 04/22/08