

|
|
Real Armor TipsPlease feel free to contribute tips! Index on Armor
Boiling LeatherThere are different opinions here. For details, the best is to google up what you need as we just have a few notes. There are a lot of web resources out there on making cuir bouille, but
the basic technique is to dip vegetable-tanned leather in very hot or
boiling water just long enough for it to become soft and pliant. Push it
into the shape you want (usually over some sort of wooden form or mold) and
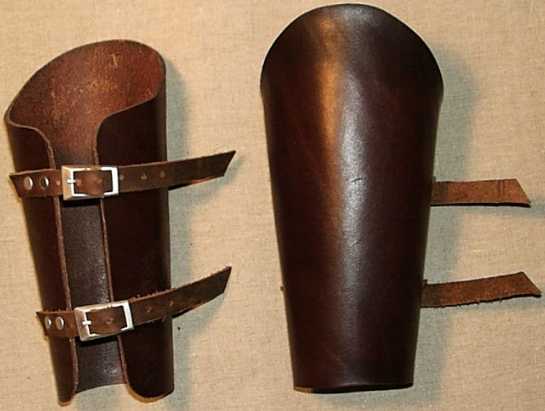
hold it in place with tacks until it dries. We often boil leather in a mixture of 50/50 beeswax and carnauba wax (It's a very hard plant wax). This is by far not authentic but it works very nice. Since the melting point of carnauba wax is higher than beeswax it is not affected by the sun. The leather gets rock hard. Here is a short explanation how we do it. But as always... it's in German (surprise, surprise) http://www.lederkram.de/anleitunglederhaerten.htm Here is a picture of 2 vambraces hardened with wax: http://www.lederkram.de/lederkram/ruestung/kl/armschienen/armschgehaertet.jpg == Mantel-Man That's cuir bouilli. As I said, mostly done by streching damp leather over a wooden mold, then inserting into very hot water until it shrinks, thickens, and hardens. Although the name means "Boiled Leather" or "Boiled Hide", it's like hard-"boiled" eggs; both are best done at a temperature below boiling. --N'stasha Embossing LeatherEmbossing works best on thinner leathers, though -- not the 10-oz and up which is used for breast plates on cuiri bouille (French for "cured boiled") leather armor. Anyway, you need a vice or press for a sharp embossing of anything sizable. Very small designs can be tapped into thin leather by laying your 3-D design carving face up on your marble block, laying the leather over it right/smooth side down, then tamping the back of the leather with a wide-headed mallet until a bruise of the design shows on the leather back/wrong side.
Embossing MetalYou won't need an anvil or anything like that, just a firm surface to work on. For embossing lines, just tape some pieces of wire to the back of the piece, lay it face-down on a scrap of leather or even a phone book, and hammer carefully along the wire. ==Matthew Getting startedBasic tools include metal snips (you won't need power tools for cutting thin sheet); a drill or hand-held metal punch ("Whitney" punch, WONDERFUL thing, a cheap version available from Harbor Freight Tools); hammers; plyers; files. Another wonderful tool is a wide-jawed plyers made for gutter and siding work, from Home Depot or Lowes, as shown here: http://www.larp.com/legioxx/loops1.jpg You won't need an anvil or anything like that, just a firm surface to work on. More tips here: http://www.larp.com/legioxx/armrhnts.html == Matthew Armor Links
This page was last updated 04/22/08 |
|