|
|
|
|
|
|
Enlarging the Upper Sleeve
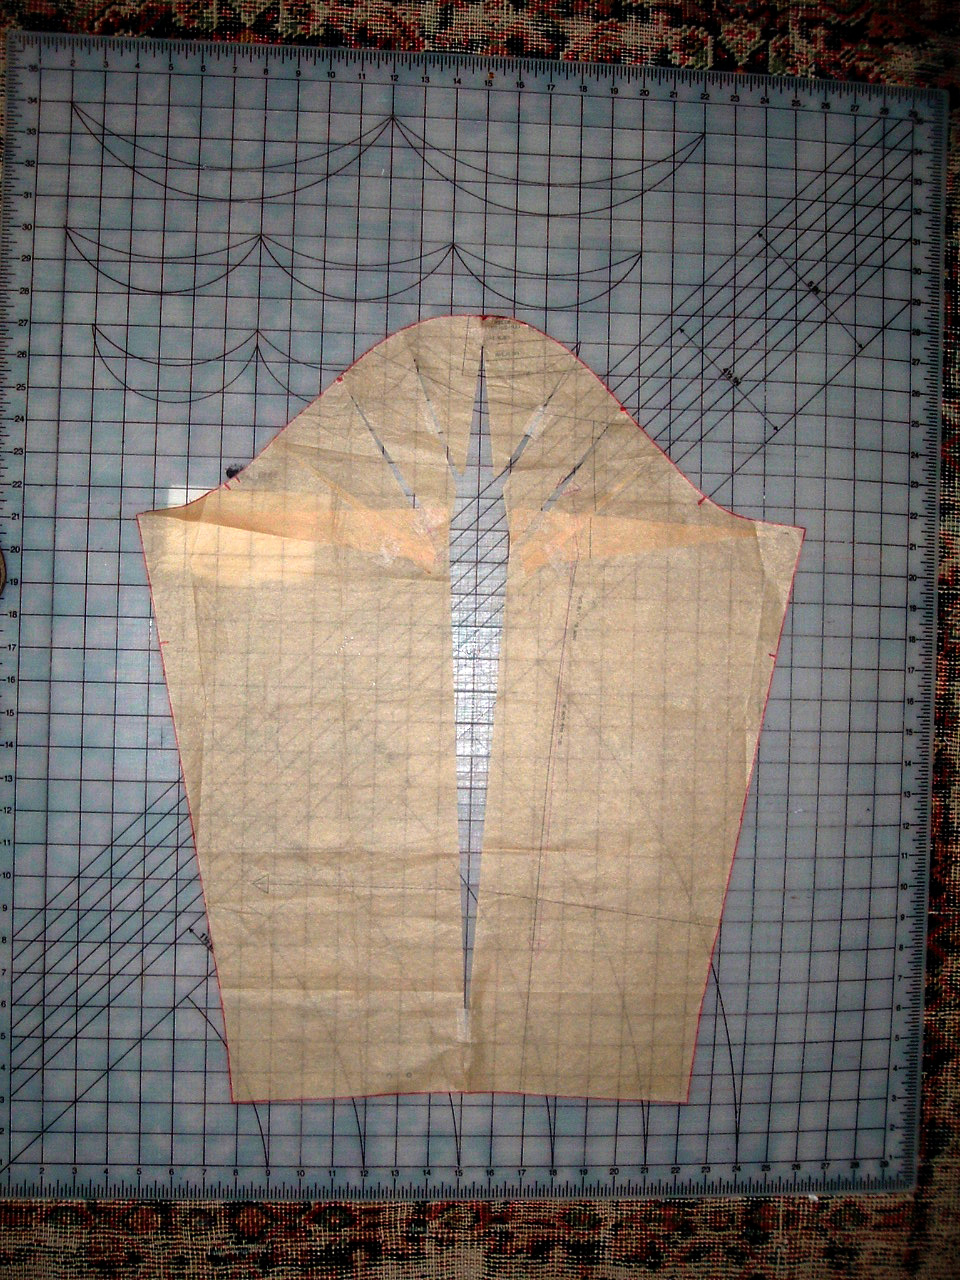
Ever made an outfit and the top part of the sleeve is binding? There is a quick way to fix the upper arm area. Note: binding across the upper arms can be the result from a sleeve that's too tight or because the armscye not falling in the correct place,. Modern set in sleeves should fit right at the shoulder joint If it's out too far, then the sleeve kind of falls down and cause problems However, in this article, I'm assuming that people are starting with a pattern that is basically the right size pattern or you've already adjusted that part of your muslin. This is instructions for how to adjust the sleeve pattern when the sleeve cap is too narrow and high, thus restricting arm movement. I have altered so many sleeves to make the cap wider and lower, I can do it without looking at the directions any more. I almost do it automatically when I see how high and narrow the cap is on most patterns. This gives more mobility to the upper arm. I learned it from Threads magazine, but it's in many pattern alteration books. Trace the original patternUse the pattern piece in the correct size Use a fresh sheet of tissue paper. The white tissue like you wrap gifts in is good. You'll need the notches, dots, grain line, etc. too. Mark the seam line on the traced pattern. Slash the PatternSlash the tracing across from armpit to armpit, *inside* the seam line, just from corner to corner straight across. A rotary cutter is handy. Also slash the pattern vertically from the dot at the top of the cap to the hemline at the wrist, or possibly a few inches above that, you'll get a feel for this when you've done a few and know how you want it to come out. Make sure your slashes are *inside* the seam lines. Make a couple more slashes diagonally inside the cap: again, *inside* the seam line, and perpendicular to it, one from about the balance point, another one or two half way or each third of the way from there to the top of the cap. The cap is now like some sort of sick pizza, all wedges. These slashes end at either the center vertical slash or the armpit to armpit slash. Now, clip the seam allowance, *outside* the seam lines, at each of the slashes, leaving the actual seam line itself as a little "hinge". |
 |
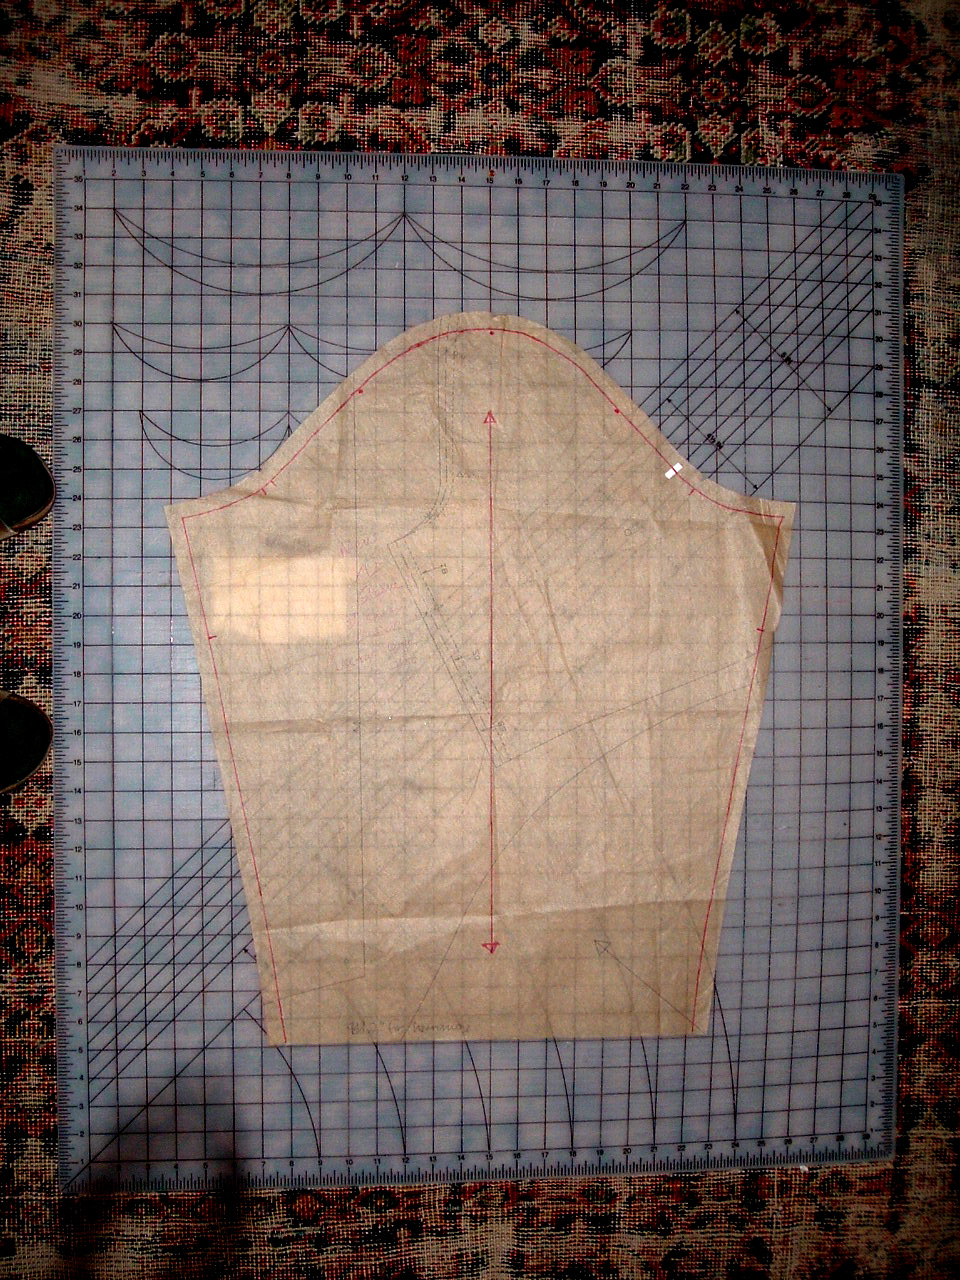 |
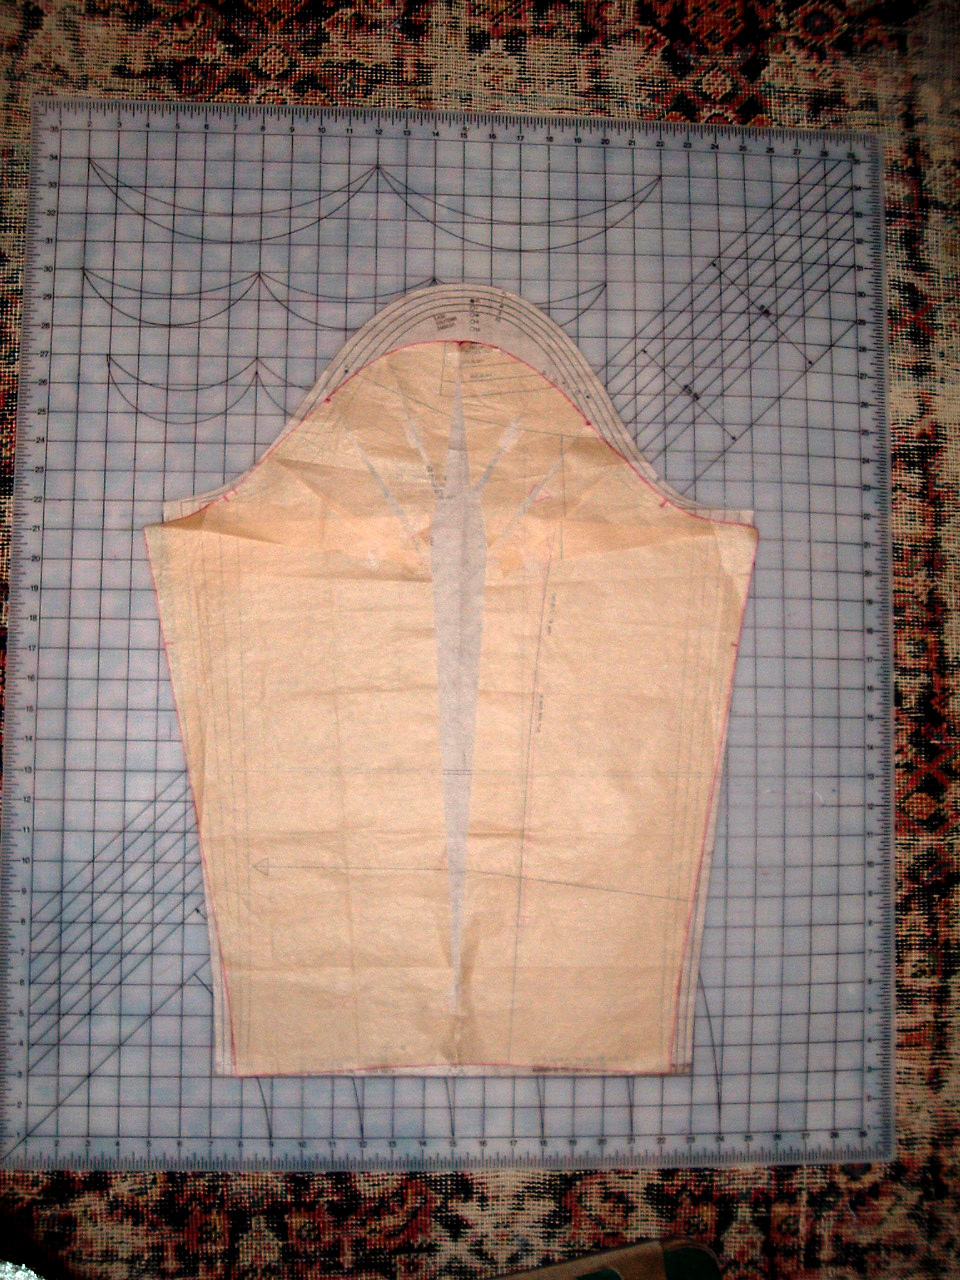
| The final spread laid on the original pattern | The new pattern all ready to test in the muslin |
*don't cut up the original sleeve pattern* this is very bad form. What if you need to do it again, only a different amount? you need your original to be intact.
This page was last updated 04/22/08