|
|
|
|
|
v ----- Advertisement -----v
^ -----Advertisement ----- ^
|
Construction of PVC Chainmail
Weta used a mix of real metal links and plastic PVC for maille. When trying to determine which an outfit is made from, look at the rings. If they are square cut on the edges, then plastic. If they are round like jump rings, metal. Remember, depending on the scene, mail (and armor) may change from metal and plastic and back again. List of material includes:
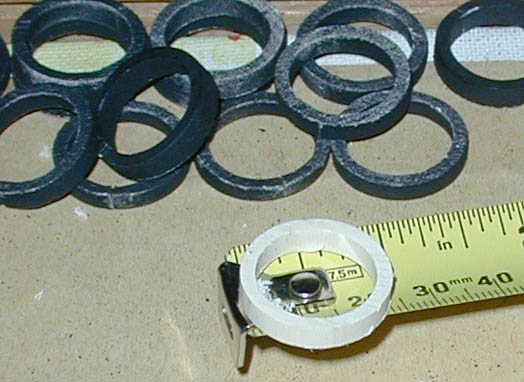
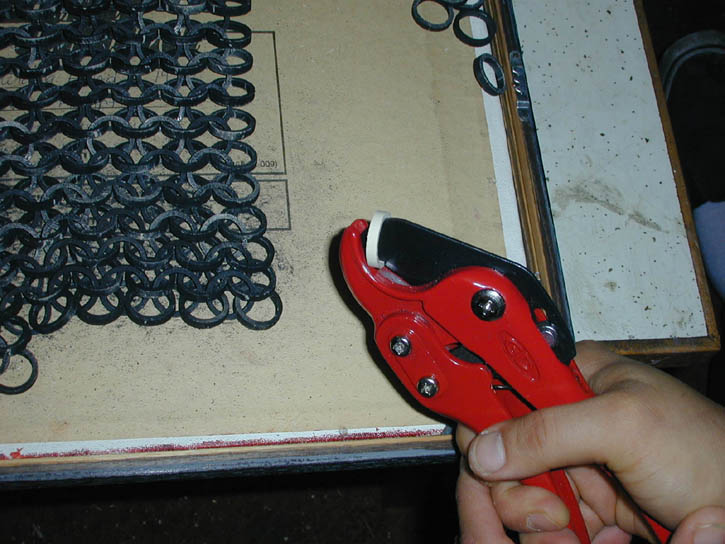
We created the chain mail using PVC pipe. Last year, Nina’s Dad gave us a band saw while we were visiting Western New York, near Buffalo. There, at a local hardware store, Ed purchased some PVC pipe that was about 7/8 inch diameter, just under 1/8 inch thick, and began slicing rings on the band saw. The rings were about 3/16” wide. He sliced almost 1,400 rings to start. Then back in California, we tried to match the size, but found two different sizes: one that was smaller in diameter and thicker, and one that was nearly the same diameter but had thinner walls. The thinner PVC pipe was purchased, 120 feet of it, from Ewing Irrigation in San Leandro, California. We sliced those rings a little thicker on average, almost ¼ inch wide. Matt Clayson of Hi-Impact purchased a gray PVC pipe from hardware stores like Home Depot’s electrical department. Ed believes it is electrical conduit pipe. Nina tried to experiment with weaving the thicker-walled rings, but she found them too hard to open and manipulate. After slicing the rings on the bandsaw, they had a lot of ‘burrs’ and crumbs of plastic that needed to be cleaned off. Nina used a round file and a piece of sandpaper rolled around a pencil to smooth some of the burrs away. Using a PVC pipe cutting tool, Ed snipped a cut into about half of the rings. (We tried a cheap PVC pipe cutting tool kit from Home Depot, but ended up returning it for an Ace Hardware-manufactured-in-Taiwan cutter; cheapest is not always best!). Then the rings were laid out flat on pieces of cardboard and sprayed with a layer of black paint. We tried primer at first but it flaked off during weaving so we switched to flat black spray paint. The rings were flipped, the second side was painted. We spaced them far enough apart that they could be fully covered with paint, but close enough together to conserve space. We let them dry sometimes for 24 hours, sometimes for only 2 hours. This was also the point at which I counted the rings (since I was laying them in neat rows). I counted more than 3,500, but used approximately 3,355 on the actual costume. The collar alone took up approximately 1,200 rings. A friend of ours tried staining his rings with black leather dye, but it rubbed off so we wouldn’t recommend using that technique.
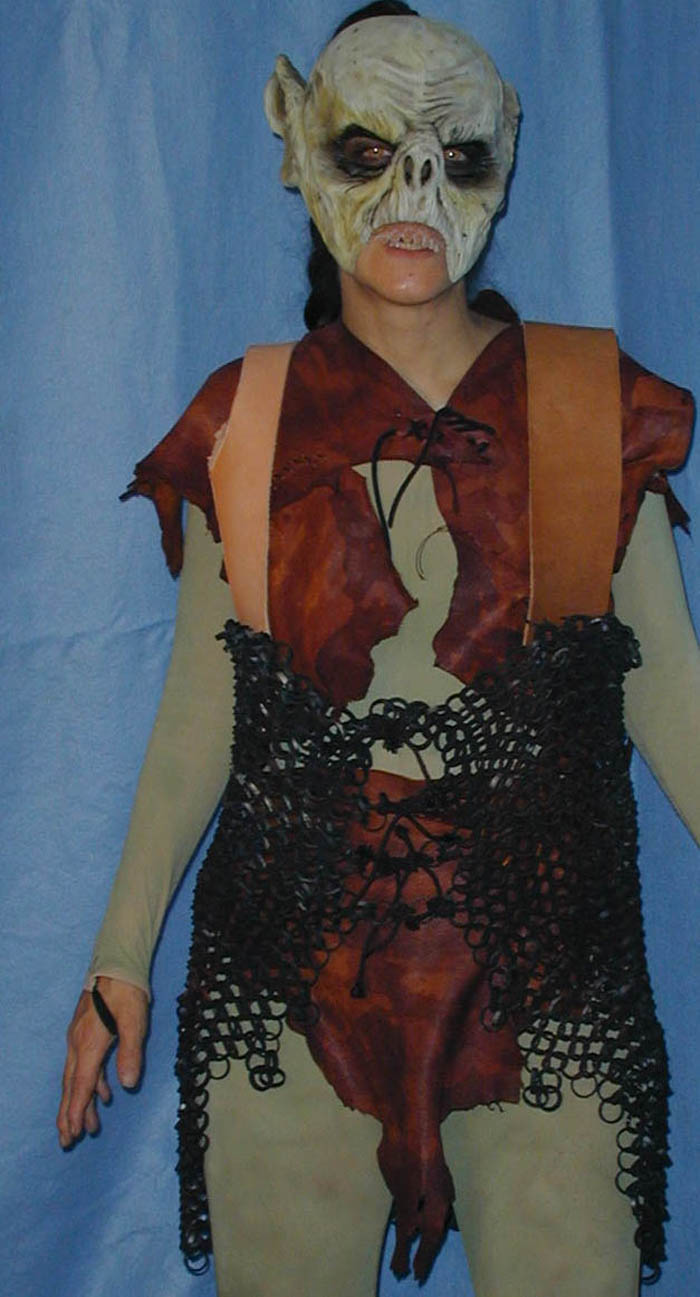
To weave the chain mail, we looked around the internet and found sites that included patterns for making mail out of real metal. Some have color coded drawings, and even animated sequences to help teach you how to do it. They were invaluable! Nina sat in front of the computer with a handful of rings and followed the animation on one website until she had it down. We decided to use a traditional European horizontal pattern, to which we occasionally added vertical rows. The garment was a girdle of chain mail with wide leather straps on each side. I made several rectangular and triangular patches of chain mail that I joined together to make bodice, back and sides.
After the some of the weaving was complete, but before the straps were attached, Ed sprayed the rings with various colors, even using some of the same rust colored paint as on the armor. He used silver and other metallics and misted black over that. Layers of color help to get the realistic effect. When assembling the chain mail into a garment, allowing for movement is key: if you leave some seams open, there is no need to glue any links closed. If no undue stress is put on them they will stay closed. The bodice has six ties, in two groups of three and is adjustable. The ties were simply dark leather laces and shoe laces. Leaving them loose allowed the chain mail to move on my body under the armor without popping any links. (When dressed and out among other costumers, I can tell you that this chain mail and armor does indeed protect you from the wayward prop sword and pointy costume parts that come your way). If you have more questions, feel free to ask the Yahoo list or talk to the authors directly at edward.martinez@att.net and ninakempf@anglefire.com Here's more on PVC Maille out on the web v ----- Advertisement -----v
^ -----Advertisement ----- ^
This page was last updated 04/22/08 |
|||||||||||||