
![]()
![]()
|
|
|
|
|
|
Judy's ExamplesClick on pictures for enlargements. A hobbit - Dora Took
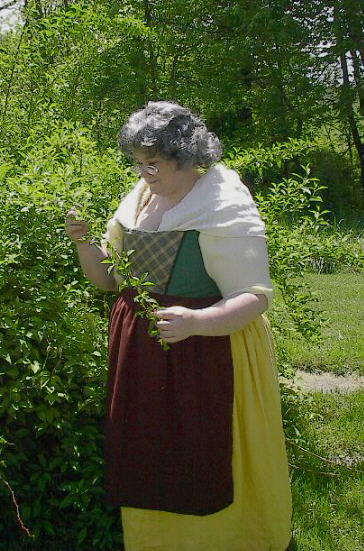
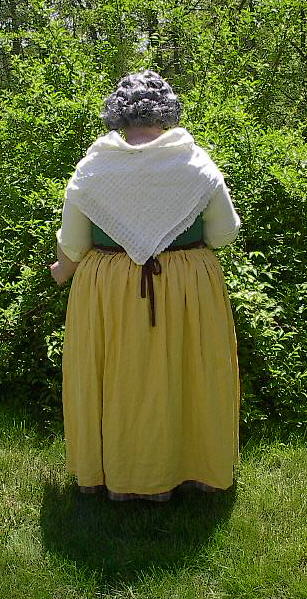
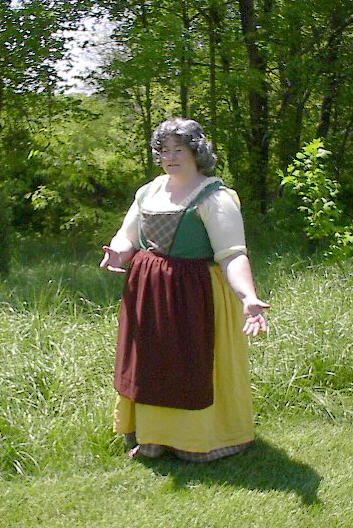
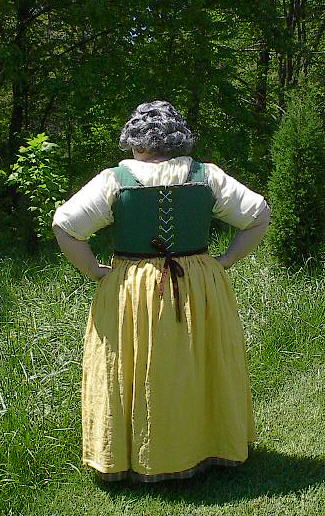
I found the cotton plaid fabric for the underskirt at a fabric warehouse. I used two panels of the 60"wide fabric, gathered them into a waistband with a hook an eye on the side. The over skirt is yellow linen that was left over from a previous cotton. Again I used two panels of 60" wide fabric but this time simply made a casing at the top and inserted an elastic waistband. The over skirt is about 2.5" shorter than the plaid.
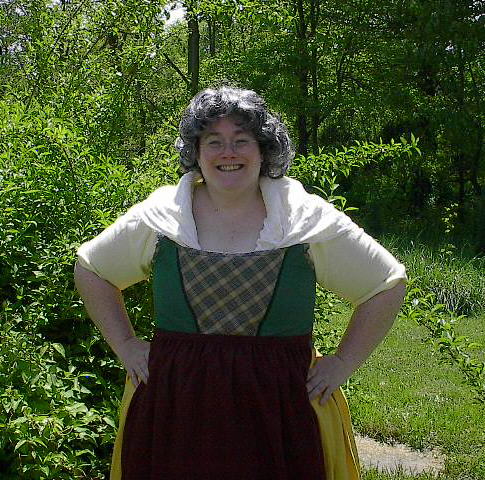
Creating the bodice was the trickiest part. I tried a number of vest
patterns but didn't like the fit when I switched them to a back closing. I
finally took my JP Ryan pattern for Strapless Stays, and combined the like
pattern pieces (from the usual 5 per side, to 2 per side + a single pieced
front). Then I added shoulder straps. I made a mockup, stitched it into a
tube to try it on and marked where the waist lay so that I cut then cut it
square at the waist instead of following the stays over the hips. With the
mockup on a dress dummy, I was also able to shift a couple of the seams. I
wanted the side seam more at my actual side than the pattern gave (it was
shifted back a bit), and I wanted to shape the front panel a bit
differently. I cut the mockup off of the dress dummy according to these new
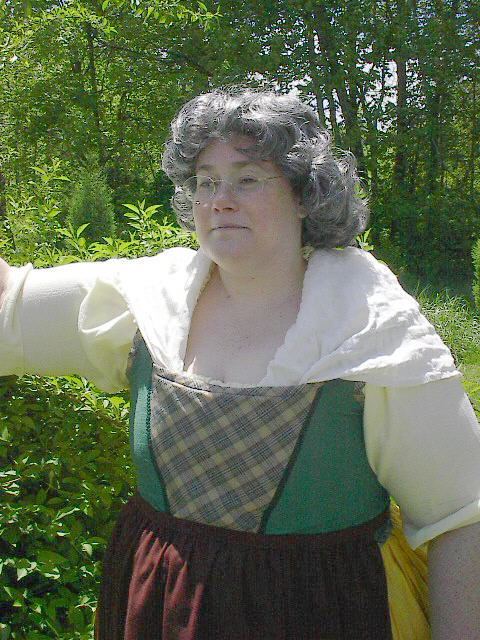
lines and had my pattern. The green cotton blend fabric was a tablecloth I
found in the thrift store.
For stability, the bodice is lined with some scrap fustian to which I sewed many lines of Rigilene boning. This was the first time I've worked with Rigilene. I found that it is made of plastic and some nylon threads, so most of the time I sealed the cut ends with a match to keep the nylon from unravelling. Also, because Rigilene comes rolled in a box, I attached it "backwards" so that the natural curve of the plastic would not follow my own natural curves as much, but might be a little stronger. I have heavily boned the back and sides, and edged the front panels along the seams). Sewing the Rigilene to the fustian was fascinating. You really can sew right through the plastic. It doesn't matter if your seams are straight as long as you stay somewhere near the edges (and the piece is straight where you want it). If I had used steel bones, I would have needed a extra layer of fabric in order to create the casings - or used the covered boning which gives too narrow a seam allowance for my taste. I cut an additional layer of the front panel out of the plaid fabric for
a nice contrast to the green and simply laid it on top of the green front
panel when I sewed those pieces together. Now I wish I had also fixed it
down with Wonder Under or Heat And Bond (or any other 2-sided adhesive
"fabric"). The plaid is much lighter than the tablecloth and is prone to
wrinkling a little. I stitched the entire lining and the entire green cover
and then sandwiched them together. It helps not to have attached the
shoulder straps at the back so that the pattern still lies flat. I made a
few strips of bias edging from more scraps of the plaid, and used this to
stitch the front and back of the bodice together. The final bit was to put in the grommets and add the back placket to hide the gap behind the lacing. One advantage of using the Rigilene is that after I had the entire thing finished, I realized that I had forgotten to put on the flat braid outlining the front panel! Because you can sew right through this boning, all I had to do was pick out a few threads in the bias edge to tuck the trim edges under, and sew right through all of the layers, boning included! You'd never know it was put on out of order. If I had used any other boning, I would have had to hand sew the trim on.
Check out even more information and pages on her web site <here> !
This page was last updated 11/21/09 |