|
|
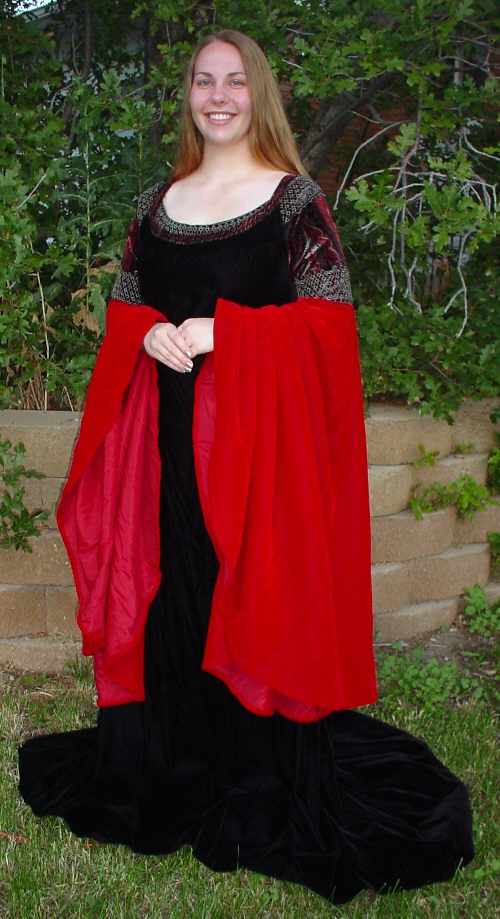
Making of Arwen's Blood Red GownVersion 2.0. August, 2003 Index
Step by Step Instructions
|
 |
|
| Front and back of under gown | |
 |
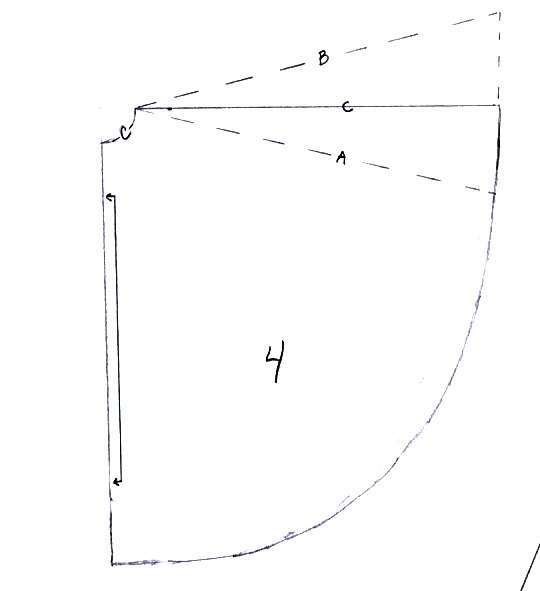 |
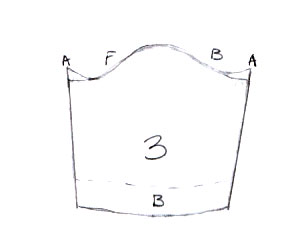
| upper sleeve of under gown, with gusset adjustment | lower sleeve of under gown |
**Note** The underdress is not very full so it doesn't interfere with overdress drape. I needed slits.
Also, the 3" trim goes around the entire circumference of the underdress neckline and therefore overlaps the sleeves (if you are making the NON sleevecap version) otherwise, trim ends at the overdress line (look at it in the mock up stage.)**
**Note** for 60" or wider fabric, it is possible to do a full circle.
 |
 |
| Overdress front | Overdress back |
 |
 |
| Godet (optional) Why use it? That
lovely pooling effect the dress creates. When I cut out the overdress,
I discovered that what it was doing was not what I wanted it to do, so I
added the godets and they produced the desired effect. |
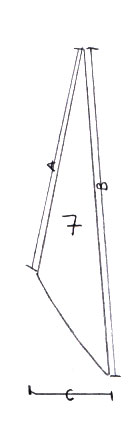
Sleeve cap (optional) |
**It is very important to do a mock up! Especially since most of this involves your own drafting. . .**
See how to make a muslin for more tips.
1. I used a pattern for the underdress and then altered the neckline according to the pictures and my shape. Based on this sketch, you could either find a pattern which is similar, or you could also use a pattern and in the mock up stage, draw your own neckline. I made it fairly narrow in the skirt because I didn't want the skirt to be too bulky.
Cut 1 Front out of black (or paisley, whatever you want -- I used black) on the fold and 2 back pieces.
2. I also used a sleeve pattern for the upper sleeve. If you have a pattern that has a sleeve -- Use it! It will make matching the armscye MUCH easier. I added built in gussets (Gusset: football shaped fabric pieces under the arms to facilitate movement of the arms. With the built in gusset, you get the same results, but it's not quite as obvious what you've done.) Also, since the pattern I used went to just below my elbow, I had to make a mock up and shorten it to just above my elbow.
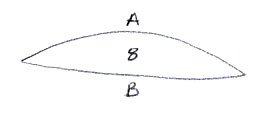
3. The lower sleeve has been speculated (based on an interview with Ngila Dickson) to be a full circle. I, however, didn't have enough fabric, so I made elliptical half circles. They have worked out wonderfully, and are actually quite nice as there's quite a lot of dress to move around when all is said and done. The optional top, inside seams are basically moving the top seam from a visible position to an invisible position. When cutting this, do one layer to line A and the other to line B. I laid my pattern out on the fold, but if you wish to do the invisible seam and it's easier to lay it out as a half circle, by all means, do so.
1. I completely drafted the overdress. I used my bust measurement (+1"), my waist measurement (+1") and my waist to floor measurement (+6 to 10") to do so.
Basically, I studied the pictures until I had a basic idea of shape in my head. I didn't do the neckline free hand. Actually, I did it a VERY high neck and had my friend draw the neckline (once we'd figured out the underdress neckline) on it. I also made sure that the bottom of the hem was the width of the fabric. To get that great pooling effect at the hem of the dress, you need PLENTY of fabric down there. This seems rather vague, I know, but I'm not entirely sure I can explain myself. The dress is not extremely fitted. I ended up taking some fabric out of the the waist/hip area after I made the mock up. Again, I cannot stress the importance of mockups! (I use old sheets . . .)
2. I made the overdress neckline trim out of the same stretch velvet I'd made the upper sleeves out of.
During the mock up fitting, I asked my friend to draw a basic outline for the trim. Then, when I went back to my paper pattern, (that I'd made) I traced it onto another sheet of paper, added seam allowance and then made a "facing" for the "trim." It seemed to work well. The overdress fabric DOES NOT go up to the shoulders. In fact, the underarm line continues to the edge of the trim. The trim over the shoulder is heavily interfaced and lined in order to be sturdy enough. (actually, mine did stretch a wee bit and I've since had to take it up . . .)
3. If you are of the opinion that the dress has sleeve caps, now would be the time to make them. Obviously, I've never made them for this dress since I did my trim differently. However, I have sent along a sketch of what I think it would look like. Mock up time! Attach it to the overdress shoulder strap and check it out! I may be completely off my rocker here
Also, DON'T FORGET SEAM ALLOWANCE!!!
1. Sew the underdress back pieces together at CB (Center Back).
2. Sew the side seams.
3. Sew the shoulder seams together.
4. Sew on paisley facing and 3" trim.
5. Sew 3" trim onto upper sleeve, leaving enough at the bottom of sleeve for seam allowance to sew the lower sleeve onto the upper sleeve.
6. Sew lower sleeve top seam.
7. Sew lower sleeve to upper sleeve.
8. Set in sleeves. **Note, the 3" trim at the neckline WILL NOT be secured in any way to the sleeve. It will simply rest on it.)
9. Hem underdress. (Can be done before setting in sleeves. Make sure to try it on and make sure it hits just at your ankle. This will help facilitate smoother, elfin walking)
10. Hem lower sleeves (Can be done before setting in sleeves)
 |
 |
 |
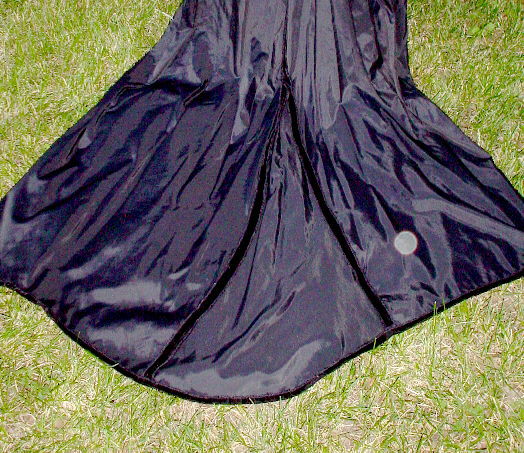
| This is the wrong side of my fabric,
showing the seam lines of the inserted godet. You can see the necessary
curvature of the hem as it segues from the front hem line to the longer
back hemline. There are many more pictures in her scrapbook that show this in detail |
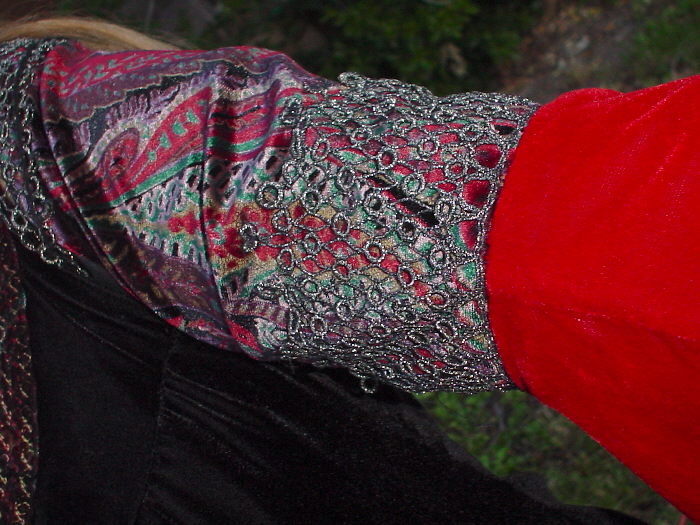
With arms down. Notice that the front of the sleeves are slightly shorter than the back. | This is showing the upper sleeve, lower trim and the inside seam of the lower sleeve. |
1. Sew godet front to dress front (starting from hem and working up.
2. Sew side seams.
3. Sew shoulder seams.
4. Sew on "trim" at front and back neckline. Finish on shoulder area.
4.a. If you made sleeve caps, sew them on.
5. Sew in darts at front bust (I am rather well endowed, so the dress pulled funny on me. I had to make a choice -- 100% accuracy, or look good on me -- I chose the latter. You may or may not need to do this. Your mock up will help determine that.)
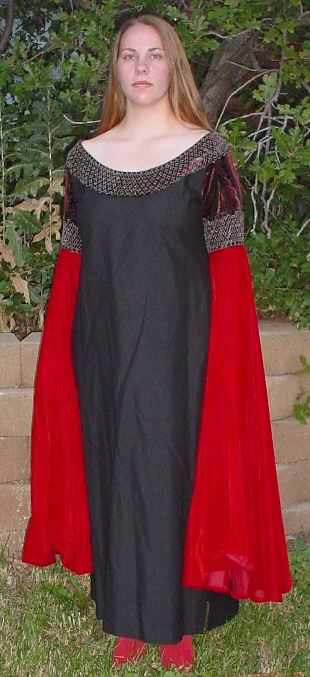
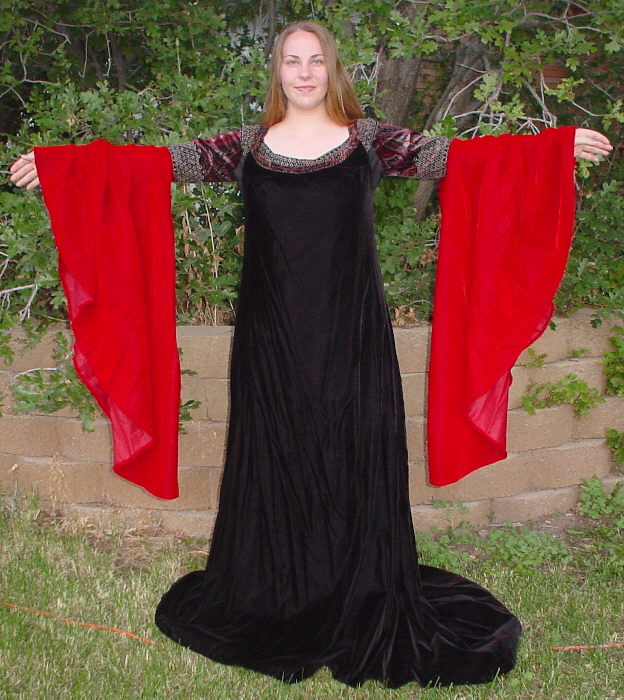
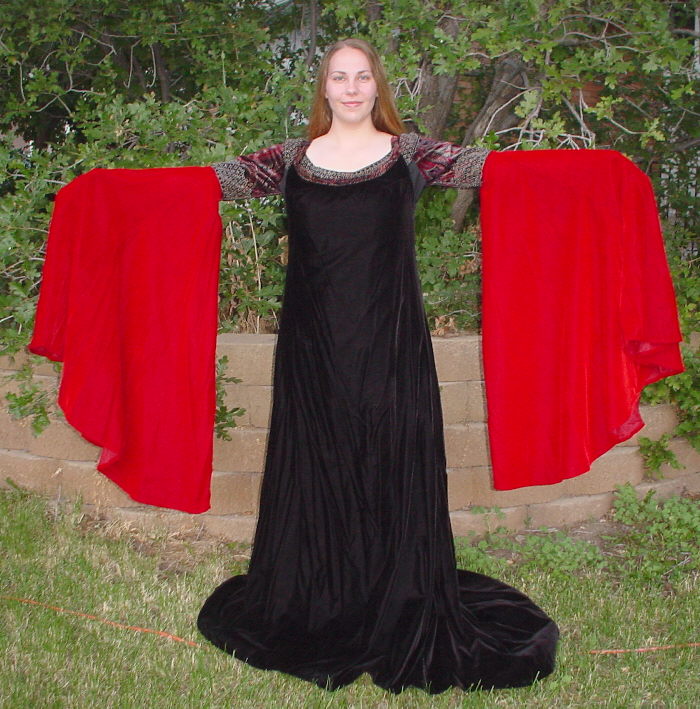
6. Try the dress on. Make sure there is plenty of fabric dragging on the ground. Refer to the pictures of her, the pooling gives the nice effect of length and therefore height. Wear the shoes you will be wearing.
7. Hem the over dress after you let it hand a day or so to stench out.
 |
 |
 |
|
| With the sleeves folded to reveal my hands. | Showing the sleeves with them covering my hands. You can sort of tell that they are more elliptical than half circles are traditionally. |
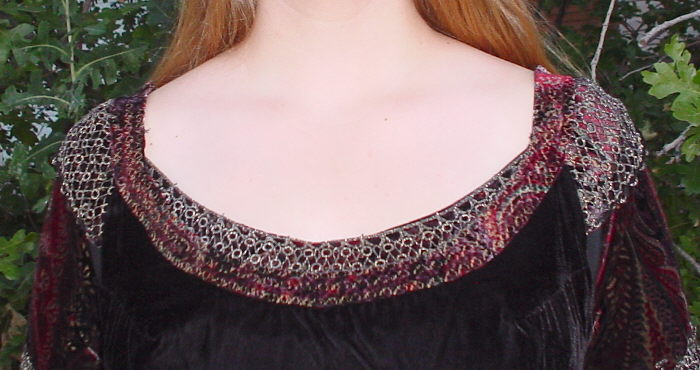
This is the front view of the overdress neckline. The line is much more of a scoop as opposed to the boat shape of the underdress. |
Voilà! You have Arwen's BR dress! As always, I'm more than willing to try to help people comprehend my ramblings. Please email me if you have any questions. I will try to be prompt in my response.
Extra note: I took these pictures quickly and did not wear the normal undergarments I wear with this dress. It is importance to wear the same (and proper) foundation from the measuring stage, though fitting to whenever the final product is worn.
There are many more pictures in the scrapbook entry
--LLSkywalker
[ladyluke_skywalker@yahoo.com]
I am 5'6" but I wore boots with an 1 1/2" - 2" heel, so adjust accordingly.
by michaela
Basically though it's best to go by proportions. I mean if you area
good 6 inches shorter than Liv then your sleeves will trail on the ground
if you use her measurements ;)
If you are using 150cm wide fabric (60") then you'll need 4 times the
length from your elbow to the ground for the sleeves, as this will include
the little adjustments for the circle you need to cut out for your arm to
go through (unless of course it's actually just set in to the top part of
the sleeve as if it were all one fabric: ie just into the back seam.)
For the dress, you will need possibly twice the length of your body plus what ever you want to "puddle" on the ground. The dresses are very simply cut with very very little shaping especially for Arwen's dresses based on this style (requien, wedding etc).
I know silk velvet comes in nice 150cm widths so you can get a front from one length and possibly the two backs from the other. I don't think you'd want three lengths and have the two backs made from one length each, or there'd be far more fabric than is visible. As it is there is at least a 3m hem (3 yard hem approx). But then I've not really seen the back of this dress. The Requiem dress was about the only costume you couldn't see the back of at the Te Papa exhibit.
Maybe three widths is what you need? You'll have a lot of fabric left over so think of a project for it;)
For the underdress... well it certainly looks to be made of blue velvet
too doesn't it? I dunno. It doesn't make much sense as it would cause the
outer fabric to creep up/down depending on the direction of the pile.
Maybe they do have the pile going down.. maybe it helps keep the top dress
sitting in place? eh, I dunno.
Anyway, if you weren't to make the underdress from velvet but a fabric
with no nap, then you can get away with a lot less fabric as you can top
and tail pattern pieces. putting the front on the fabric, then nestling
the backs upside down with the body part near the hem and vice versa. It's
how I cut my Orange wool dress and how I was able to make it out of one
blanket.
== michaela
http://costumes.glittersweet.com
This page was last updated 04/22/08