
![]()
![]()
|
|
|
|
|
|
Michael S. - Georgia, USA
|
| Sewing machine | |
| Scissors (sharp!) | |
| Push pins (long) | |
| Pin cushion | |
| Thread (heavy duty; silver, brown) | |
| Heavy crape paper | |
| Sketch paper | |
| Masking tape | |
| Paint pen (Krylon; silver) | |
| Tape measure | |
| Chalk (white) | |
| Furniture grade vinyl | |
| Ribbon (1/4” gold) |
 I
had no pattern to base the surcoat on, but I did have a long leather coat to
use as a model. I measured out the back piece and recorded these
measurements onto a rough sketch. I measured the widths of the neck, back,
shoulder and arm openings.
I
had no pattern to base the surcoat on, but I did have a long leather coat to
use as a model. I measured out the back piece and recorded these
measurements onto a rough sketch. I measured the widths of the neck, back,
shoulder and arm openings.
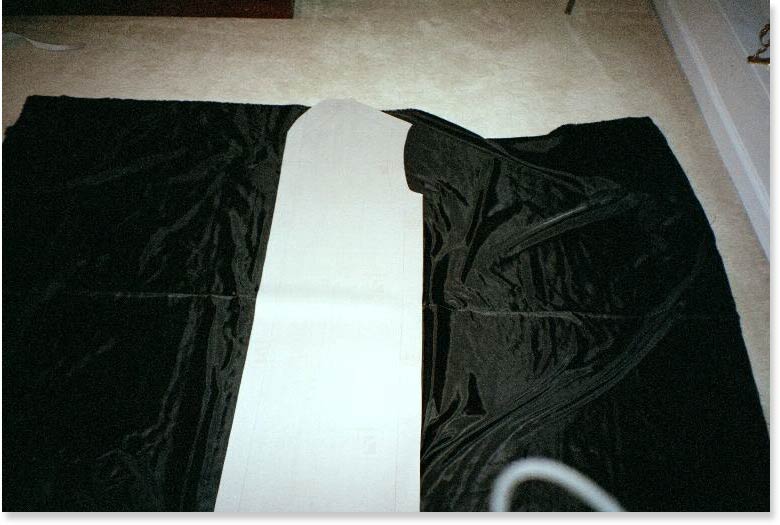
I then transferred the measurements onto the heavy paper to create a pattern for the back. I discovered that the measurements for the front panels were about half the widths overall so I simply used the one pattern of the back as a guide for the two front panels, just cut the back into two halves. After cutting out the pattern of the back and front panels, I taped them together and tried it on to gauge the overall fit. I made minor adjustments in the shoulder angle, neckline, and taper around the chest. I also increased the size of the arm openings.
 |
 |
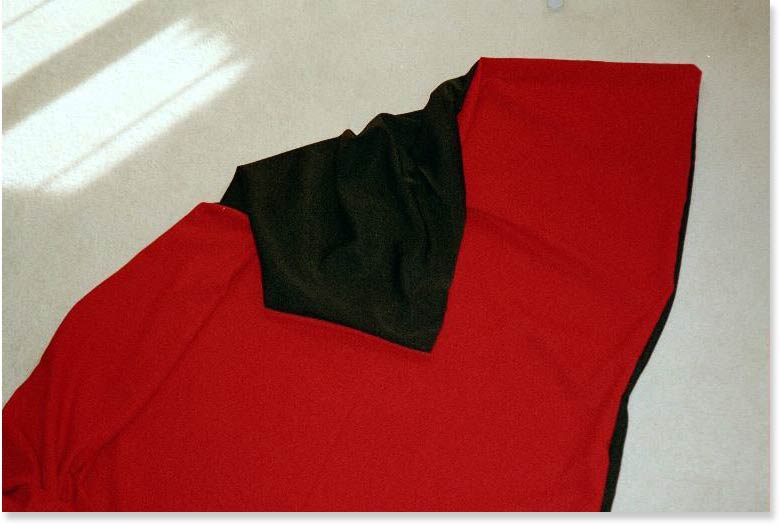
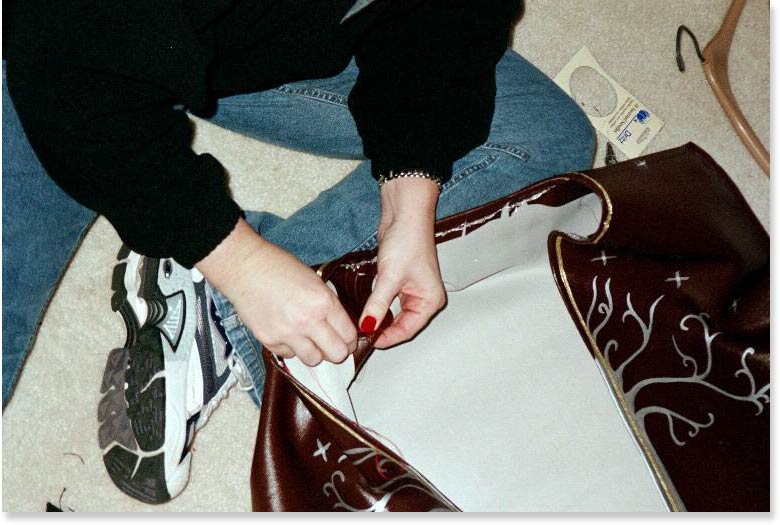
After I was satisfied with the fit I traced the patterns onto the backside of the vinyl material. At this time I measured the length. I allowed for a one-inch margin and traced a second outline for the hem. I cut around the outer guide line until I had my three main panels for my surcoat. I then pinned the panels together and tried it on to make sure it fit. I tapered the waist in a little more and then adjusted the guidelines accordingly.
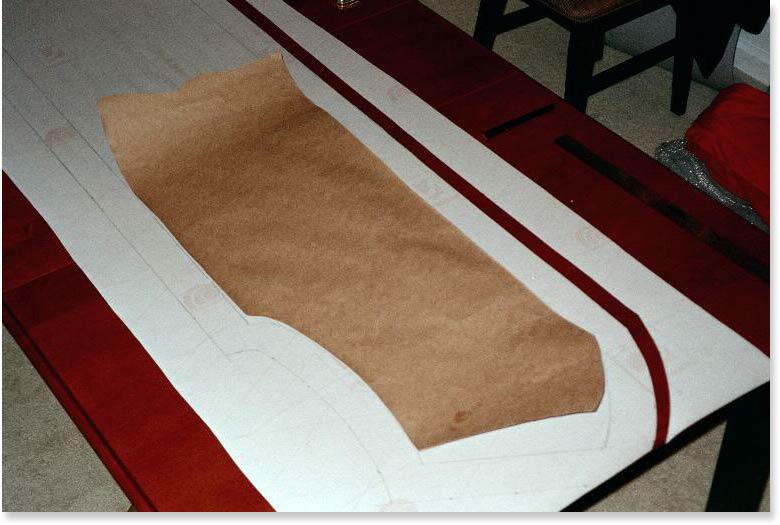
 The
nice lady at my local Hancock Fabrics made a small pattern and showed me the
best way to attach the panels. The trick is to pin the panels together at
the inside guide lines and sew on these lines while the material is
inside-out. Sew the shoulders together first then fold the hem back and sew
the second rows to secure down the hem.
The
nice lady at my local Hancock Fabrics made a small pattern and showed me the
best way to attach the panels. The trick is to pin the panels together at
the inside guide lines and sew on these lines while the material is
inside-out. Sew the shoulders together first then fold the hem back and sew
the second rows to secure down the hem.
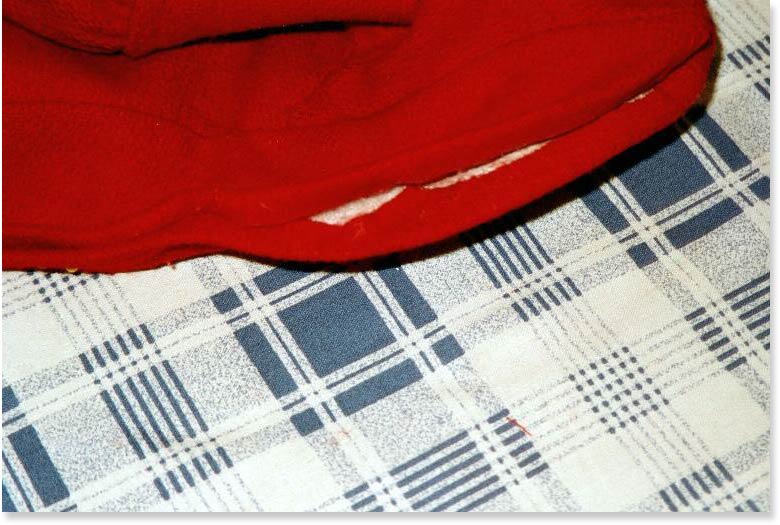
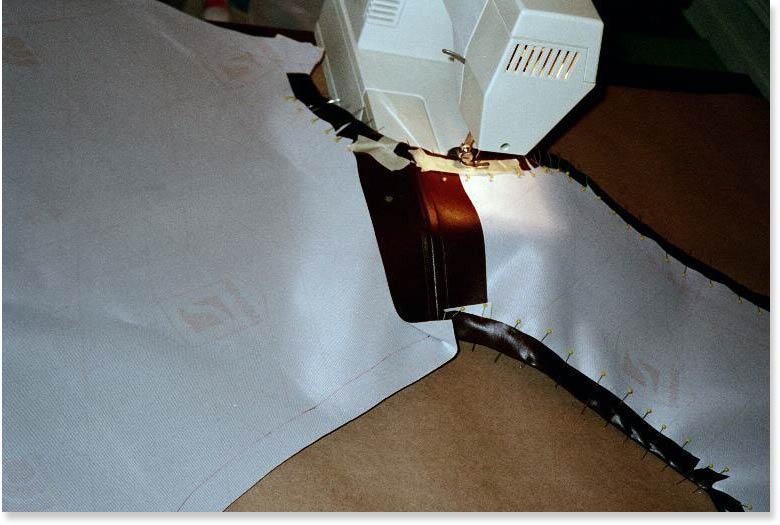 Then
I notched all the edges that would be exposed and pinned them down. These
are the edges in the arm holes and the collar and down the front panels.
The real tricky part is at the collar where I had to bend and pin the vinyl
to a curve around the neckline and collar. I used masking tape to help
secure certain tricky spots. Vinyl is very heavy and slick and passing
these panels through the sewing machine proved to be very cumbersome,
especially for a first-time sewer. After much pinning (pricking fingers),
and sewing (breaking thread), I finally had a finished shell for the
surcoat.
Then
I notched all the edges that would be exposed and pinned them down. These
are the edges in the arm holes and the collar and down the front panels.
The real tricky part is at the collar where I had to bend and pin the vinyl
to a curve around the neckline and collar. I used masking tape to help
secure certain tricky spots. Vinyl is very heavy and slick and passing
these panels through the sewing machine proved to be very cumbersome,
especially for a first-time sewer. After much pinning (pricking fingers),
and sewing (breaking thread), I finally had a finished shell for the
surcoat.
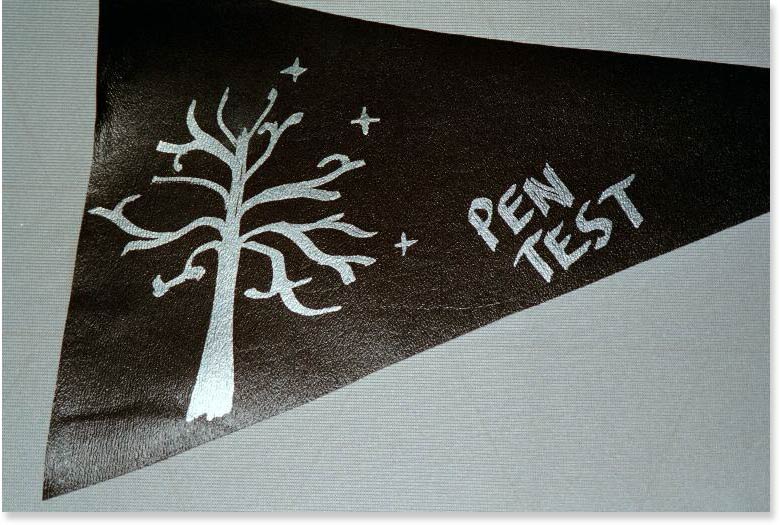
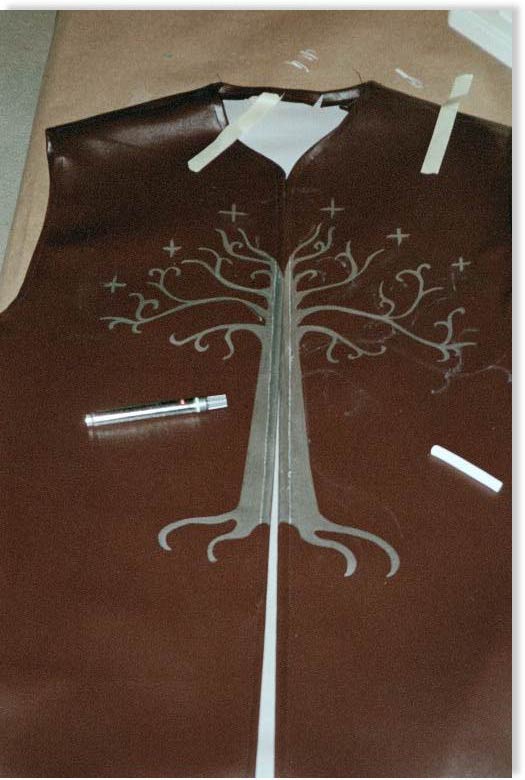
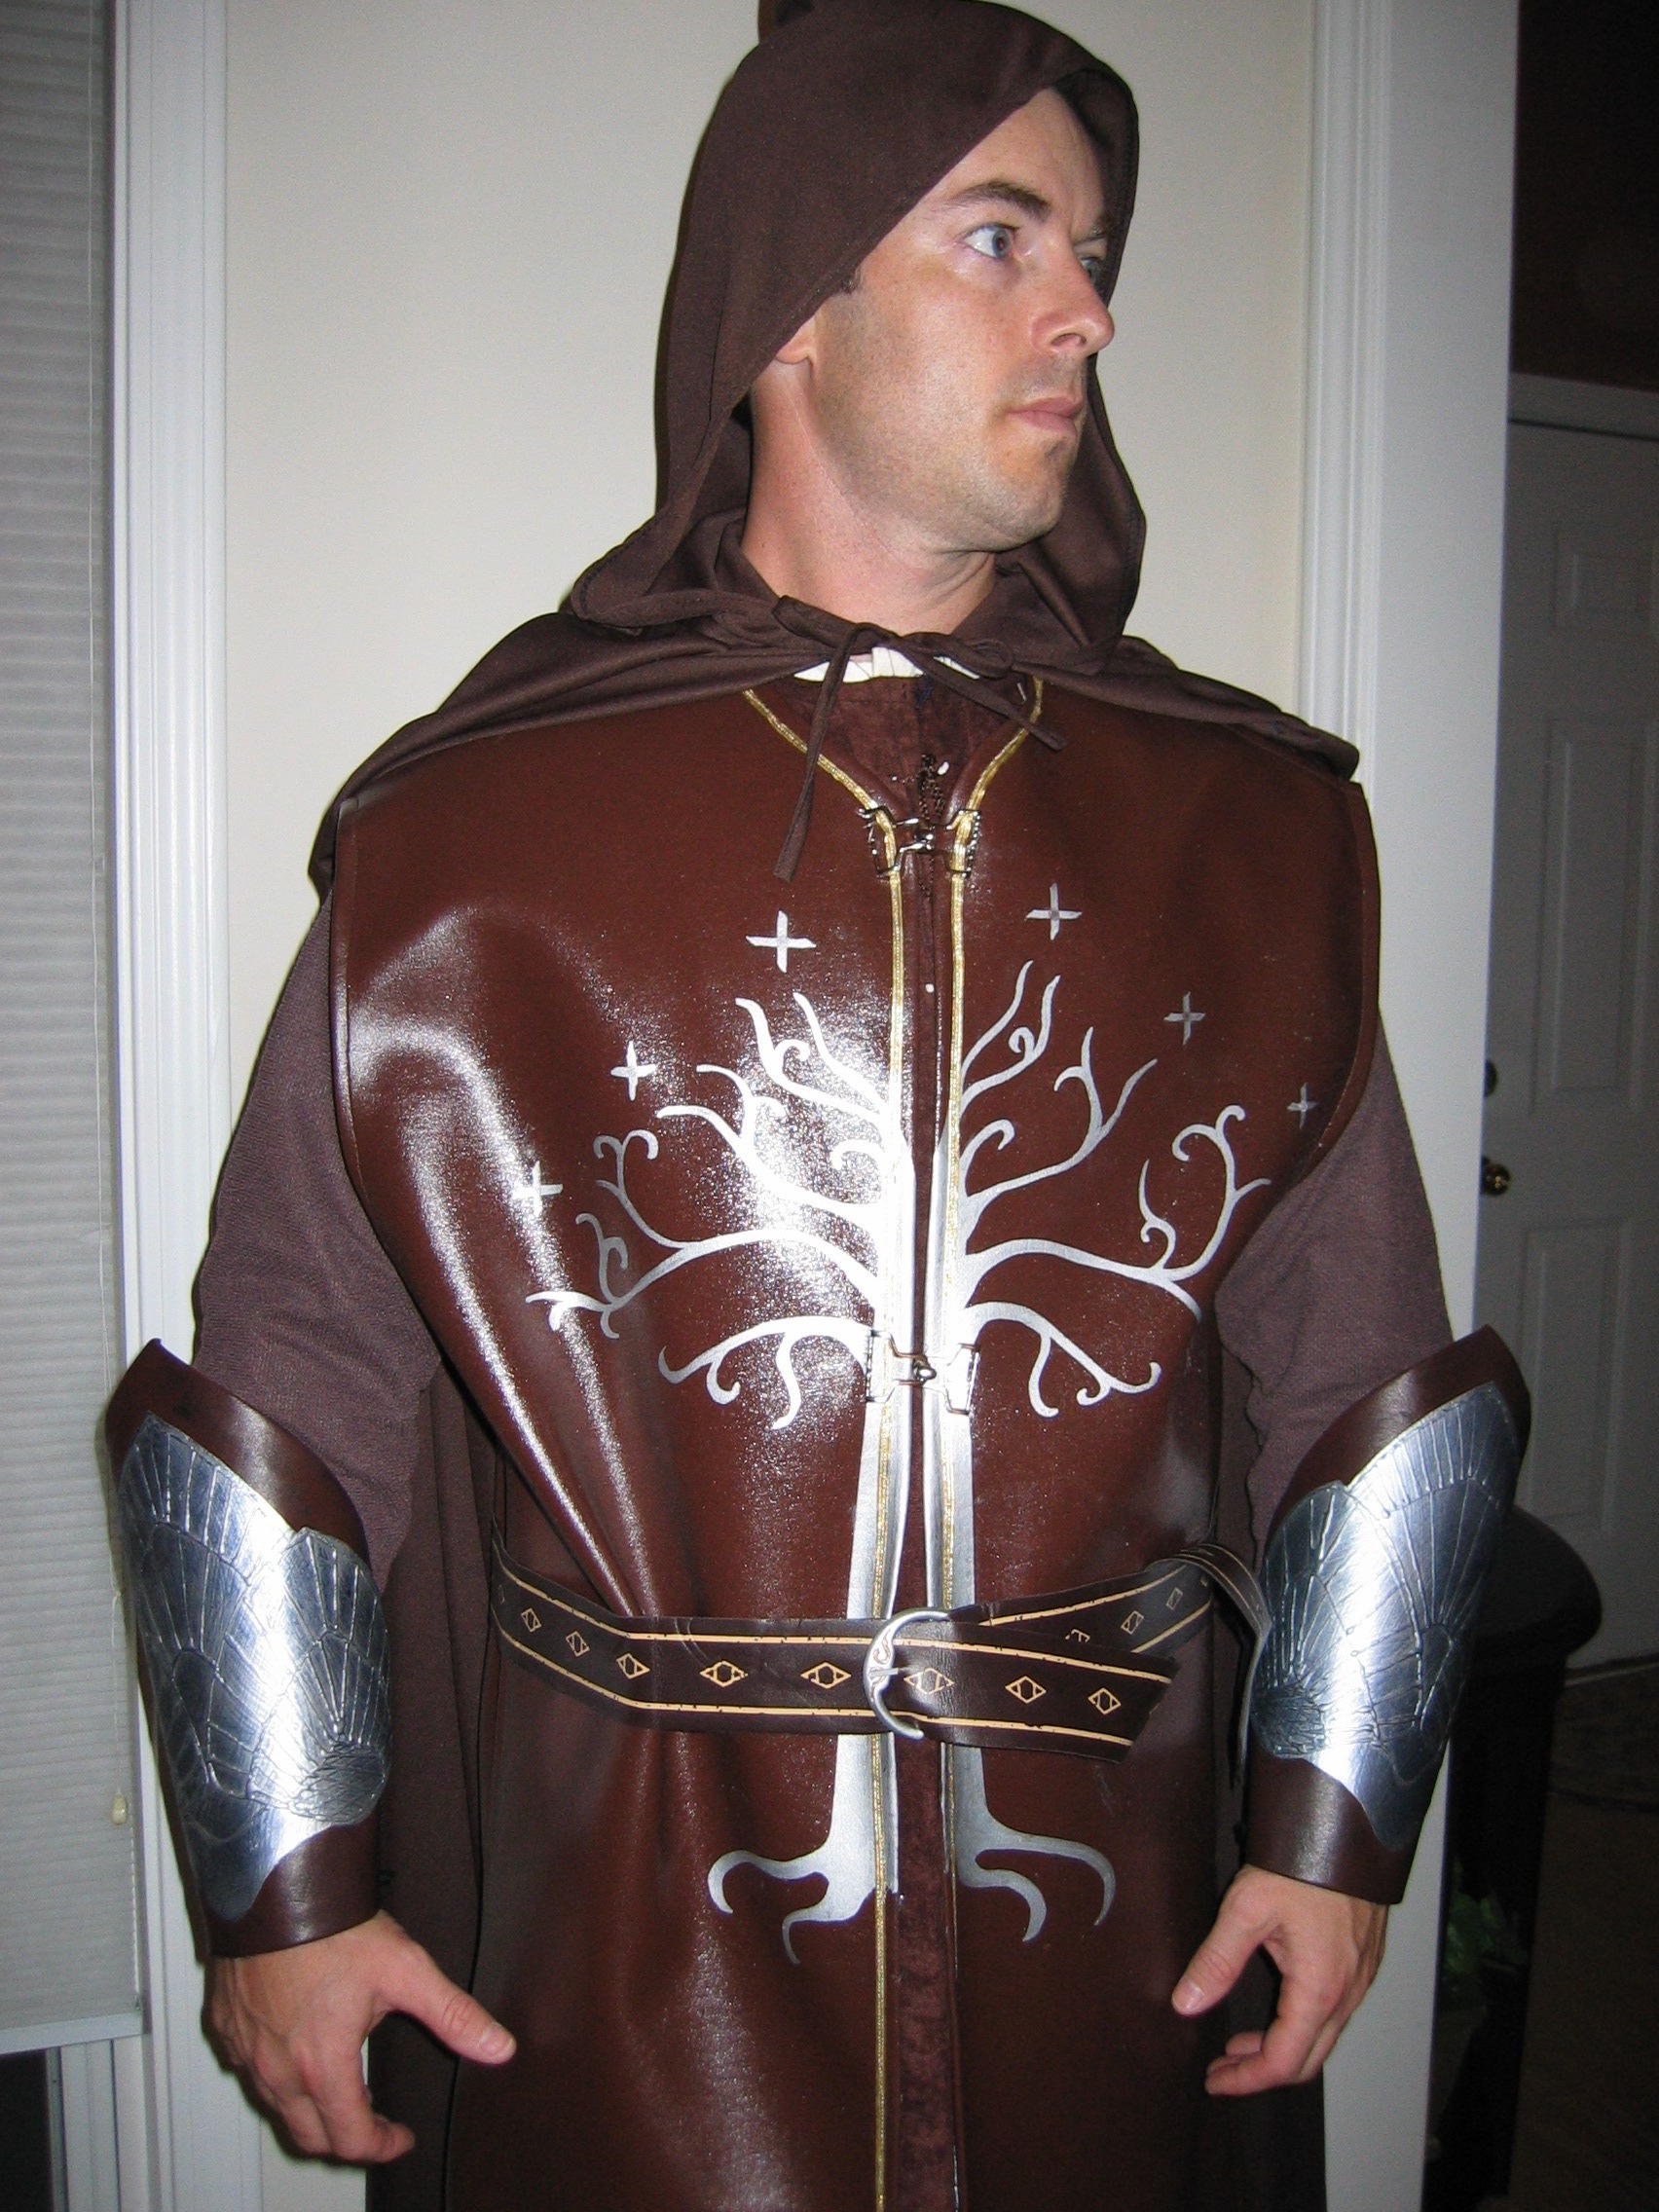
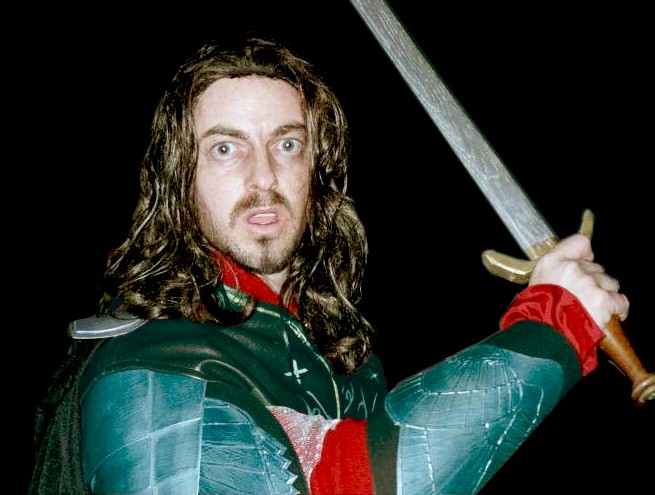
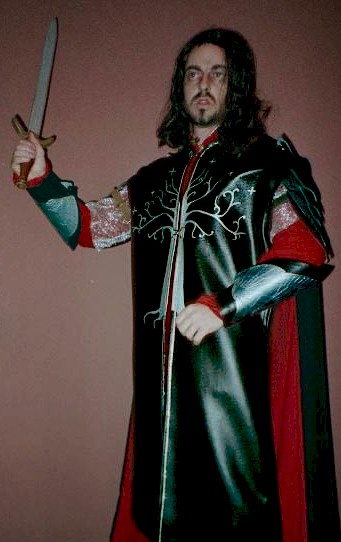
After finishing the shell it was time to add the silver tree. This was a nerve wracking time because it would be VERY difficult to fix what I might mess up. I experimented with a couple paint pens and ended up using a Krylon brand calligraphy paint pen. I sketched out the tree with chalk then went back over with the Krylon paint pen. Luckily I got it right for the most part. None of the spy photos showed the bottom of the tree but I noticed it shown somewhere else and so from memory came up with a fairly accurate version.
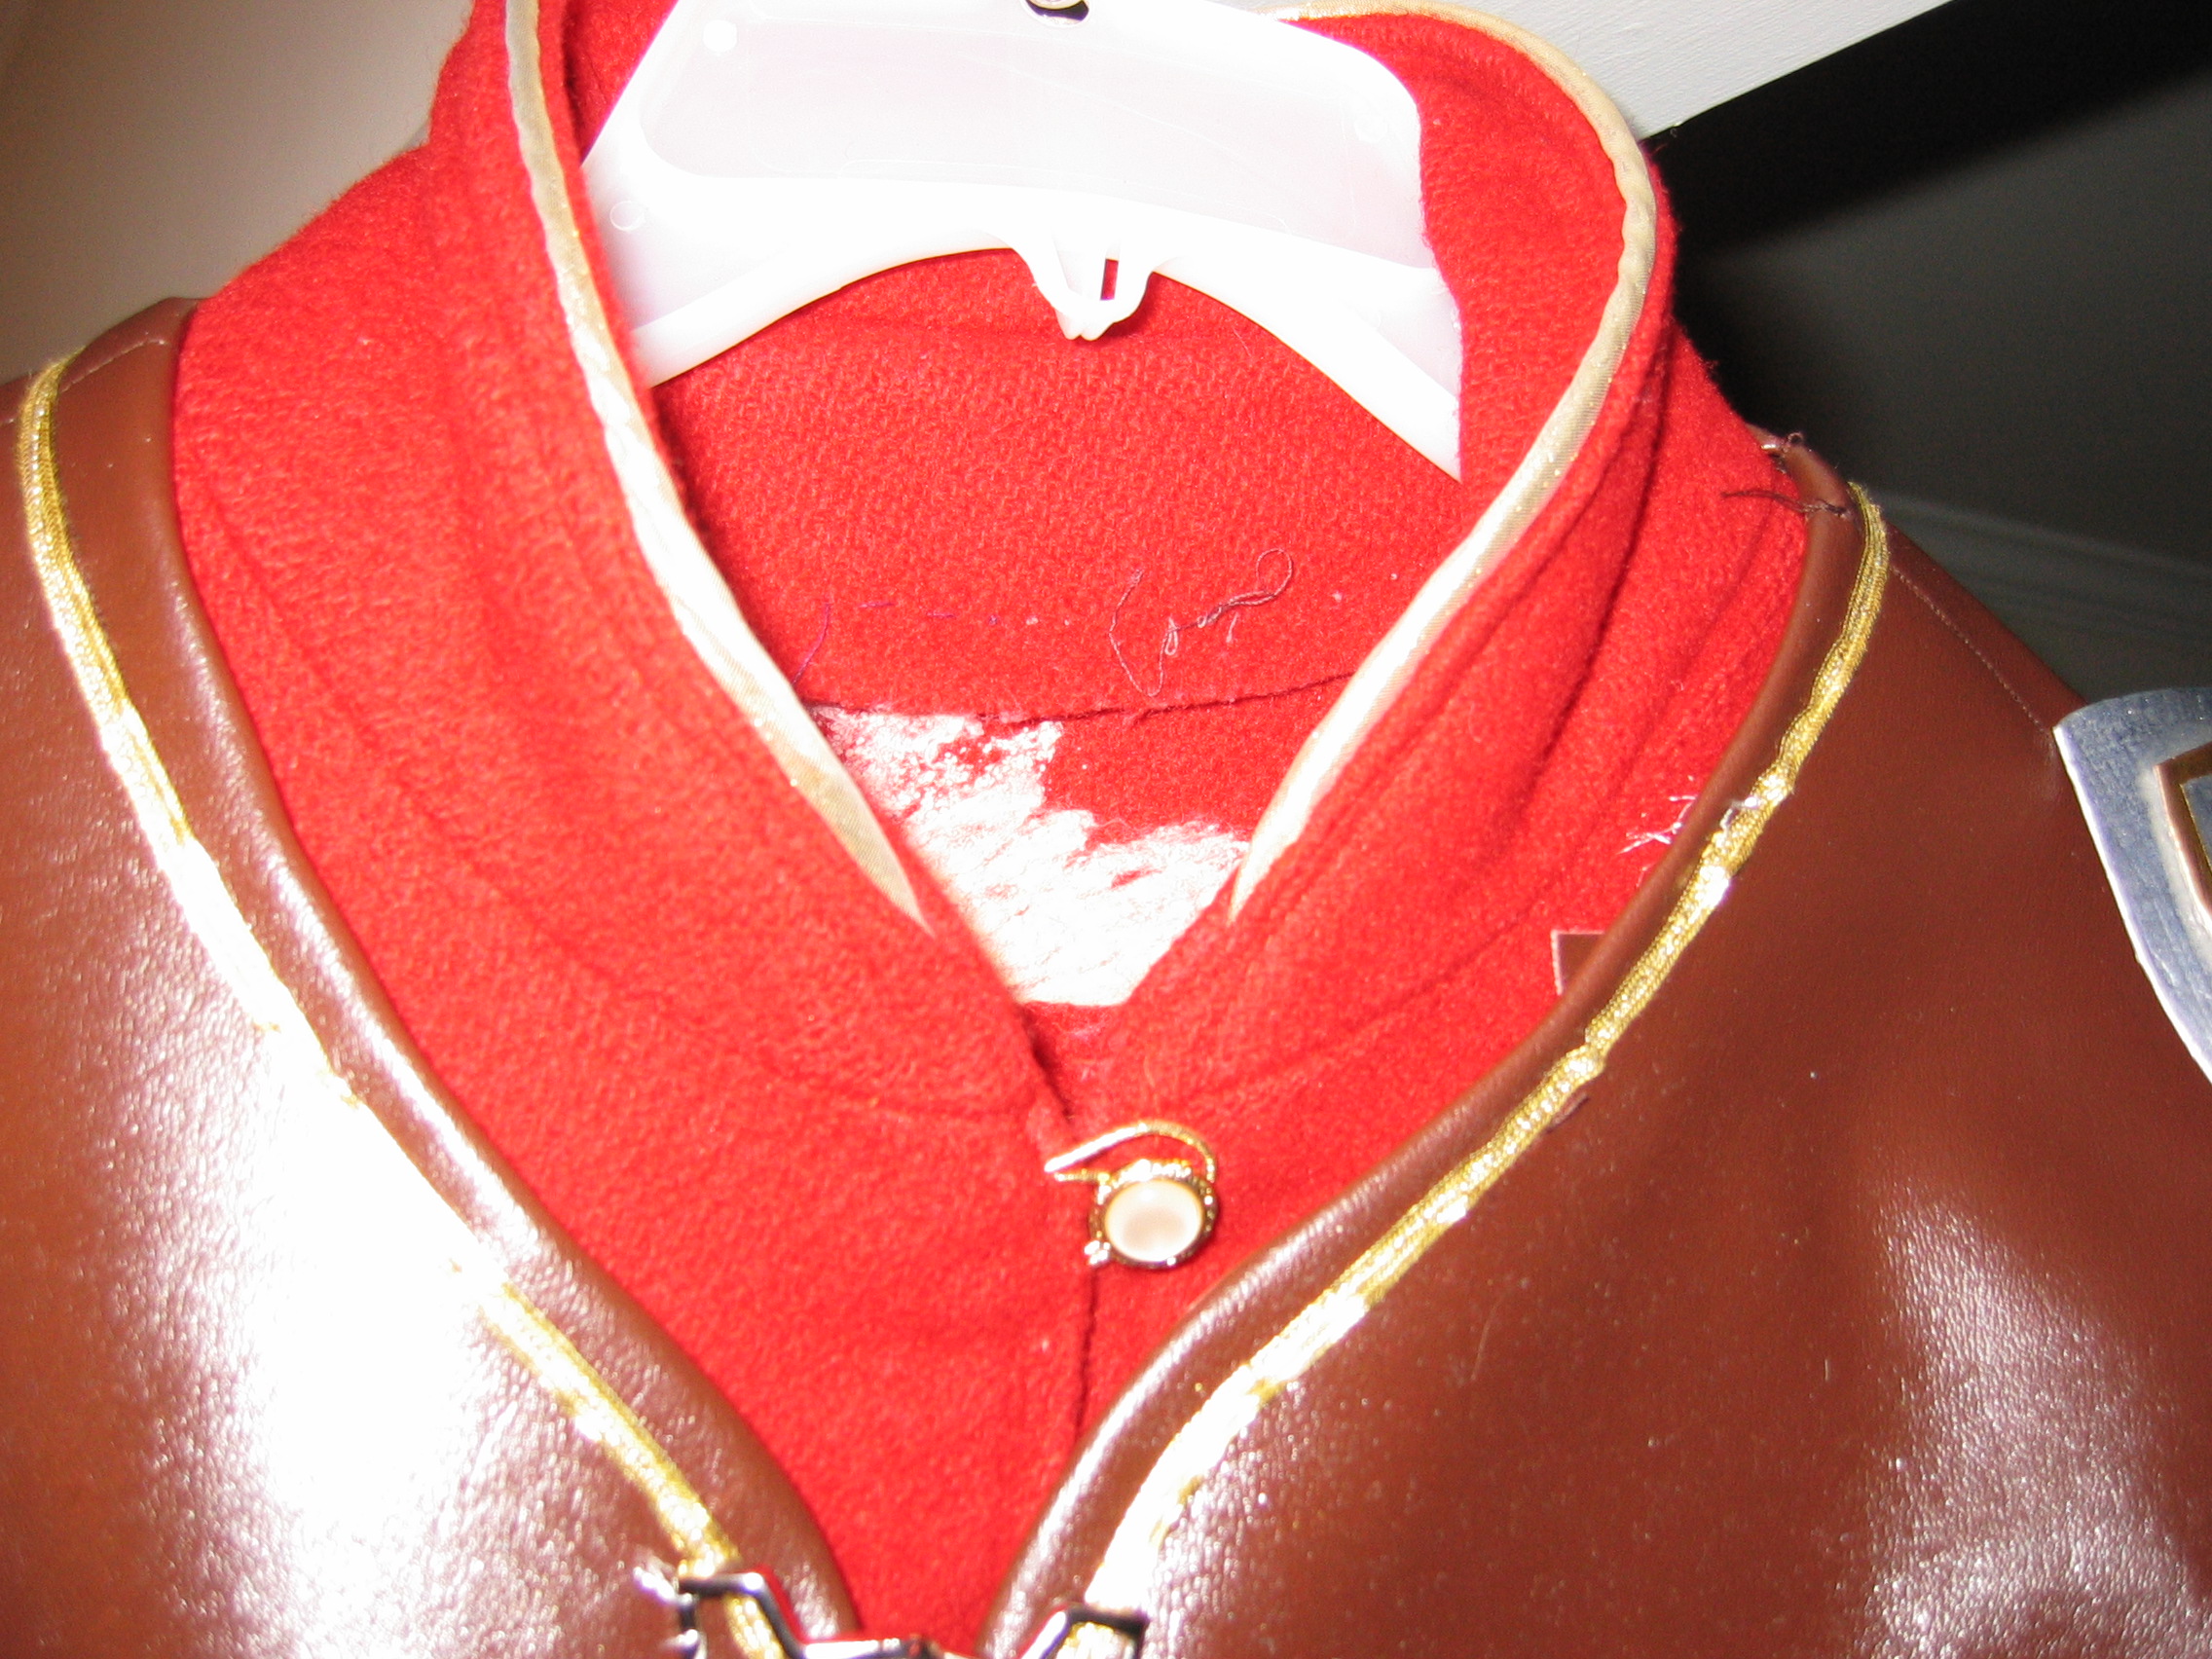
Next, using the silver metallic thread, I sewed the gold ribbon onto the inside lengths of the surcoat, around the neck and down the entire length.
For the clasps, I ran out of time finding a proper set of clasps so this is definitely an upgrade for the next costume. I went with metal hook-n-loop clasps which work well but are very plain. I then sewed a raised button onto each shoulder to hold the cape.
 |
 |
| Sewing machine | |
| Scissors (sharp!) | |
| Push pins (long) | |
| Pin cushion | |
| Thread (heavy duty; red) | |
| Steam-A-Seam (1/2”) | |
| Gold ribbon (1”) | |
| Cording (1/8” diameter) | |
| Elastic cord (gold) | |
| Decorative button | |
| Red shirt (I used old wool jacket) | |
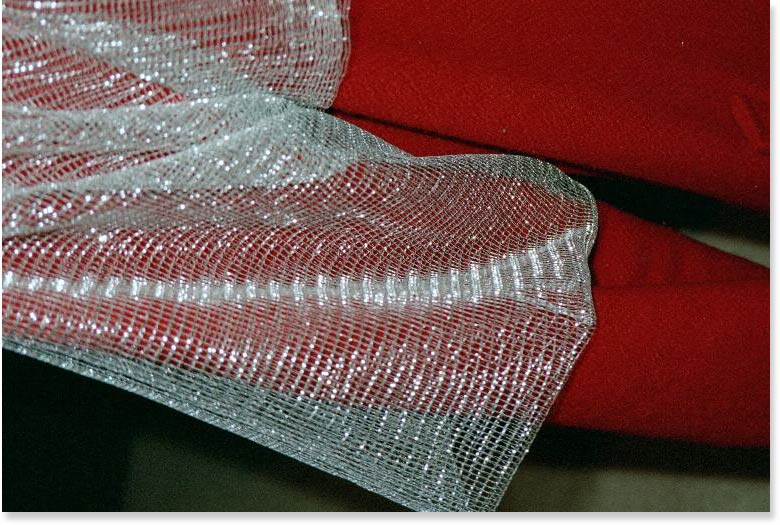
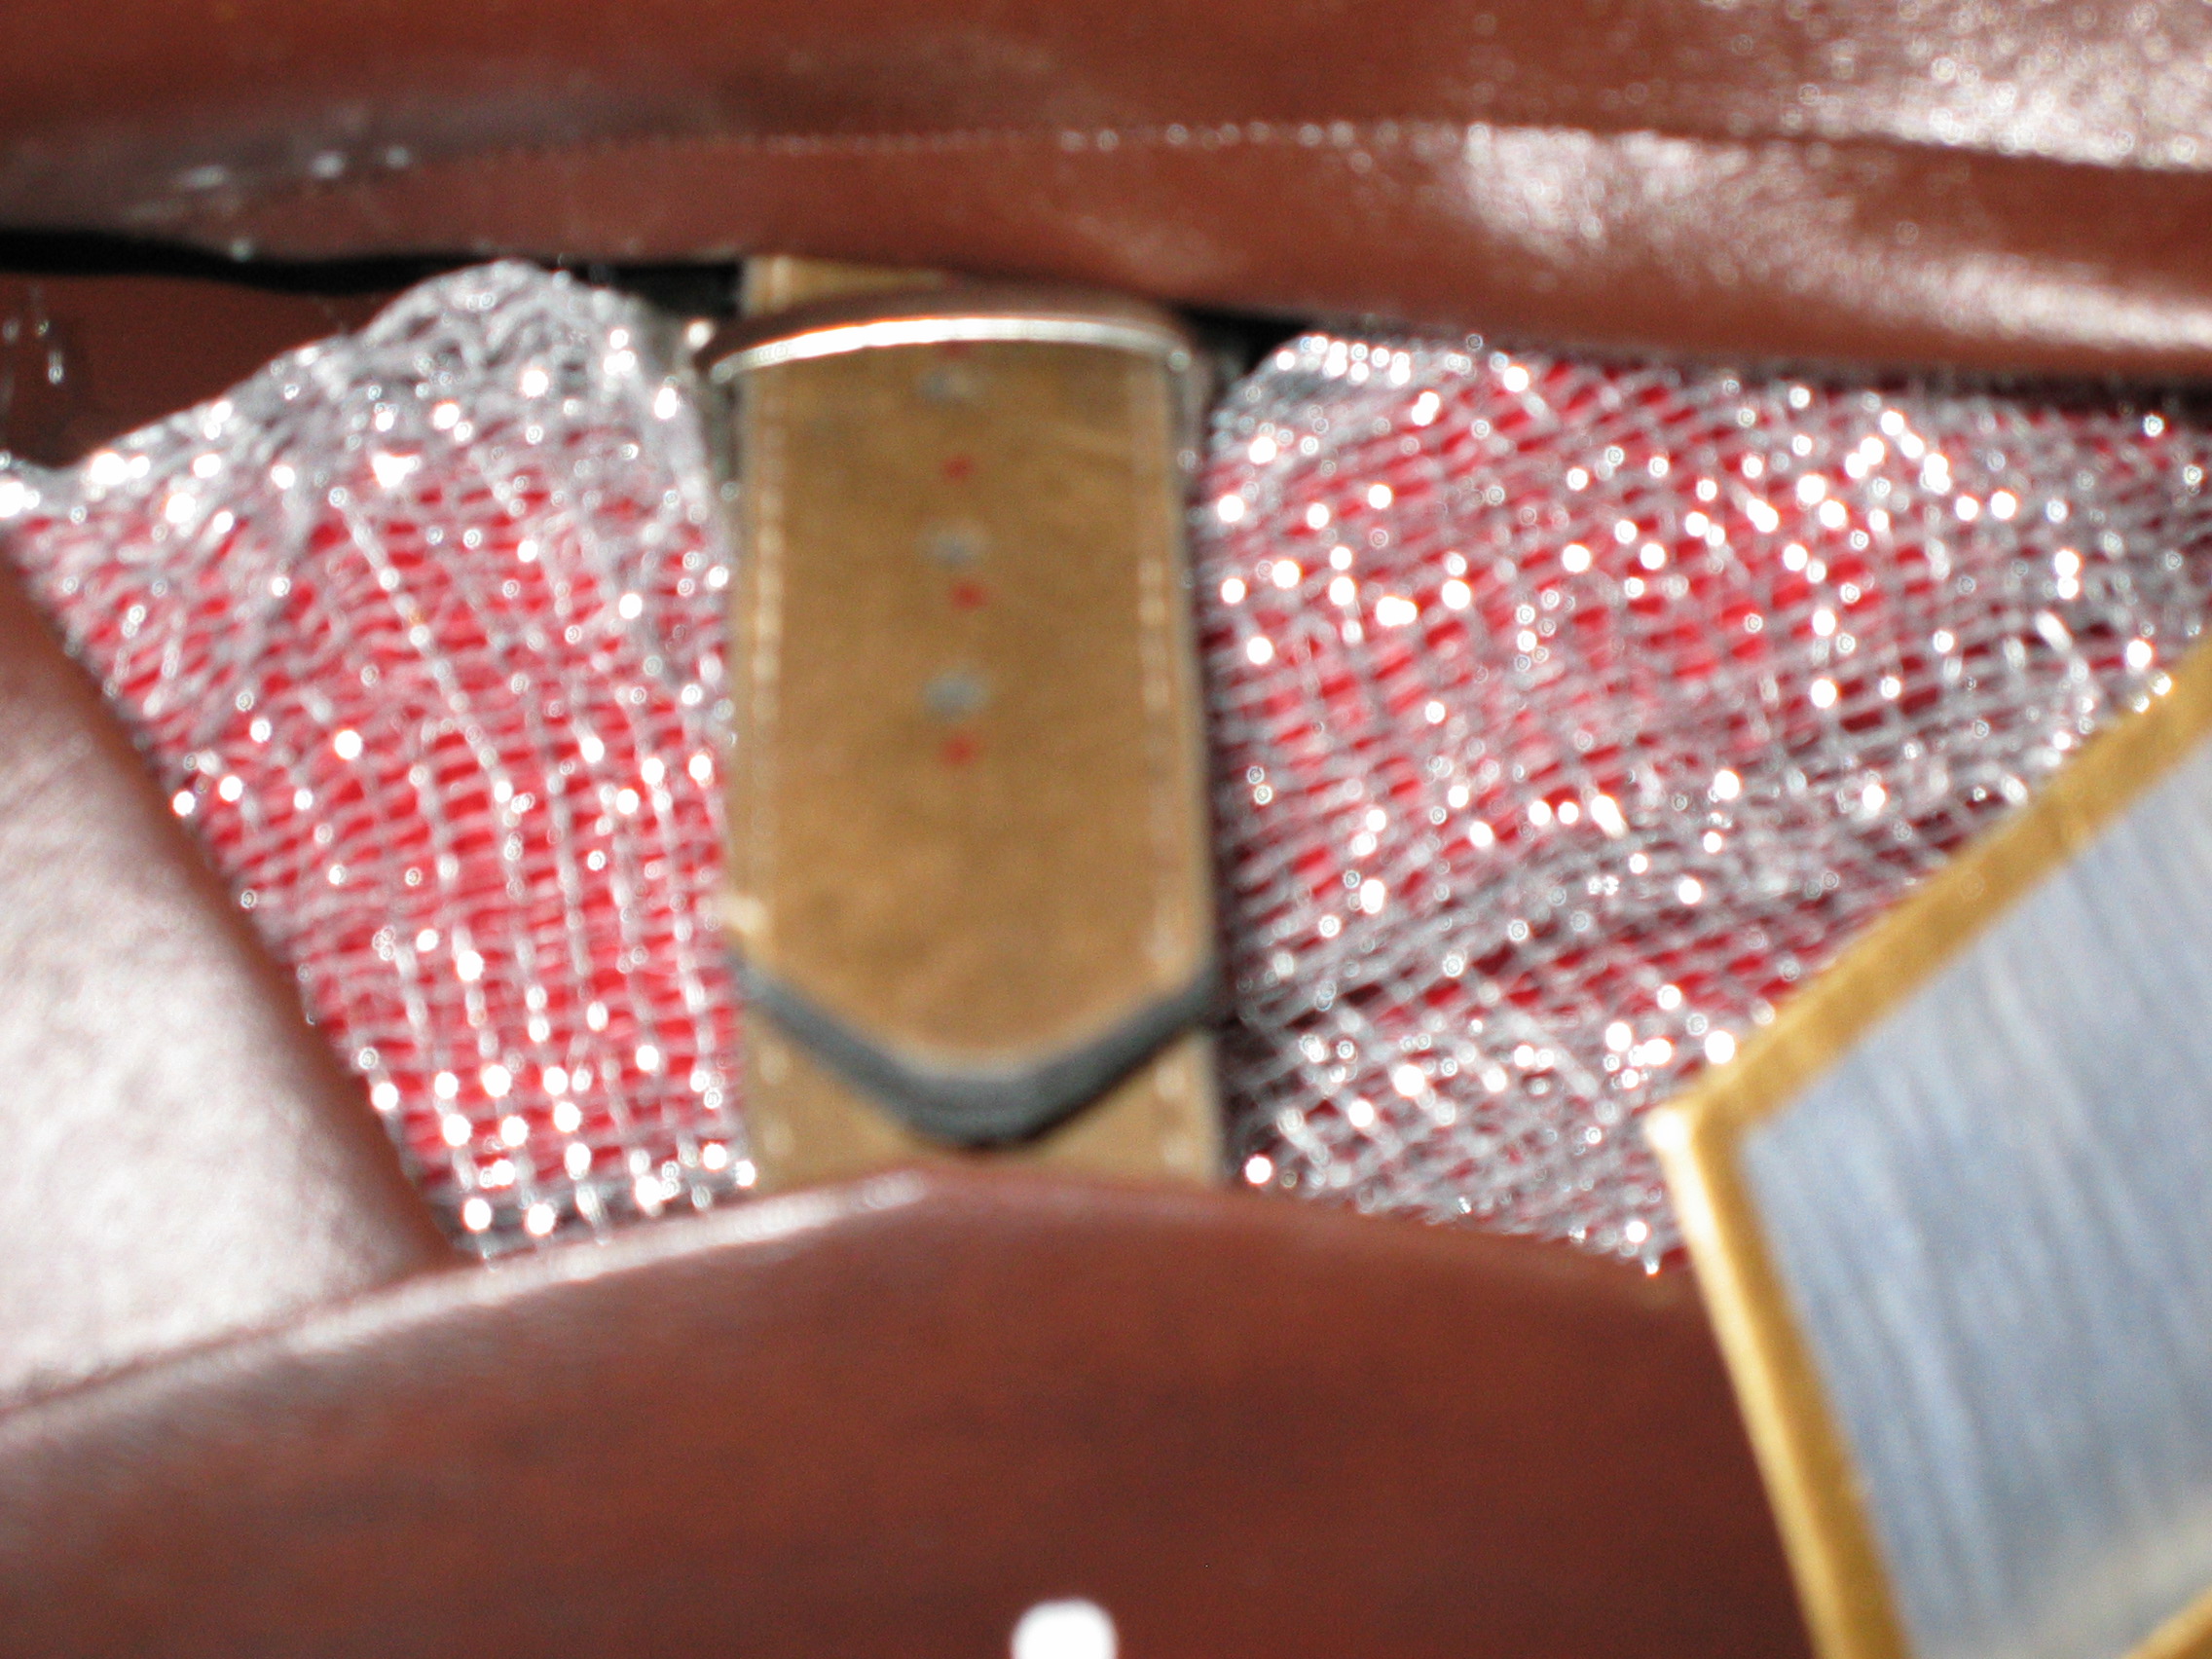
| Silver mesh fabric |
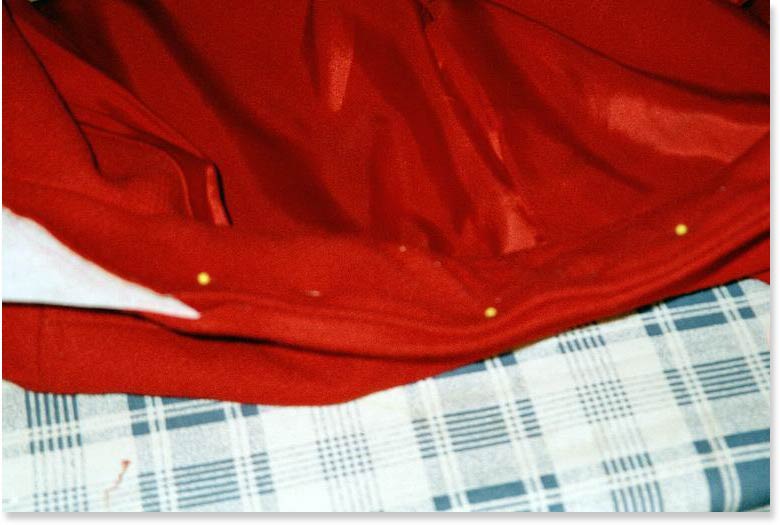
Again crunched for time, I would rather have found a full length robe type of garment but instead a made do with a red wool fitted jacket. I traced the cut lines around the collar and sheared off the collar wings. I then removed the stitching from around the entire collar and re-hemmed it to the desired curved shape. I added the Steam-A-Seam strips inside the hems and ironed them flat to hold. Then I pinched the collar back together and added the cording with the ribbon wrapped around it and tucked this into the hemmed collar. I pinned this together and ran it through the sewing machine part ways. I looped and knotted the gold cord and tucked the loop into the hem then sewed the knot on the inside to help hold the cord lop in place. I stitched on the button on the opposite side.
 |
 |
 |
| Brown vinyl material | |
| Poster board | |
| Newspaper | |
| Craft Paper | |
| Hot glue gun | |
| Mod Podge | |
| Fabric glue | |
| Silver spray paint (Krylon) | |
| Gold spray pint (Krylon) | |
| Black shoe polish | |
| Black pen | |
| Masking tape | |
| Velcro tape | |
| Leather hole puncher | |
| Leather cord (or shoe strings) | |
| Thin brown leather belts (2) | |
| Double-sided foam tape |
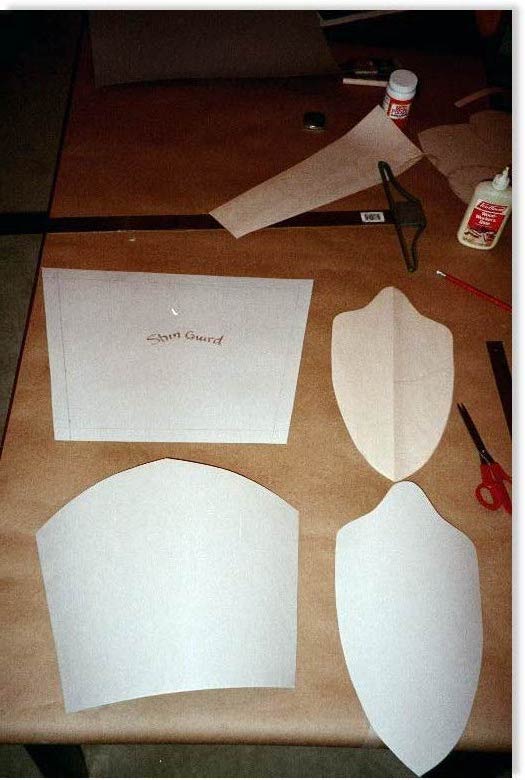
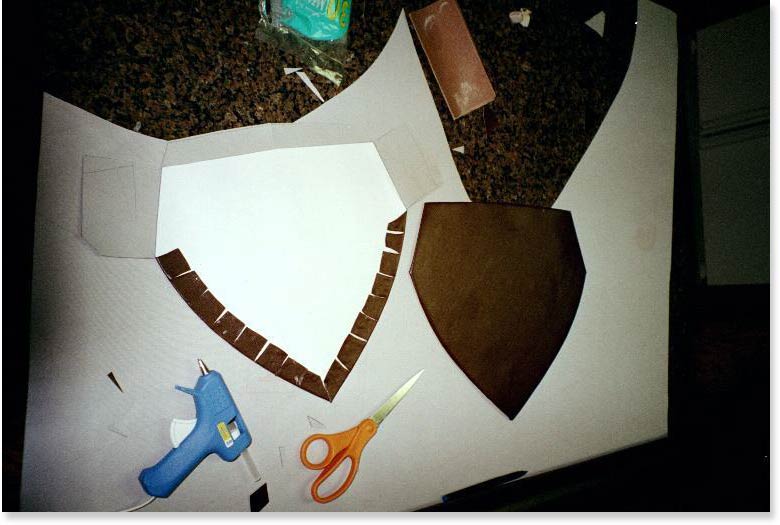
The armor list includes: shoulder armor, pauldrons, gauntlets, rebracers, and the small shields covering the buttons for the cape.
I was inspired by the simple and easy-to-follow poster board (Elvin) armor instructions found on www.alleycatscratch.com, a website that was instrumental in moving me from the Strider Aragorn to the Royal Battle-ready Aragorn. I measured and sketched the patterns onto the craft paper for templates. Then I cut out all pieces including the “leather” and “metal” parts, out of poster board. I separated these in the leather and metal categories and constructed the leather parts first.
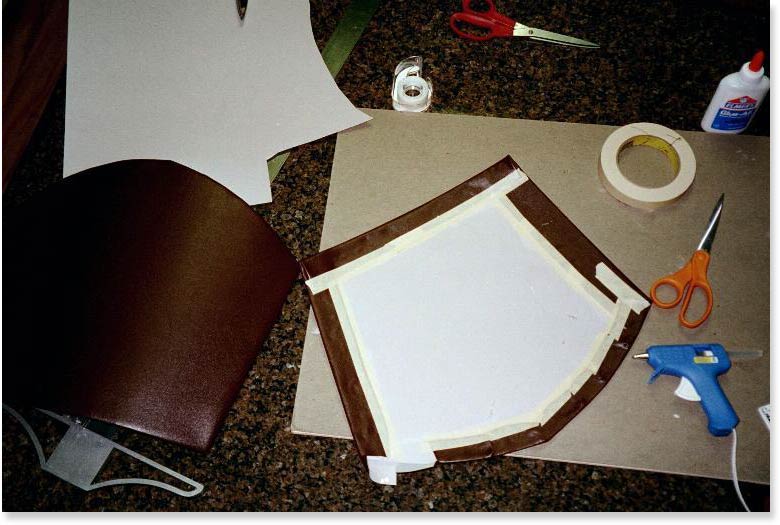
I traced the pattern using the poster board pieces onto the backside of the vinyl. I cut out the vinyl pieces leaving a one inch margin to allow for a hem. I then notched out thin wedges in anticipation of having to bend the vinyl around curved shapes of poster board. I placed the poster board piece on top of the back side of the vinyl piece and bent the vinyl hem (wedges) over and I used the hot glue gun to tack down each wedge of the vinyl to the back side of the poster board. In some cases I used masking tape to help secure the vinyl into place. The glue gun only gives you about 3 seconds per application before the glue cools and looses its tack.
 |
 |
 |
|
For the gauntlets I decided to fit these to my wrists using leather or nylon shoe strings so I used a leather hole punch to make holes for the straps. IN the construction I made sure to overlap the vinyl around the edges for extra strength. I allowed for the finished touching edges to overlap in case I needed the fit tighter.
I then modified two belts to use for the straps to attach the pauldrons to my arms above the biceps. For the paldrons I punched guide holes (two sets of two holes) into the outer edged (about 1.5 inches inside the edge) for where I planned to attach the modified belts. I lined up the belt with the leather pauldron piece and punched two holes to match the position of the holes on the pauldron. I used black twist-ties (wire) to secure the leather pauldrons to the belts. So now I have the leather pieces ready for the metal plates.
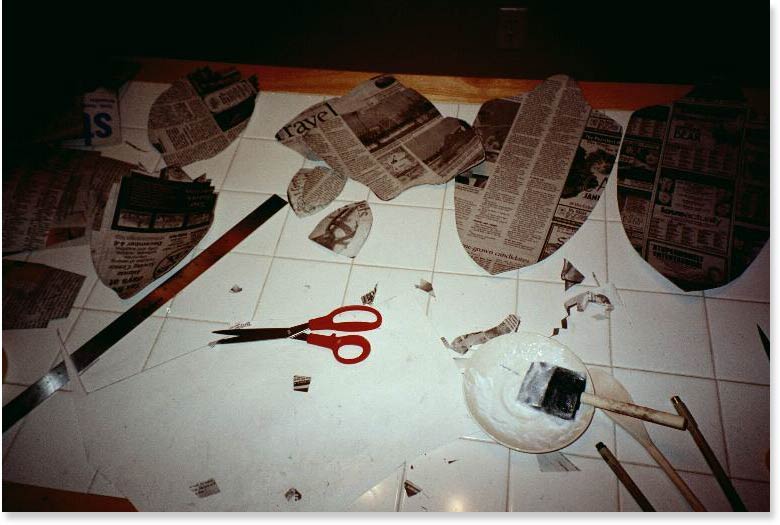
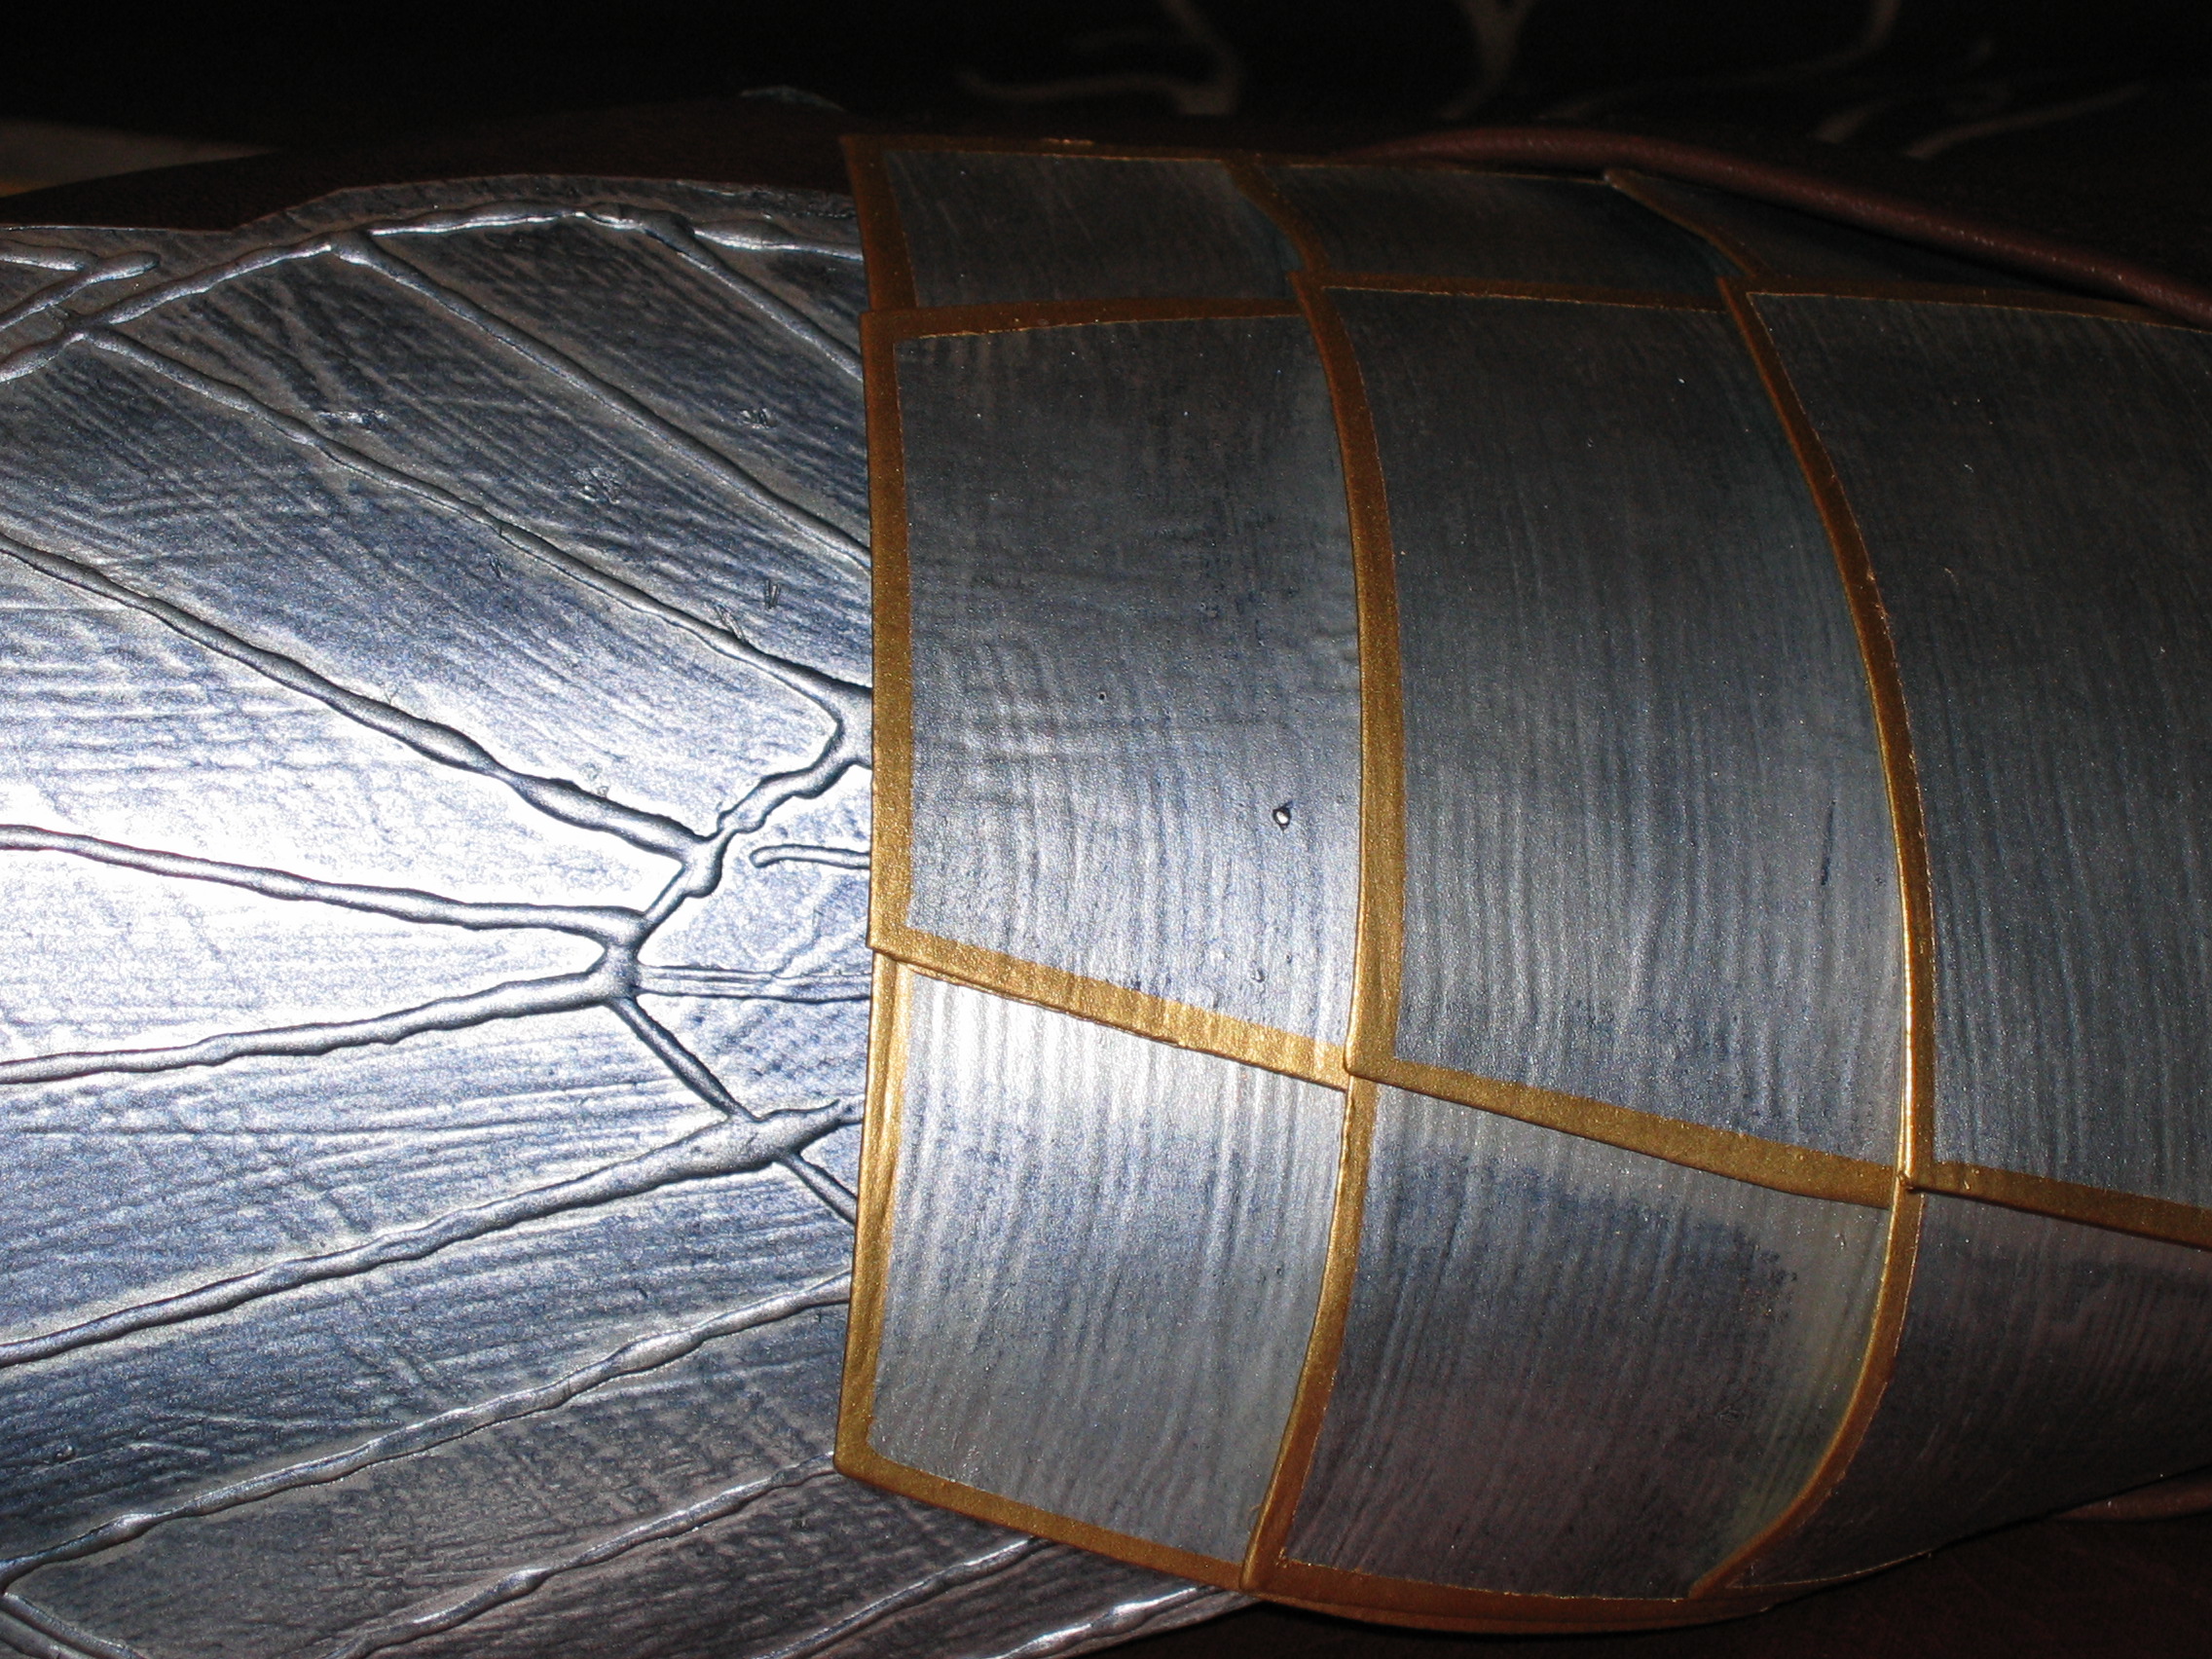
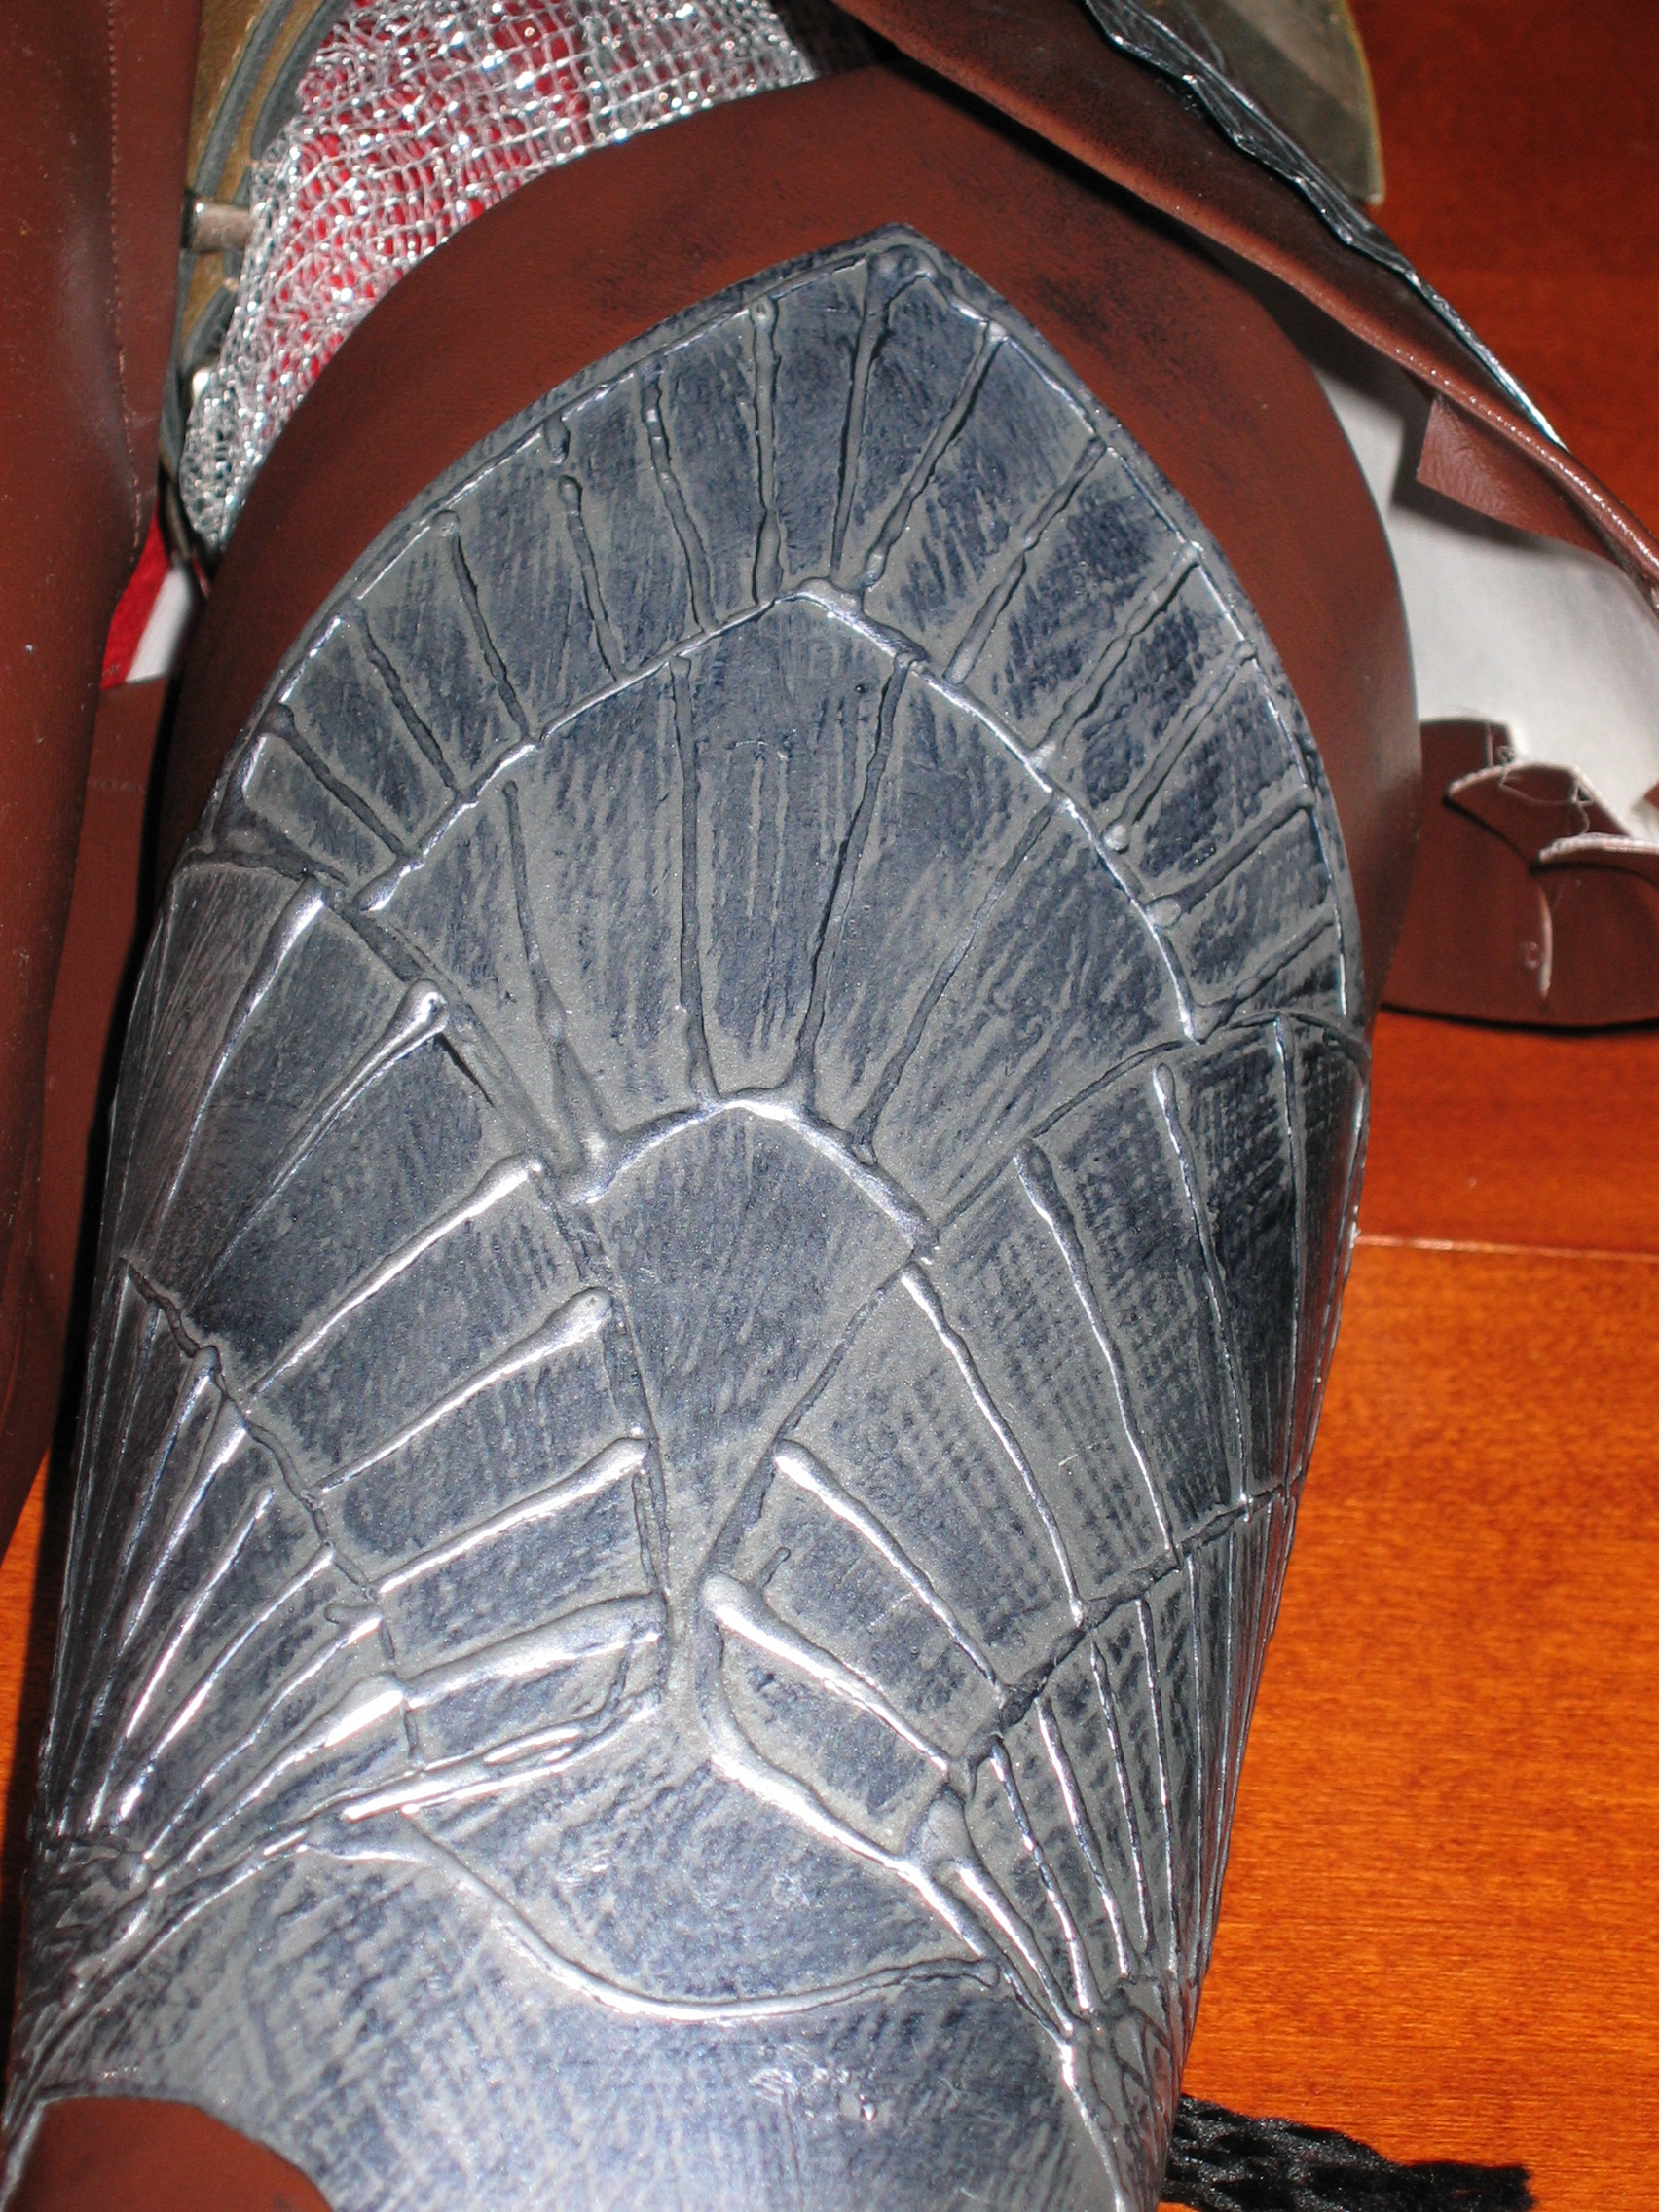
Using the poster board pieces as templates I cut out matching newspaper pieces. I then traced the templates onto more newspaper and this time trimmed the pieces leaving a half inch boarder around. For the shoulder armor I used three layers with smaller plates on top of larger ones. I painted one side (to be the visible side) with Mod Podge and secured the oversized newspaper piece down. I flipped the piece over (after cutting notches in the excess edges of newspaper) and painted Mod Podge onto the back-side, then folded over the tabs. Then I gave the entire back-side a coat and laid on there the newspaper piece that fit perfectly. I repeated this procedure with every piece that would become the armor plating.
 |
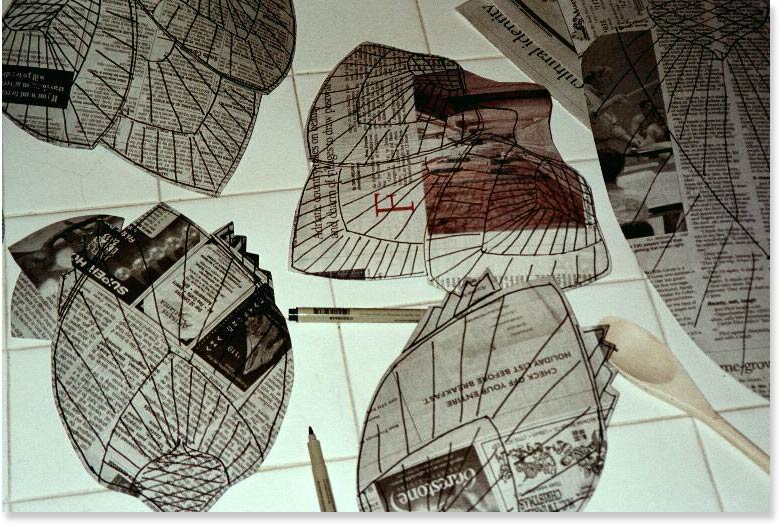 |
After the pieces had dried (about 5 minutes) I proceeded to give all pieces about three more coats. I would have applied more but time was a premium. The more coats, the smoother the result will be and the more rigid.
Between each application I began shaping the pieces to fit their application. For the shoulder pieces I bent to a crescent shape (scalloped) to wrap around the shoulders.
I then used the fabric paint tube to trace back over the feather patterns I drew onto the gauntlets and pauldrons. I let the glue dry.
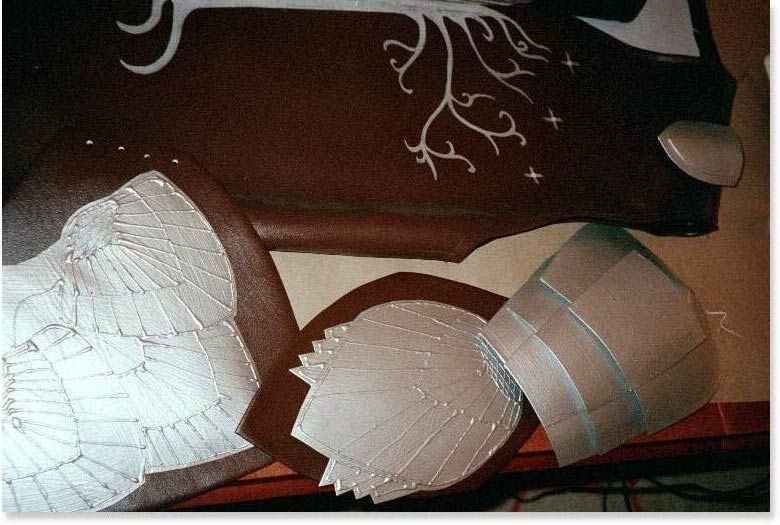
I sent all pieces to the garage to be painted. I laid out all pieces and applied three coats of silver paint.
 |
 |
 |
|
After the paint dried I strapped the shoulder plates together using newspaper strips, masking tape and Mod Podge. I secured the top layer of plates to the lower using the double-sided foam tape then I masked off the main portion and left only the edges showing and spray painted the edges gold. .
For the pauldrons and the gauntlets, I used strips of Velcro tape to secure the metal plates to each leather piece. The Velcro will allow me to remove and repair or replace these metal pieces in the future.
 |
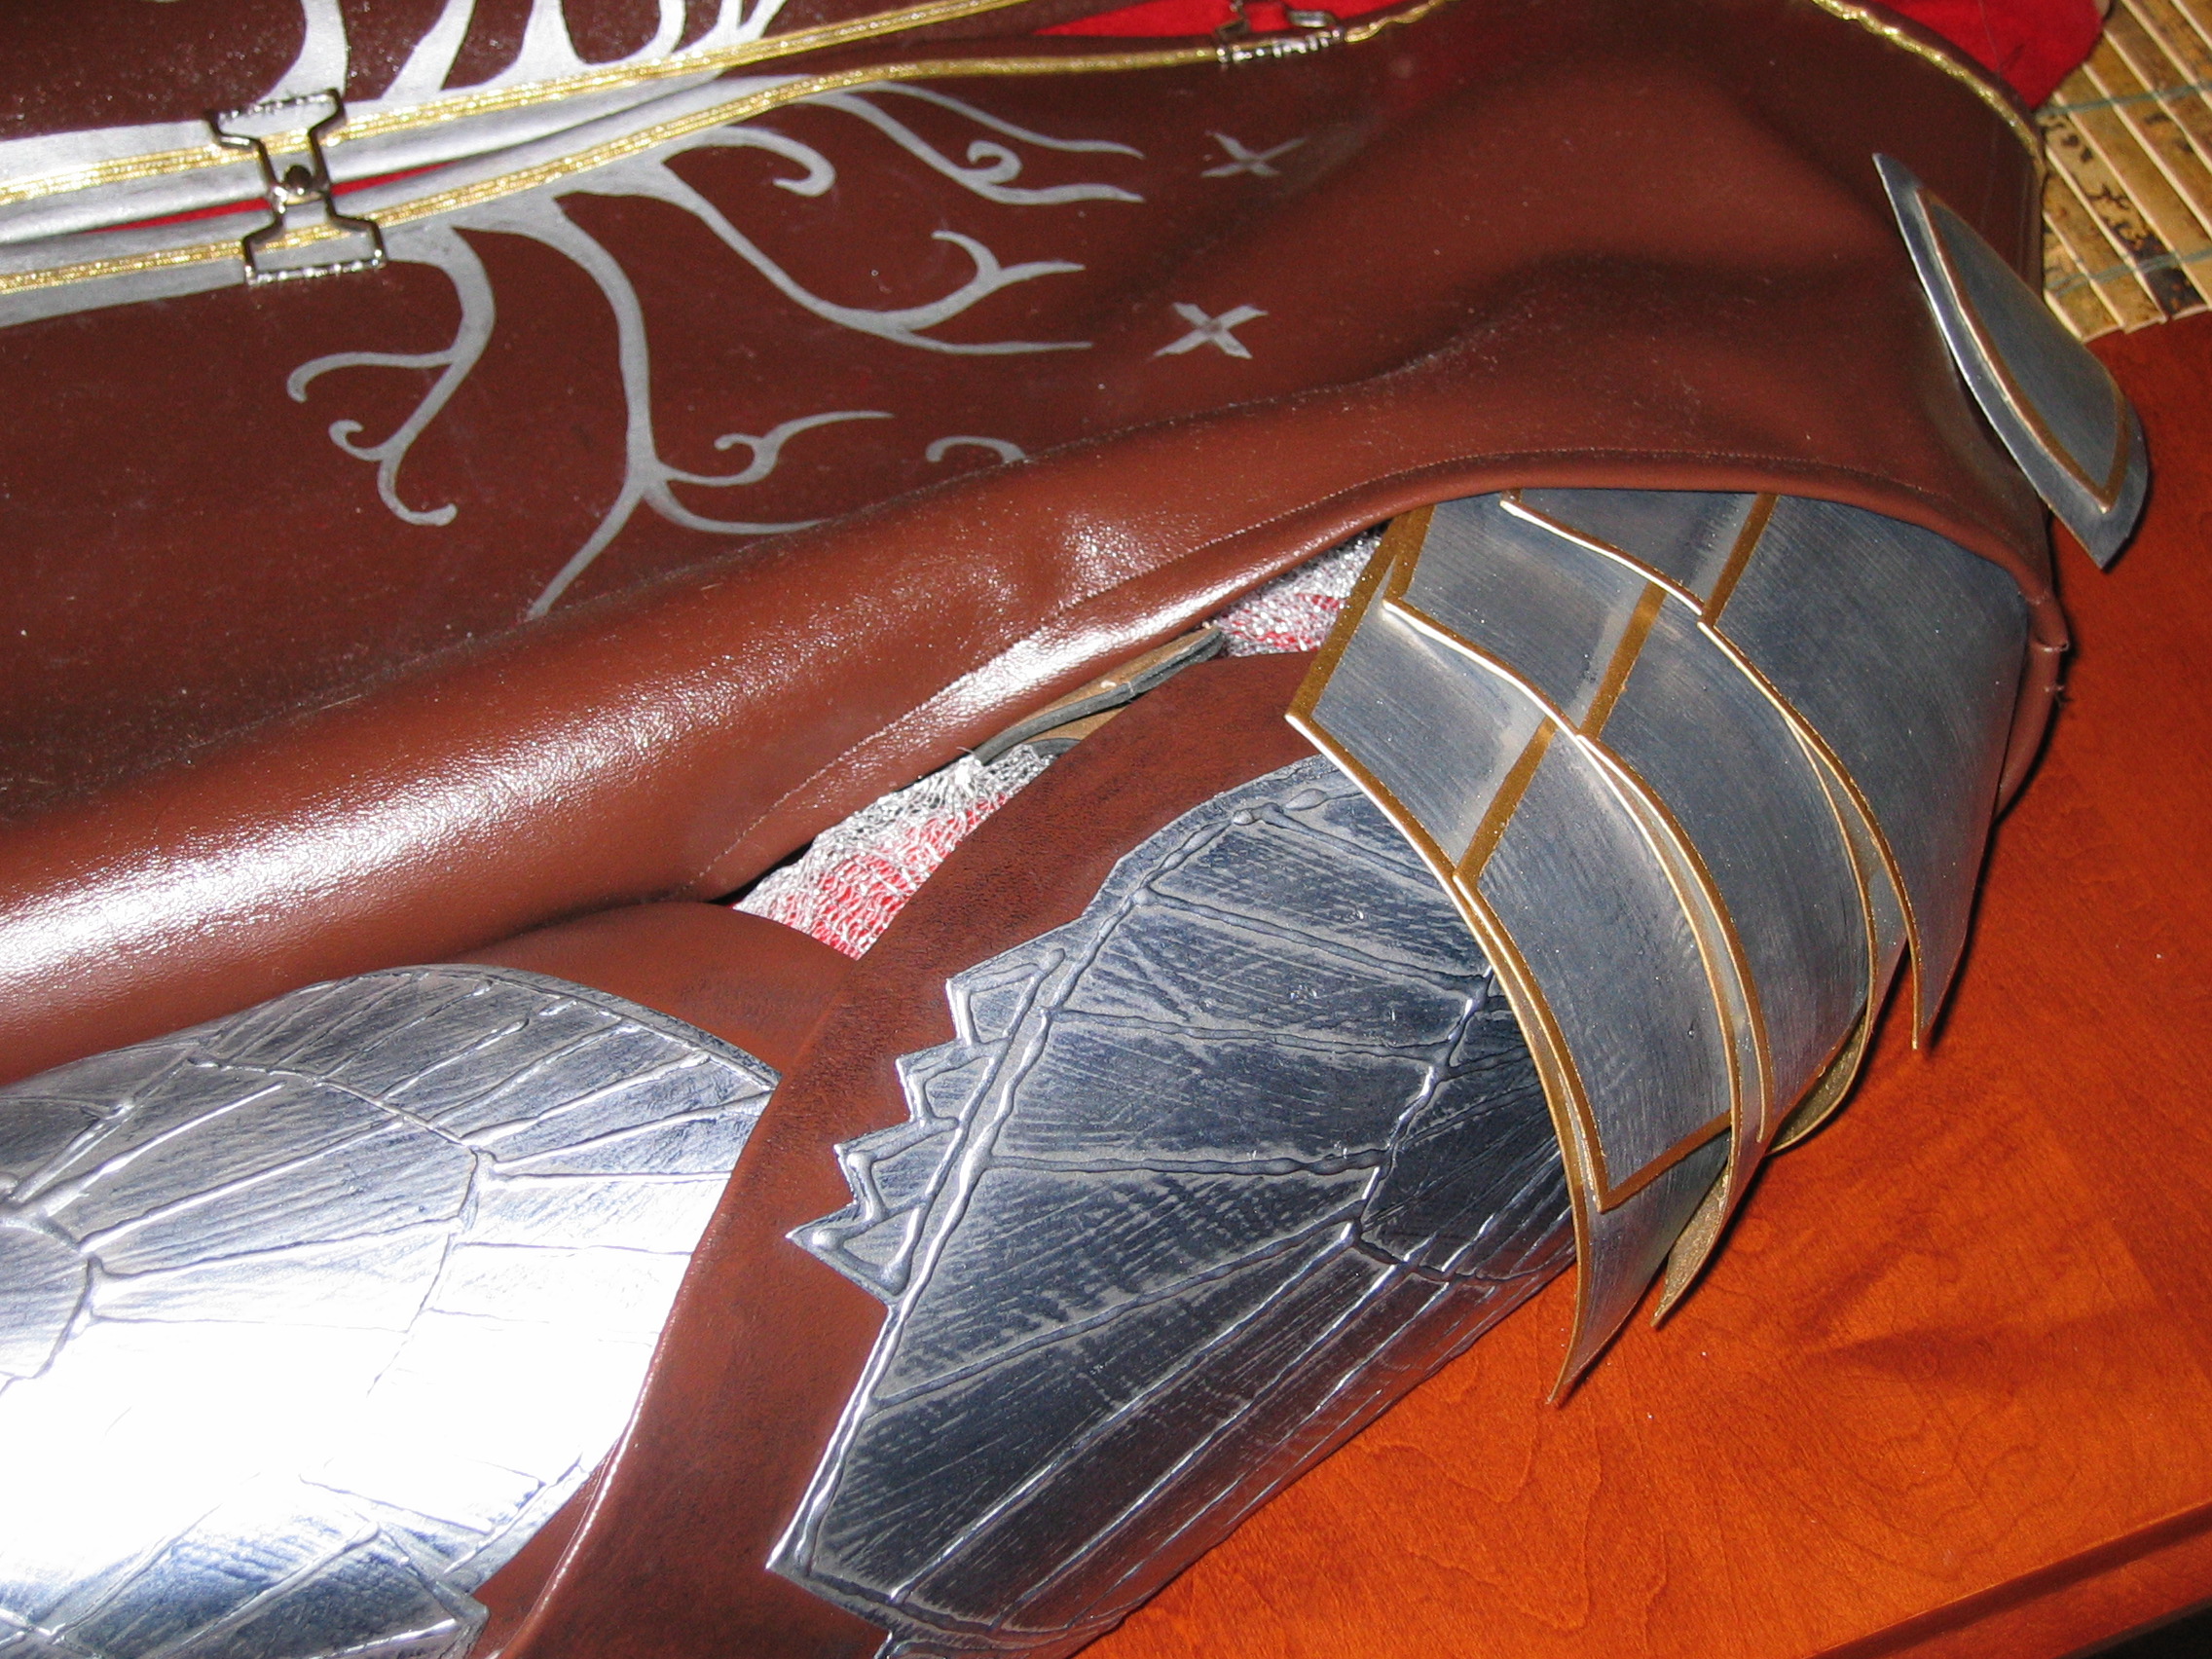 |
To complete the burnished look I used black shoe polish and applied generously so that the polish would gather in the crevasse in the detail. I then let these dry and lightly buffed the pieces until I was satisfied that the aged look was achieved.
Overall I was very satisfied with the results.
 |
 |
 |
 |
Faramir version using parts from the Newline costume version of Ranger Aragorn from the Two Towers and pieces from my Royal armor version. (SEE PHOTOS: Faramir 1, 2)
Aragorn version
 |
 |
 |
 |
 |
![]()
![]()
This page was last updated 11/21/09
