
![]()
![]()
|
|
|
|
|
|
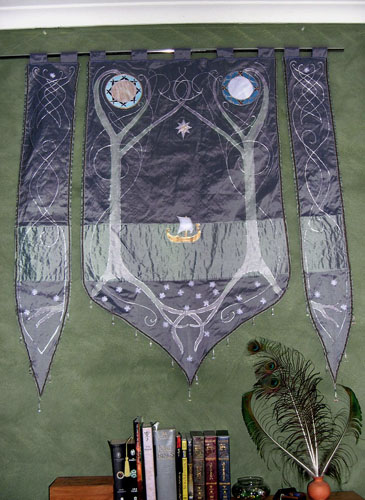
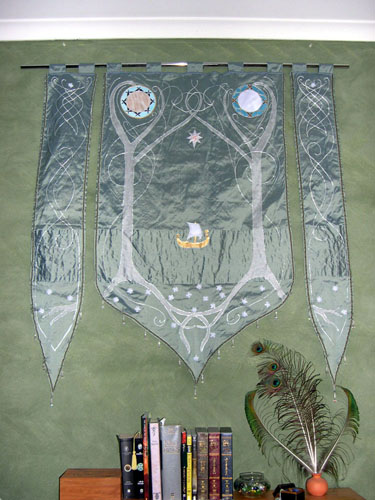
Eruvyreth, New South Wales, AustraliaArwen's Bedroom Banner
Well, I decided I wanted to make the banner, so I took a trip to Spotlight, a fabric store here in Australia. I spent hours in there looking for the perfect fabric, something green and purple at the same time, because after some research on Alley Cat Scratch I found that the real thing was made out of a fabric both purple and green. I nearly gave up after 3 hours of browsing through the shelves. But then I spotted this absolutely GORGEOUS silk that was the perfect colour, majorly green, and purply - shimmery too. I then turned over the price tag and nearly cried. At $54 per metre, there was no way I could afford it. So I put it back on the shelf and decided to save for it... but then I turned around and saw on the opposite shelf something even more perfect! It wasn't silk, it was a cotton-polyester-acetate blend that looked exactly the same, apart from this was a distressed fabric with an even more middle-earth look. And it was only $5.50 per metre!! It was a beautiful grey-green and purple. This I could afford! So I bought 2.5 metres of it. The fabric was 115 cm (nearly 4 foot) wide, so I decided that would be the length of the banner. I printed off the pattern drawn up on ACS and measured, cut and hemmed all the pieces. For all the viney parts, I used Polymark white pearl iridescent fabric paint that comes in a little bottle. It looks embossed, and that was perfect. For the water, I took a length of the fabric and sewed it with the grain running horizontally instead of vertically. Then I sewed wavy lines across the whole length of it using pale blue silk thread. I tried using silver material to form the tree trunks, but it just wasn't getting the effect I wanted. So I used silver fabric paint. I turned out well. The flowers/jewels I bought from Spotlight too, little bunches of jasmine flowers with pearls in the middle, and then I sewed them randomly across the bottom. The star is white satin. I traced the shape on with the Polymark pearl, then when it dried I cut it out (that way it doesn't fray) and embroidered is with gold and silver thread. The boat used the same method, I used gold and white satin, traced with Polymark, cut and attached. The sun and moon were a little more time-consuming, but essentially using the same technique. Polymark is your friend. I looked at the pictures on ACS very closely and got the patterns just right. Lots of metallic fabric paint involved. The most time consuming part was hand-stitching the velvet ribbon around the border. if you find a quicker way, do it! It gets depressing doing an hour of stitching and not going much further from where you started. I'm happy with the result though. The beads at the bottom were a lot of fun to do. They are translucent glass beads, and on each little strand is: one droplet bead, then a 4mm faceted bead, then a 7mm faceted bead, followed by another 4mm faceted bead. The droplets are at the end of the strand. Added some tabs at the top, bought a piece of chrome tubing from my local Bunnings hardware store, and threaded cord through the tube, tying it in a loop to hang it up. And voila! We have a banner!
This page was last updated 11/21/09
|