|
|
|
|
|
v ----- Advertisement -----v
^ -----Advertisement ----- ^
|
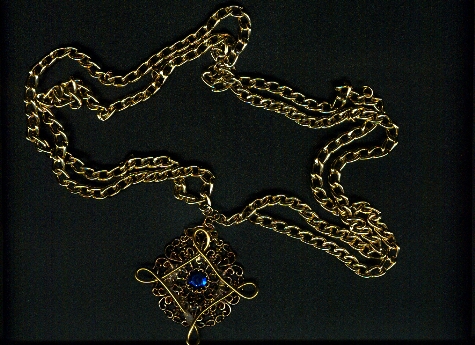
Quick Jewelry - Halloween shortcutsHere we present some shortcuts from our members. Eowyn's Gold Broach
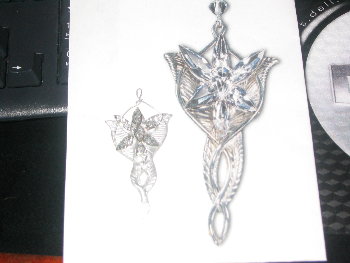
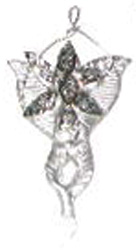
Evenstar from Sculpy, wire, and sticker gemsI also made an evenstar pendant. I used sculpey clay and some sparkly "stampendous" scrapbooking stickers from Michaels for the jewels on it, and also some wire, 28 gauge I think. I printed out an actual size picture of the real evenstar (I also printed out a large picture of it for details). I used this picture and placed the clay directly on it. then I formed the clay so it was the exact size. then I drew the leaf lines in it with a toothpick. then I put six oval shapes in the center to put the stickers on. then I put the wire on it. then I baked it. then I sprayed it with silver spray paint. then I placed the stickers on it, and voila!
See her scrapbook entry for more tips. == Dernhelm D Also, head over to our main sections for more details on modifying Evenstar Very Quick Band Crowns from Computer PrintoutsYou can do this for both Aragorn, Arwen and Theoden You need, At a minimum: a color printer, regular school glue, regular computer paper paper, stiffer paper or thin cardboard. Scissors Extras that are cool to have: Glitter, Glitter paints (the kind in a small tube that look like T-shirt paint), T-shirt Paints (the kind that leave a raised line). Colors? Clear and whatever the crown is gold/silver or both. Jewels or Jewel stickers. Exacta knife. Felt. Research: You need to find good pictures or drawings of the crowns. . Especially a picture of the front. It would be nice to have side pictures, but the front is what really matters. Check out our Character section for pictures. Save the pictures. Making the crown band: Figure out the size of your crown band. This is normally about 1" thick and needs to be able to sit on your head without sliding. Some of the crowns have a wider band in front. Just do the band, not the fancy decoration in front. Once your figure the size out, cut the band out of your heavy paper/cardboard. If you can't cut it all out of once piece, you can hide another seam at head center. Close up the crown pattern into a circle... use tape, stapeles or whatever, but just make sure it doesn't open up. Making the crown front, if you can edit photos well: Figure out how tall the center piece of the crown should be. Find your best photo of this. Crop the picture down to the crown front. Edit the size so it matches the height you need for your crown. (This will be different on kids and adults.) If you have it, you may want to use the sharpen filter before your print. Also print out any side pieces you want. If you only have a good picture on one side, you can flip your image horizontally and print it for the other side. If you've got color picking, you want to open a new picture window and make it the size of a regular sheet of paper. Then pick the best gold or silver from the crown and "color" the plain piece of paper that color. This will be your "crown band" Making the front, if you can't edit your photos (but ask your 7 year old first), Just print out the pictures as big as you can of the front crown part. Use these to help you draw just the center piece of the crown. Sketch it and then paint it on plain paper. For both: IF you want to be fancy, print out mutiple copies, one for each layer of the front. Glue the crown center pieces on a piece of cardboard. Let it dry. Do the same for the sides. (These are probably just flat squares of cardboard, nothing is cut out yet.) Cover the cardboard crown band with your printed crown band. (or, just the white paper... and hit it with spray pain... or wait - no T-shirt glue yet.) Let dry. After the glue is dry, cut out the crown front piece. If you did layers, cut one on the biggest layer, another for the center medallion. Put all the pieces together. Glue is better, but if you're in a hurry, staple. Attach the center to the crown band. If you still have white paper at this point, go ahead and lightly paint w/ the T-shirt paints. (You have to do this after gluing.) You decorated by running your glitter paints around the top edges and adding texture to the front piece and band. You can glitter just sections. Be careful when you use some of the paint. Your printer ink may smear if you bust something on. If you just squeeze paint lines, you should be OK. Glue felt to the inside to help the crown stay better. You may need to bobby pin the crown on, especially if it's windy. == Cat More crowns in Circlets and Crown
More shortcutsDon't forget to checkout all our tips on making quick Fellowship pins. Many of those techniques can be used to make other items. We've got a whole section of tips in Circlets and Crown. Some of the techniques are simple, others get fancier. Disclaimer: Everything here is just provided to help you out as a suggestion. . v ----- Advertisement -----v
^ -----Advertisement ----- ^
This page was last updated 04/22/08 |