
![]()
![]()
|
|
|
|
|
v ----- Advertisement -----v
^ -----Advertisement ----- ^
|
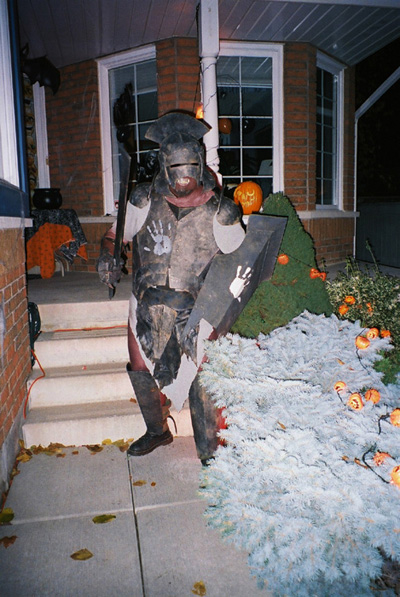
Hector - Ontario, CanadaUruk-Hai Swordsman
I have worked on the costume since February but really most of it was done in the last 3 months - finished for Halloween. All the armour is cardboard & modge podge papier-mâché, painted and weathered to look like metal. It's surprisingly strong and heavy but I can move around in it easily. I was even up dancing at a costume party in Toronto!Here's how I went about it... FORMING THE ARMOUR
|
 |
 |
| Close ups on weathering |
All in all I'm pretty happy with how it's turning out. The only thing I would change would be to use something other than pewter for the metallic wash. I didn't want it too shiny which is why I chose pewter but it gave the finished armour a brownish hue. Next time I would pick a silver knowing I could dull it down and weather it so I could get more of a blueish black metallic look. Oh well, I'm not starting over at this point. Working to my advantage was that I wanted it to look like really beat-up distressed metal I don't thing these same techniques would work if you wanted very smooth armour - anime armour for example - certainly not without a lot of filling and sanding.
Here's just few notes on some of the pieces so far...
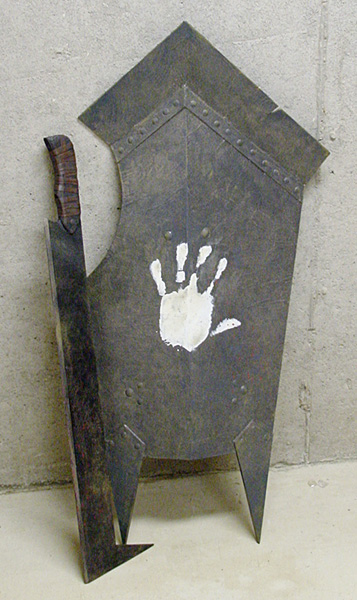
This was my first piece so I worked out the construction process and painting recipe on it. It is basically all one piece of canvas board, cut to shape and then scored and folded to shape. For the angled flange at the top I made a vertical cut from the point at the top down to the score where meets the bulk of the shield. I them folded it out. Doing this opened up the vertical cut so I cut a scrap piece of canvas board in a triangle shape to fit and glued it in. This held the angle in place. Once everything was covered with modge-podge you can't really tell that it's not all one piece. For the spikes at the bottom I cut them out as part of the main body of the shield and then attached identical pieces on top to create the 3-D look of a separate plate. The handle on the back is a Stanley gate handle, padded and wrapped with leather thong. The upper arm support is an old leather belt from the thrift store.
 |
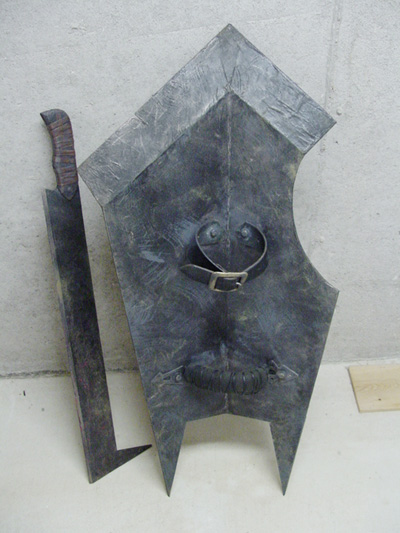 |
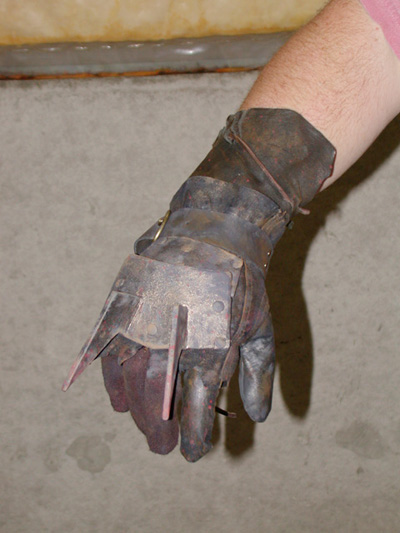
| Another view of the finished glove. Here you see the armour plates have been riveted directly to the outer glove. I built in articulation when attaching the plates so there is a bit of movement when flexing your hand. | Back view of shield showing handle
grip and belt used for upper arm support. |
 |
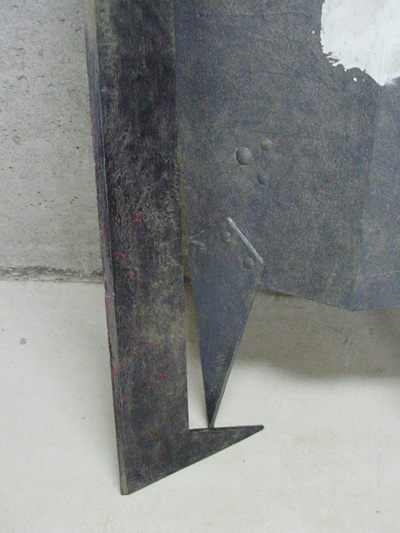 |
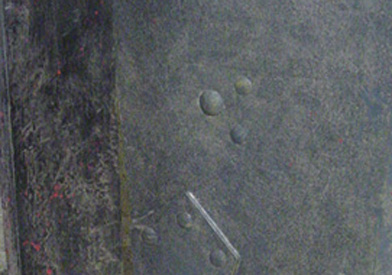
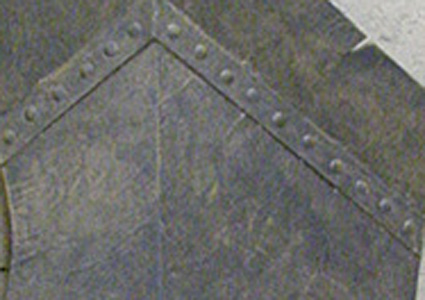
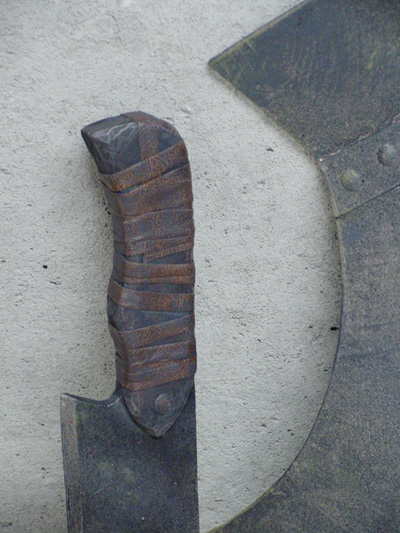
| Detail view of the top of the shield and leather-wrapped hilt of the sword. All the rivets are decorative only and made out of thumbtacks. | Detail view of the bottom of the shield showing the how the spikes appear like separate plates. Again all the rivets are cosmetic only with the exception of the large bolt head which is used to attach the handle to the shield. |
I downloaded an image of the United Cutlery Uruk-Hai Scimitar and traced it's outline including the hilt. I them scaled up the drawing on a photocopier to 30" in length. For this I cut 2 identical pieces of canvas board and carefully cut an angled bevel along the blade edge of both pieces. I then glued them back to back, smooth side out. The 2 angled cuts created not a bad edge when put together. The hilt was finished off with 2 pieces of wood glued and then carved to shape.
Leather straps completed the look.
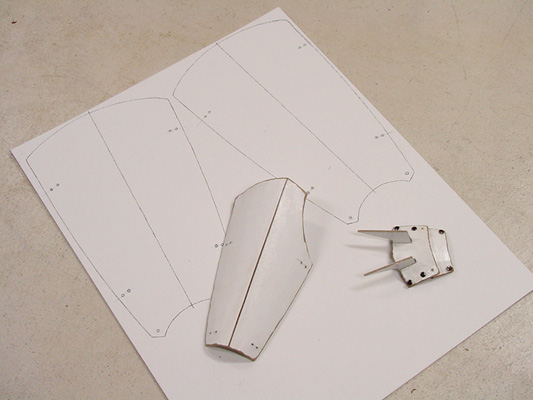
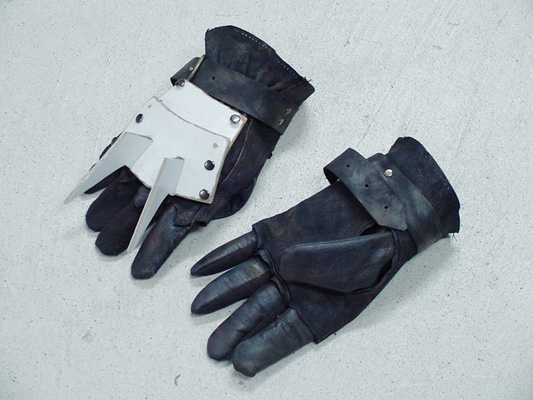
For the gloves I roughly followed some of the images on the 'net and in the design galleries of the TTT extended edition DVD. They are made up 2 layers of gloves. The outer are rough leather work gloves with the fingers cut off and the inner gloves are some cool gardening gloves I found. I thought that they weren't long enough so I made some cuffs out of scrap leather that fit inside them. The metal plates on the one glove is again made of painted canvas board and then riveted directly to the outer glove.
 |
 |
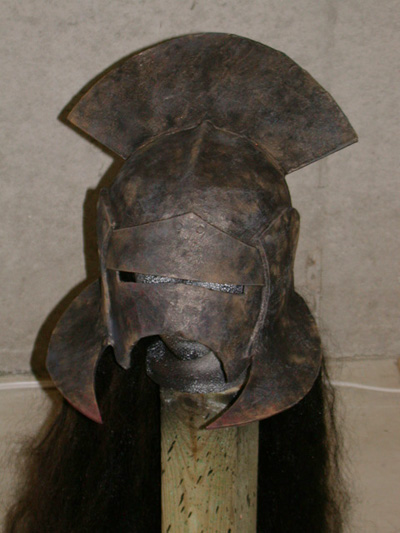
| Front view of the finished helmet. It is all done in cardboard, newspaper and modge-podge over a baseball helmet shell. It's very strong and surprisingly heavy. The wig is (for now) attached to the inside back of the helmet. When I wear it I'll put in fangs and apply makeup to the lower part of my face and neck. | Side view of the helmet. The overall proportions are off due to using the baseball helmet as a base but it greatly simplified construction so it's forgivable. |
 |
 |
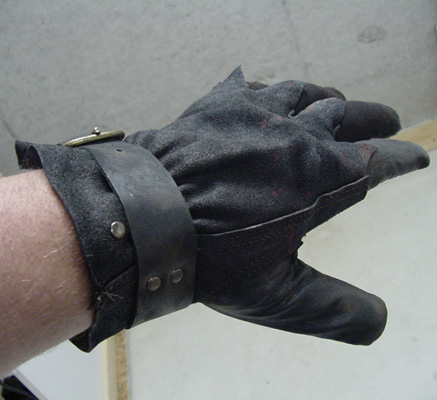
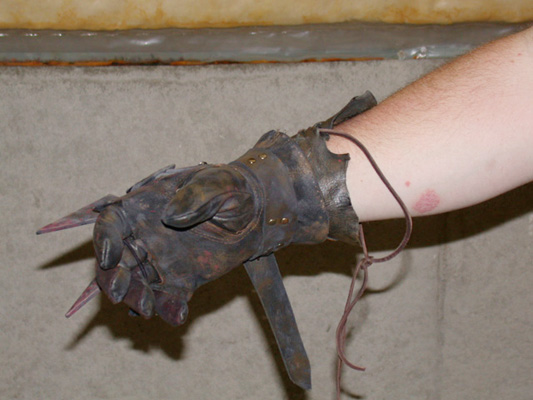
| The shield arm glove in progress. It was made using a leather work glove, dyed black and the fingers cut off. | Another view of the glove in progress. You can clearly see the two types of gloves that make up the inner and outer gloves. The inner glove is a type of gardening glove with a black vinyl no-slip material covering parts of the thumb and fingers. Everything has been extensively weathered. |
 |
 |
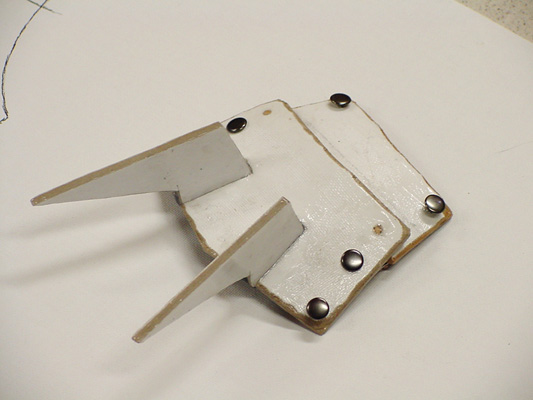
| This shows both gloves in progress with the spiked armour plates yet to be painted and attached. I later made cuffs out of scrap leather to fit inside the gloves and make them look longer. | The finished sword arm glove showing both the finished spiked armour plates and the leather cuff. It has all been further distressed and weathered. At bit of red paint for blood splatters is always good. |
 |
|
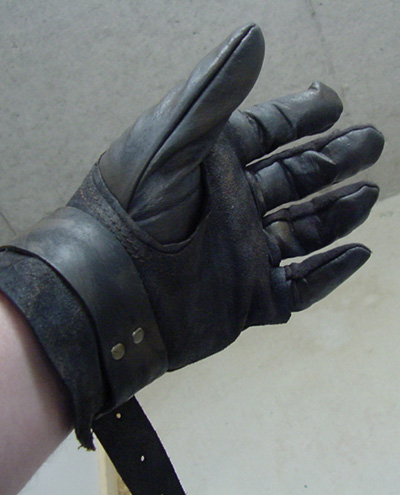
| Another view of the finished glove. Here you see the armour plates have been riveted directly to the outer glove. I built in articulation when attaching the plates so there is a bit of movement when flexing your hand. |
This is what I thought would give me the most trouble an I thought about it a lot. In the end it went quite easy. I got the idea of using a baseball batting helmet as the base from the 2 women doing Sam and Frodo in orc armour. Once I had that to build on the rest just fell into place. I built the basic look of it using poster-board and electrical tape. Then I bent and inserted coat hanger wire to strengthen it and create the flare at the back. Separate pieces of artist's mat-board formed the various plates and the blades where made out of canvas board with a lot of filler to get the curves. The proportions are little off but passable I thought. For now I've attached the wig to the inside back of the helmet as I'm not planning on wearing a mask. I've got a set of Uruk-Hai teeth from Dental Distortions and will use makeup on the lower part of my face and neck but the helmet covers the rest of my head. My thought was that since the costume will be hot and heavy I can take off the helmet and wig to get some fresh air without having a hot prosthetic mask on. I might change this in the future so the wig is attached with screw posts instead of rivets.
 |
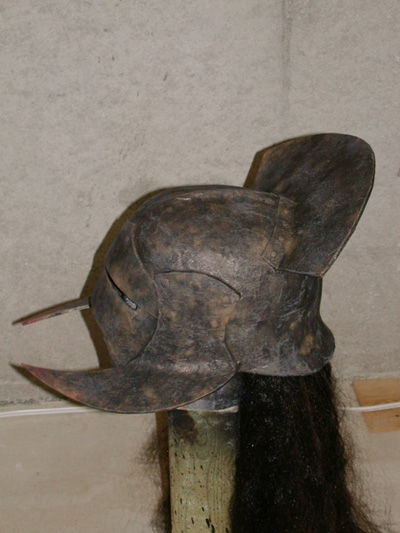 |
| Front view of the finished helmet. It is all done in cardboard, newspaper and modge-podge over a baseball helmet shell. It's very strong and surprisingly heavy. The wig is (for now) attached to the inside back of the helmet. When I wear it I'll put in fangs and apply makeup to the lower part of my face and neck. | Side view of the helmet. The overall proportions are off due to using the baseball helmet as a base but it greatly simplified construction so it's forgivable |
 |
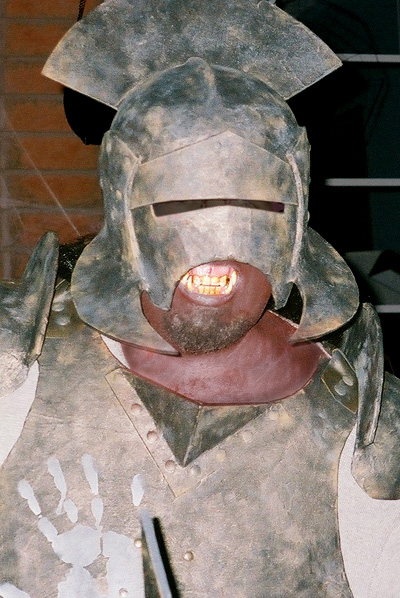 |
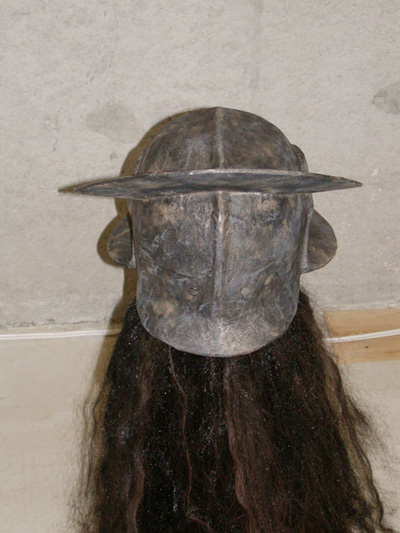
| Back view of the helmet. All the rivets are for appearances only with the exception of the six across the back which are screw posts to hold the wig in place. The screw posts will allow me to remove the wig if at some time in the future I decide to go with a full-face prosthetic, in which case I would want to wear the wig on my head. | Close-up view showing off the fangs. You can just make out how I was able to wear my glasses under the helmet so I could see. In the future I'll get some special effect contacts and re-position my head in the helmet to bring it closer to my face. As you can see, because of the coverage afforded by the helmet, as long as I leave it on, a prosthetic mask is not necessary. However, this is again something I'll look into in the future. I know most Uruk-Hai in the movies had little if any facial hair (a hold-over from their ancient elven heritage?) I kept my goatee as I was reluctant to shave it off. I think it adds to the look. |
 |
|
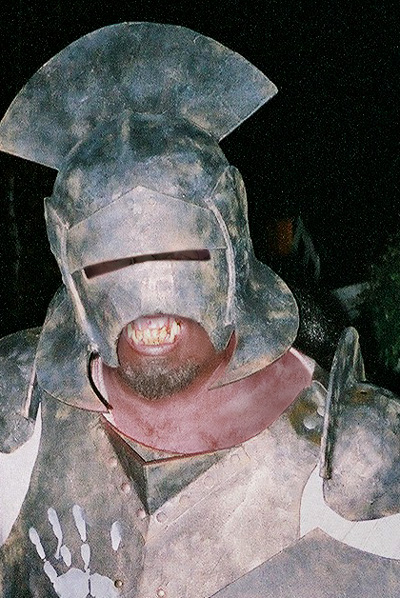
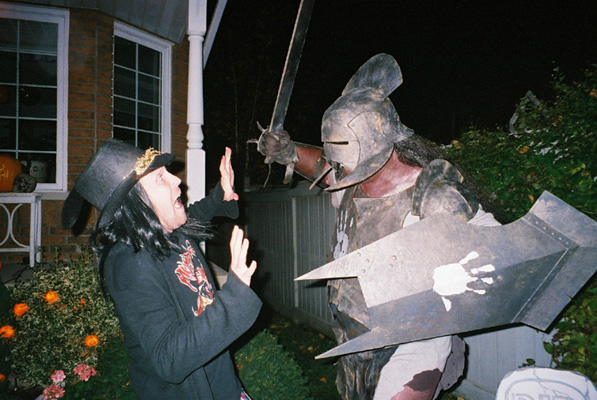
I wore the costume for the first time at Halloween - I was working on finishing it off right up until the last minute! I'm 6 feet tall and the helmet visually adds at least 8 inches to that so needless to say I scared a lot of kids (and I think quite a few of their parents, as well) - more candy for me! Actually, it was fun. A lot of kids recognized the character and wanted to come and see me up close to see if I was for real. I'd shake their hand if they were brave enough. :)
 |
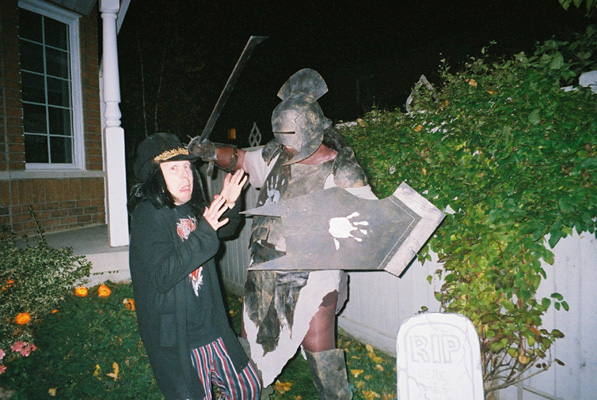 |
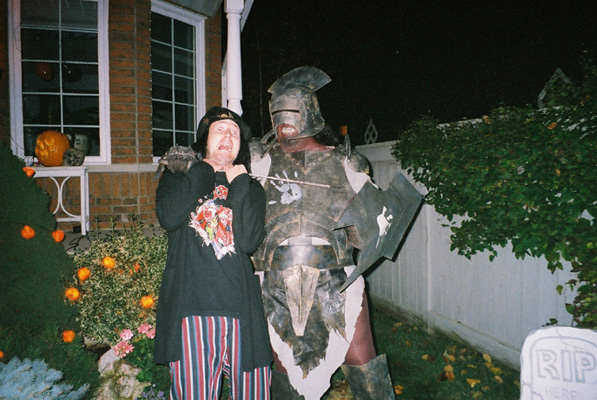
| This and the next 2 shots show me clowning around with my brother but they show off the mobility of the outfit and how I can manoeuvre in the armour. I think I'm more than a little intimidating! | |
 |
|
![]()
v ----- Advertisement -----v
^ -----Advertisement ----- ^
![]()
![]()
This page was last updated 11/21/09