|
v ----- Advertisement -----v
^ -----Advertisement ----- ^
|
Note: there are more tips related to these techniques though out this section. Basic Tooling Steps
The leather design will remain for a good period of time. Age, moisture and use will eventually wear away the design but good leather care will extend the life.
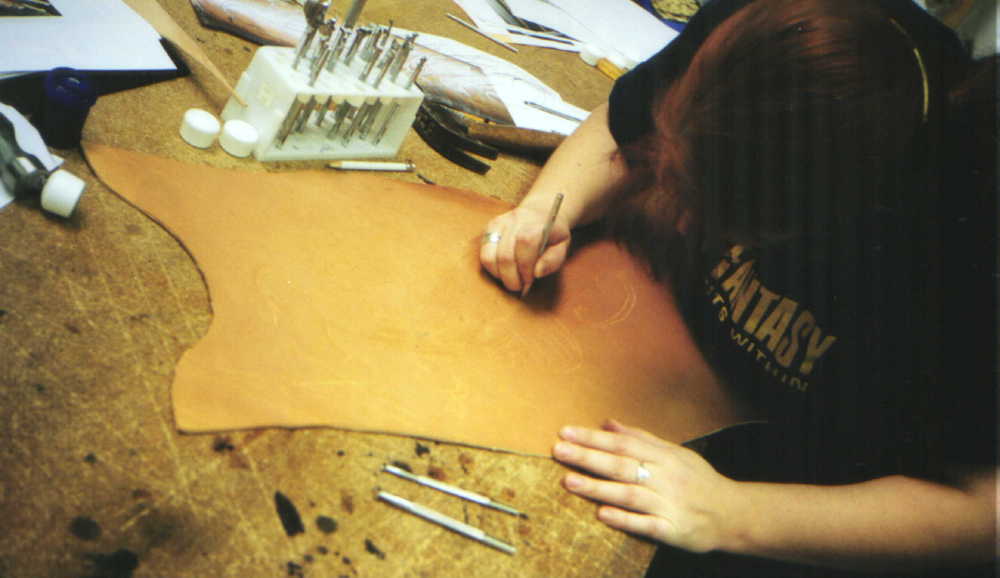
Step Breakdown -- with tipsSelect your leatherUsually, tooling is done on "top grain" leather, the type with a smooth side (the natural skin surface). And it is best done on vegetable-tanned leather that has not been oiled or waxed in any way, so it's still pinkish or flesh-colored. If you're not sure, as always. Test. Wet a corner of it and try making lines with various items like the back of a table knife, the edge of a penny, things like that (not too sharp or pointy). Does it keep the line? Cut your leather patternStandard scissors are not going to cut though anything but the thinnest leathers. Use an exacto knife or specially sharpened scissors. (Can be purchased as Tandy Leather.) If you are making something curved, like the quiver or vambraces, build your mold. Quiver will probably need a cardboard and duct tape mold. Vambraces may just need the right diameter bottle or can. Vambraces can also be left flat. Other molding items can be things like butter tubs. Point that varies among the folks giving tips. Some like to dye the whole piece of leather now. Others wait until it is shaped and carved and then do all the dying at once. Trace the patternTransfer the pattern onto the leather. Carbon paper is a good option and doesn't rub off. You can draw with chalk, but be careful not to smear your work. You can work directly over the leather using tracing paper... but you may need to secure the pattern in place. Put the pin holes somewhere they will not be seen... like where you're going to put lacing holes. Use binder clips or anything that works. Punch the holes or slots for sewing now.
Dampen the leather(Here is where opinions vary from folks) Smaller projects you can use wet sponge or wet rag. That's why you soak the leather through and leave it for 30 minutes (less for smaller pieces) , laying on a flat surface and then go tool it. That way it will still hold the form when you mold it and it will hold the design but not be too waterlogged. Too wet it does have a tendency to revert to "flesh" so it might be a little too malleable. Let dry a bit. Warnings:
Burnish the leather - optionalBurnish the leather with a metal burnishing tool or a wooden pointy stick. (These are sold at leather stores so look for them when you buy your leather). This will help the longevity of the pattern. Carve and stampCarve your design into the leather without cutting it. (Cut are only used very sparely.) You will need stamps and various molding tool to create designs. A stylus will allow you to draw lines. The stamps are hammered into the leather with a mallet. A rawhide mallet is best but you can also use plastic. You do not want to use a metal hammer. That provides too much pressure. You must be careful when you are tooling a large section of leather. All that pounding and cutting and wetting and pounding can end up stretching your piece of leather so that it no longer correctly fits. Tape or glue something to the back side of the leather to keep it from 'growing' out of size. Most basic leather books mention this but time and time again. people run into problems with fit after the careful work in the beginning. Dye the leatherAfter you've carved your designs, you may wish to dye the pattern you have just tooled or, it you have not yet dyed the whole hide, now is the time. Be use to wear gloves and protect your surfaces. Lock up the cats. Leather dye will get into/on everything. Practice first so that you can see how the dye flows and absorbers into the leather. If you dye before the pieces are cut, then your cut edges will show a lighter/undyed color. Dyed leather will tool differently and, if you're going to carve it, the
gouge will show a different color than your dyed surface. However, you
might like that look, so try things out on a test-dyed scrap first. Recommended dyes
Finish the edgesSmooth and slick your edges to a polish. Edges that are not finished over time will look frayed and worn. Mold ItIf you are doing something that needs shaping, stretch the leather over the mold and lace it in place. This could be your cardboard and duct tape mold. It could be a paint can for the vambraces... etc. You may do more cutting and punching at this point. Additional painting of the design may be done at this point. Paint recommendations
Let dry at least 24 hours. Seal itWhen you are all done, the leather needs to be sealed to protect your work and keep it from the damp.
Tips out on the web for toolingAn advanced Tooling and Leather Project
v ----- Advertisement -----v
^ -----Advertisement ----- ^
This page was last updated 04/22/08 |
|||||