|
|
|
|
|
|
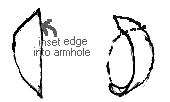
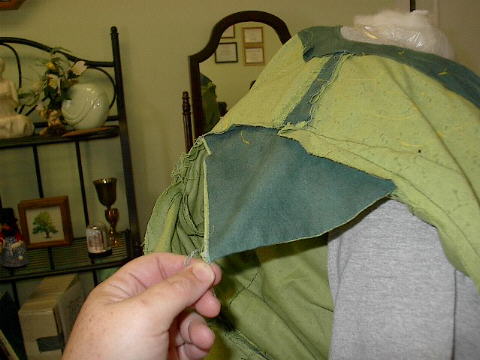
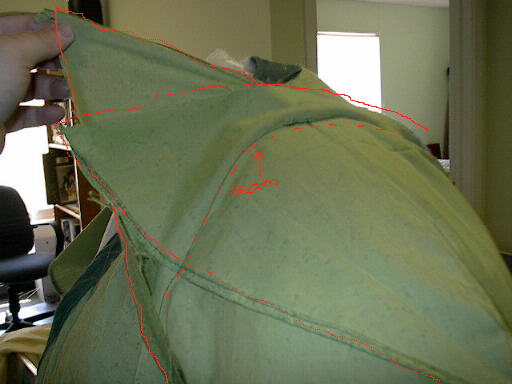
Making the Legolas JerkinV1.1 May, 2004 Legola's costume was redone after shooting had begun. There was a frantic 30 hour marathon session during which it was reworked. We're interpreting this to mean, that they draped and fudged like crazy... and did not go to a flat pattern for the first jerkin that Legolas wore. However, we recognize that not everyone is happy with draping and that some would rather just modify a pattern, so we are going to present both version of the sleeves. See yet another method in pattern modifications for a "half wrap" sleeve pattern. Draping the sleeves== Judy I've *attempted* to draw the pattern shapes and how I curled it around the armhole. Please be kind, I have problems drawing stick figures. ;-) Because I sewed it all together, I pinned the top leaf wrap in place and then pinned in the bottom/inner leaf wrap and sewed them both in one seam. And did a lot of fussing with them! In the topleaf I started with a half-oval shape, and then tapered the ends a bit. The mid section is sorta straight and rounded. It's kinda like a not-quite half-circloid, Then I tried to draw how I wrapped it into the armhole. Visualize, I started pinning it at the bottom under the arm, and worked around to over the top... and then instead of pinning it simply along the straight edge of the "leaf" at the top, I pulled the point through the seam, so that the seam (that dotted line going around) cut off about 5" of point - it helps shape the leaf and keep it from flapping as much. Does it make any sense? In the bottom leaf, I did sorta the same thing. I used a much longer piece (the full 45" fabric width) to do the same basic half-circloid shape. Then I curled it so that the two points overlapped into a "tube" sleeve, creating a straight circular edge for the armhole. Well, of course this was much too floppy, so I did the same sort of thing I did with the topleaf: I pulled the points through! Yes, this changes the angle of the overlapped curve, but it worked ok. So when I stitched the two leafwraps into the armhole, it looks rightish from the outside, and on the inside, I have a lot of excess points (in quilting they call things like this "bunny ears") padding my shoulders. I'll trim it someday. I'm not exactly sure what the final pattern piece shape is, when you start with the half-circloid and end up trimming 5" or so of point off at an angle - that's art and I can't even see it! I only know that I fussed it in the sewing.
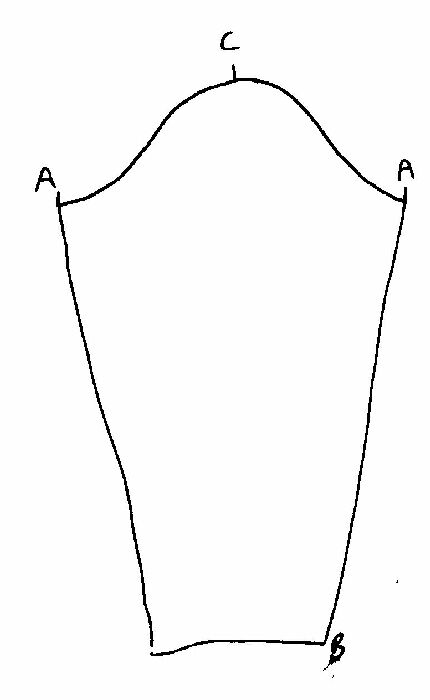
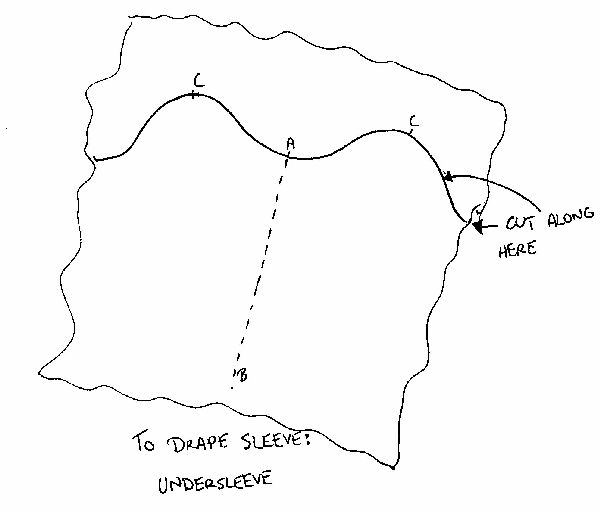
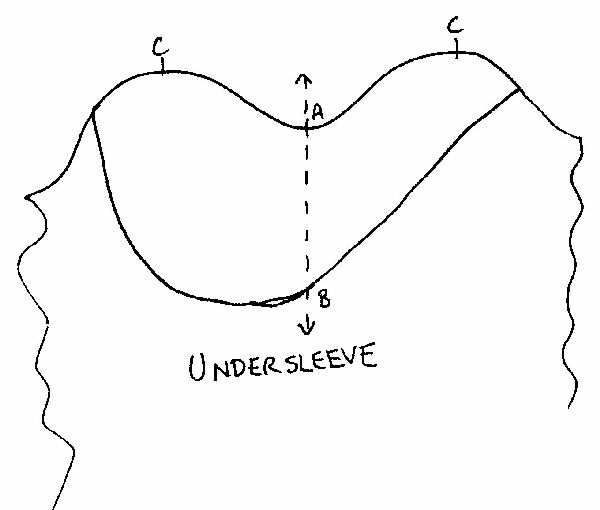
Flat Pattern== Naomi UNDERSLEEVE: The easiest way to make the leaf-wrap design sleeves on Legolas' jerkin is to begin with the sleeve pattern that comes with the base pattern from which you are making the jerkin body. You need a set in shirt sleeve pattern.
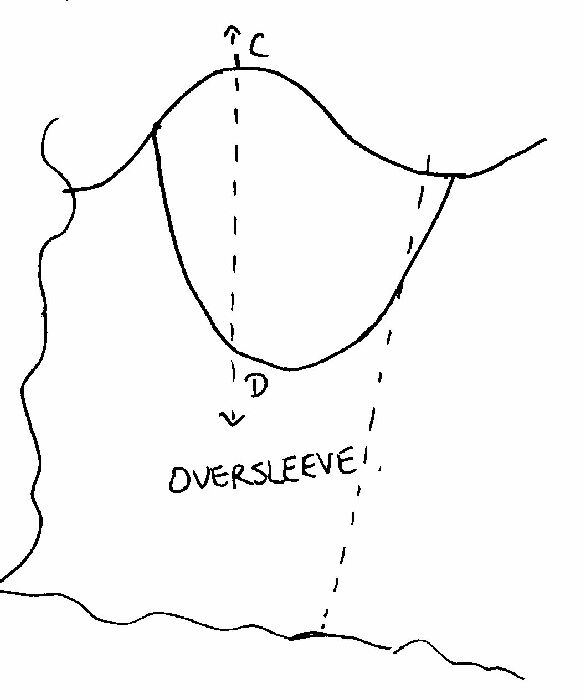
OVERSLEEVE:
ASSEMBLY: Complete the body of the jerkin first, including side seams. Pin the outer sleeve in place, matching point C to shoulder seam and point A to side seam of jerkin. I recommend you baste it or machine stitch it near the seam allowance, to hold it in place. Then position the inner sleeve, beginning with the front of the sleeve, match point C to shoulder seam, point A to underarm, and then fold the back around and up, matching point C to shoulder seam, so it lies innermost. Pin, then machine stitch all layers together. BELLED SLEEVE FOR SILK SHIRT:
NOTE: When Legolas wears his jerkin and vambraces, the bell is folded towards the inner arm and held in place by the vambraces. LEGOLAS' COLLAR FOR SILK SHIRT: Collar diagram follows basic principle of all continuous roll collars. (See directions in Collars section). Facing should be cut to continue to waist line of shirt, or even down to hem if you are making it with continuous panels and no waist seam.
Find out how to estimate how many hides you need to make the jerkin.
|
This page was last updated 04/22/08