


|
|
Arwen's Hair Jewel - Beading Technique
aka Arwen's Bridge Headdress
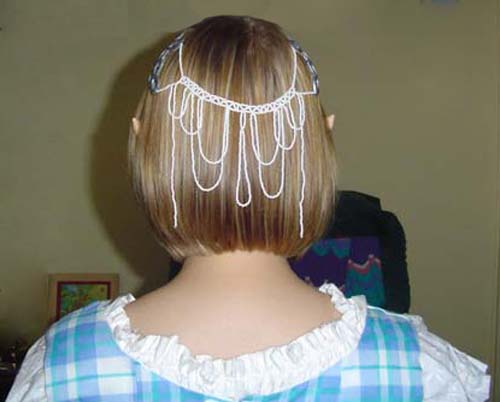
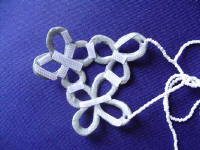
This is the beautiful decoration we see on the back of Arwen's hair
while she wears the Bridge Dress
by Karlie S.
Things you’ll need
(besides a sense of humour and patience):
For Clay Flowers:
- 1 package silver sculpey
- Aluminium Foil
- Wax paper
- X-acto knife
- Toothpick
- Silver Paint and Brush
- Super Glue
- Velcro
- The non-adhesive/sew type of Velcro will work
best and are easiest to use
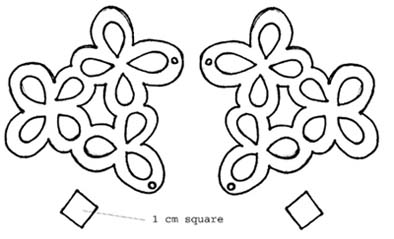
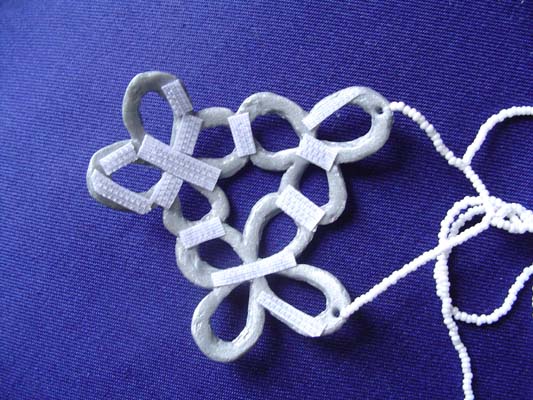
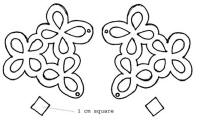
- Side flower pattern
Beadwork:
- at least 50g of pearlized (“Ceylon” finish”) white
seed beads or delicas
- beading needle
- Beading pattern from
pattern
- 1 skein beading thread
- You MUST use beading thread, because it will have
the required strength and drape. A monofilament like “Fireline” will
not work as well because it will not drape properly.
When you print the patterns off, make sure that you
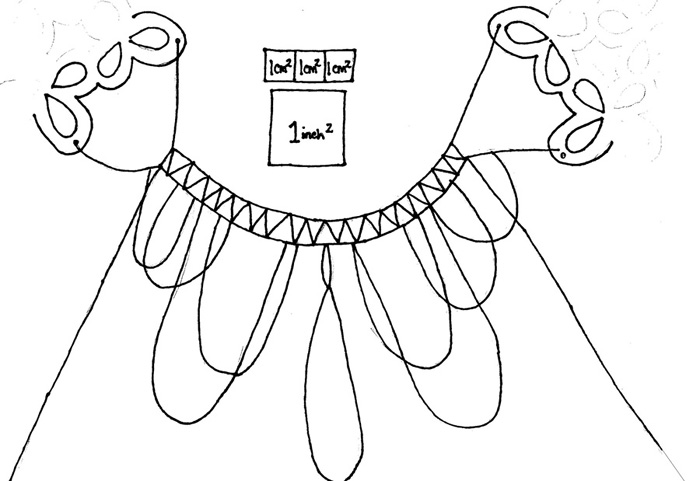
print them to the right scale. I’ve included boxes (on the flower pattern,
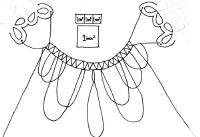
they’re 1 cm2 , on the beadwork there are three 1 cm2 and one 1” square).
The two main patterns should print off at the correct
size with a standard print program. Leave them set at 72dpi.
 |
 |
| Master Hair Flower pattern, left and
right sides |
Bead drape pattern |
Part 1 : Creating the Flowers
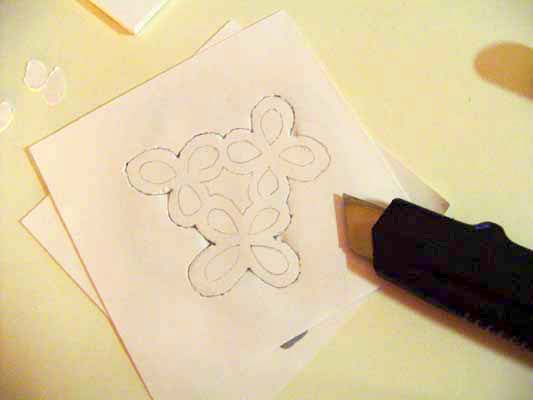
You will probably want to protect your work surface
when working with sculpey so you don’t cut or scratch the surface
underneath. Thick paper or thin cardboard will work well.
Lay out wax paper over your work surface and
paper/cardboard. This will help you to transfer the unbaked flowers.
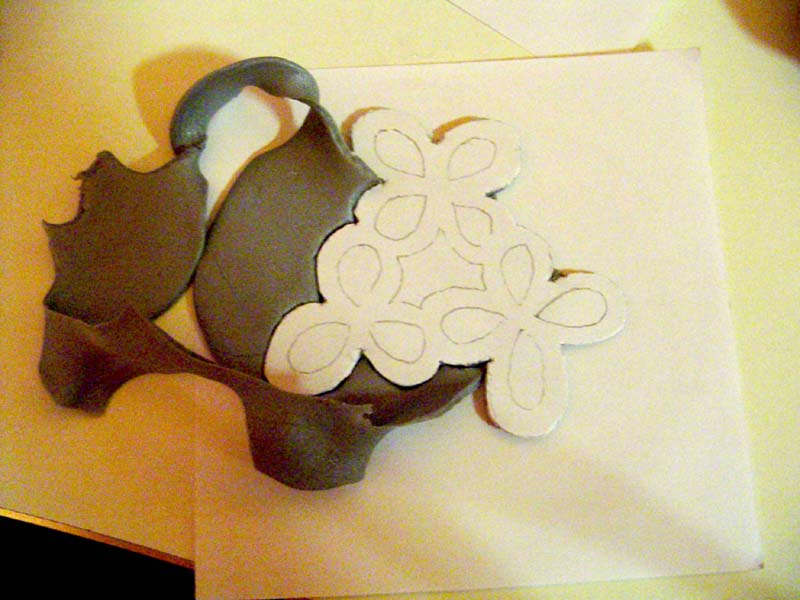
Roll out the amount of sculpey required to fit the
flower pattern to approximately 1.5-2mm thick (1/16 inch). Note that
I am only cutting out one at a time, feel free to do this as well.
Poke holes through the flowers in marked places (small
dots) with a toothpick. Use the toothpick to help smooth the edges of the
sculpey.
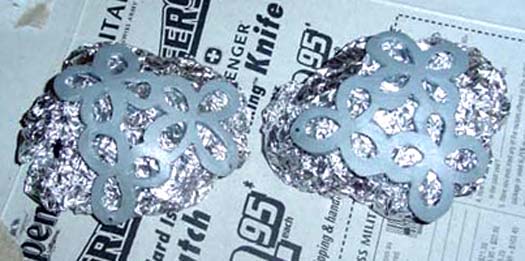
Bunch some aluminium foil into two shallow dome
shapes. This will help the sculpey bake into a curved shape (like the sides
of your head). Lay the flowers over top and bake according to directions.
When cool, paint silver (if desired).
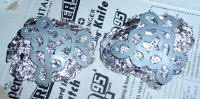
Cut the sharper hooked side of the Velcro into small
pieces (see picture) and carefully super glue in place.
REMEMBER! SUPER GLUE WILL BOND SKIN IN SECONDS, BE
CAREFUL!
Part II: Beadwork
NOTE: A lot of this is trial and error work, since
beads vary in size, as do people’s heads! I’ve tried to provide clear but
open directions.
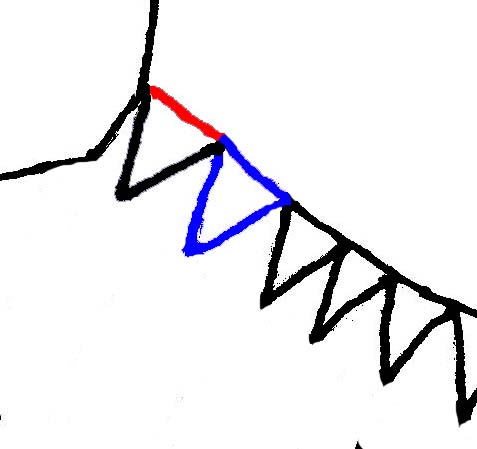
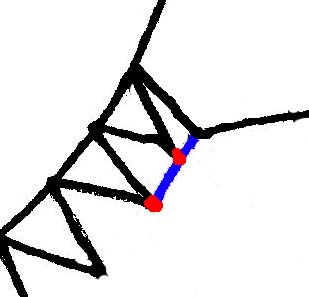
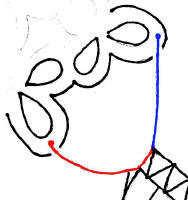
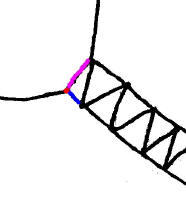
- Blue lines indicate new
beads strung on,
- Red
lines indicate returning through beads already strung.
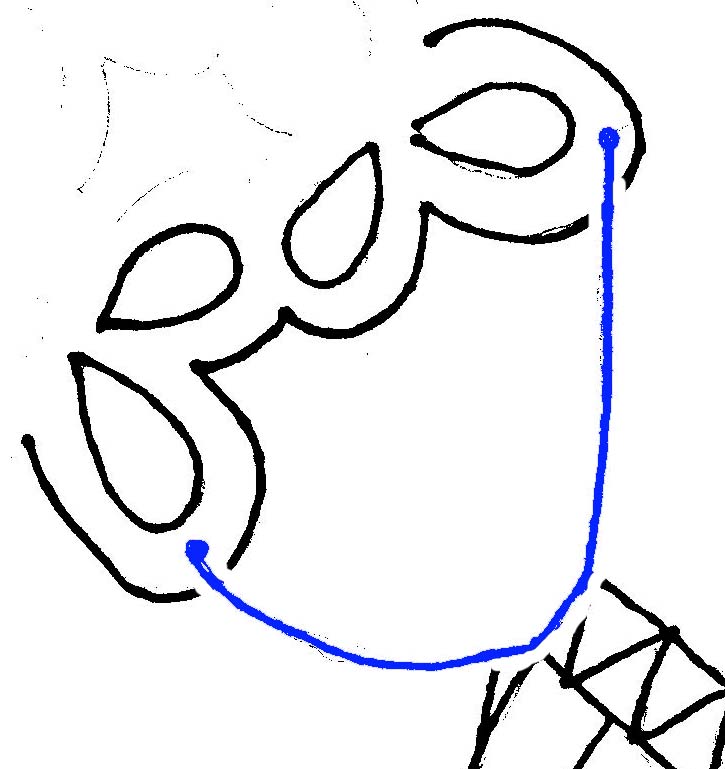
 |
Attach beading thread through the top
hole in the left flower. (Be sure you have the correct flower and
hole!). String enough beads for required length of triangle: |
 |
Loop through bottom hole, then
return through bottom length beads. |
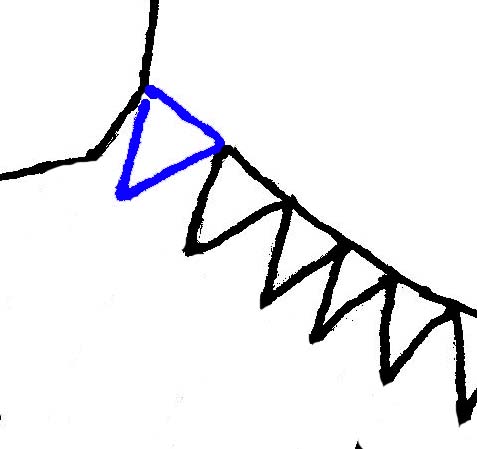
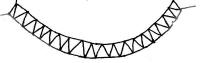
 |
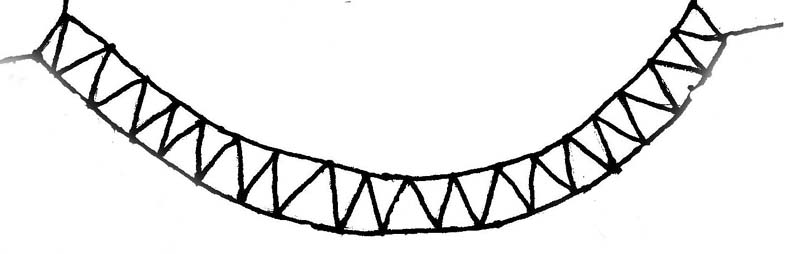
The rest is mostly done by trial and
error. The pictures show the basic way to weave the thread. Since both
seed beads and delicas vary in shape and size an exact number of beads
to string and go through is not possible to give.
Remember make your triangles out of an odd
number of beads! |
 |
|
 |
|
 |
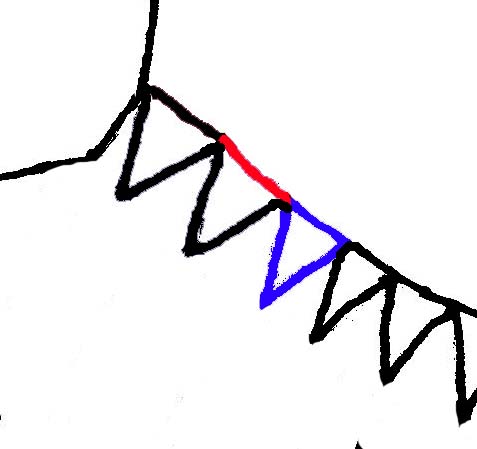
After triangle repeats are done, add
beads for right top length
Loop through hole, then return those new beads. |
 |
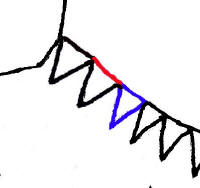
String on beads for right bottom
length, loop through hole, then return through ALMOST all of the beads.
We’re going to make a “side”. Decide how many beads (usually 3-4) will
make a side about equal in length to the height of your triangle. DON’T
pass through that many beads at the top. |
 |
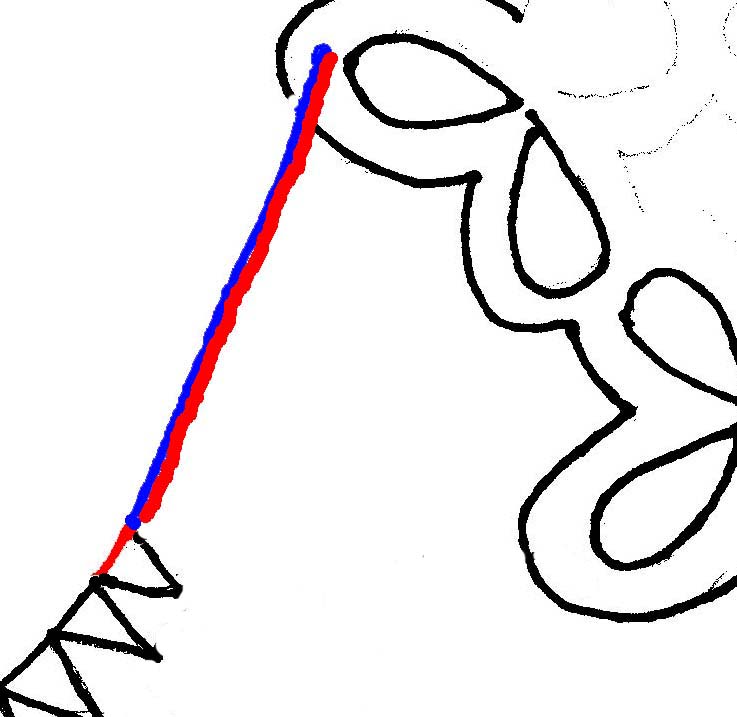
At this point you will need to have a
length of thread the length of your headdress, plus 15 cm (6 inches)
that is free of knots!
If you have to add more thread, undo the beading
you just did, trim it back so that you can hide a knot within those
beads, then attach a long enough length using a weaver’s sheet bend.
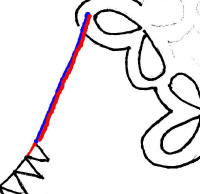
String on enough beads to span between your “side”
and the first triangle peak. Go through the triangle peak bead.
Continue in this manner, but there are a few things to take into
account. Since this will be draping in a curve across the back of your
head, you’re going to need to make this into a curve. You can do this
by every so often adding an extra bead between the peaks, that is, one
more than would be required to span the gap. It will likely take a few
tries to get it to look right (since I was speeding through mine, mine
isn’t even). This is why you don’t want knots in your thread, because
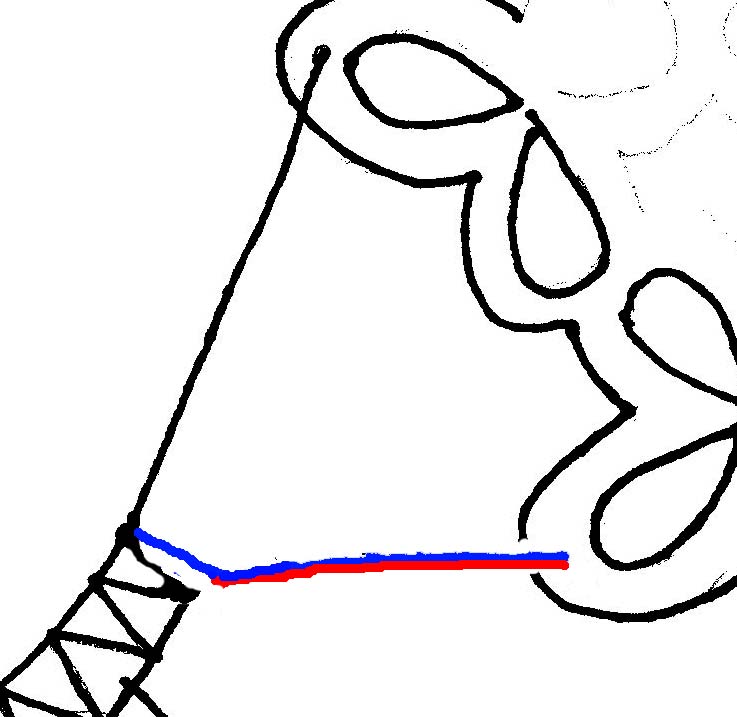
then it’s easy to pull back out. Do this until you reach the last peak. |
 |
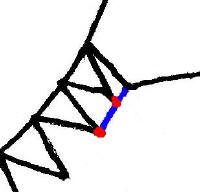
Count the number of beads there are
in the right “side”. Then, count that many beads down from the junction
of the LEFT top and bottom lengths (these beads are marked in purple).
|
 |
Add enough beads to your string to
span the gap between the bottommost “purple” bead (marked here in red),
and your peak. Then go DOWN through that red bead. |
 |
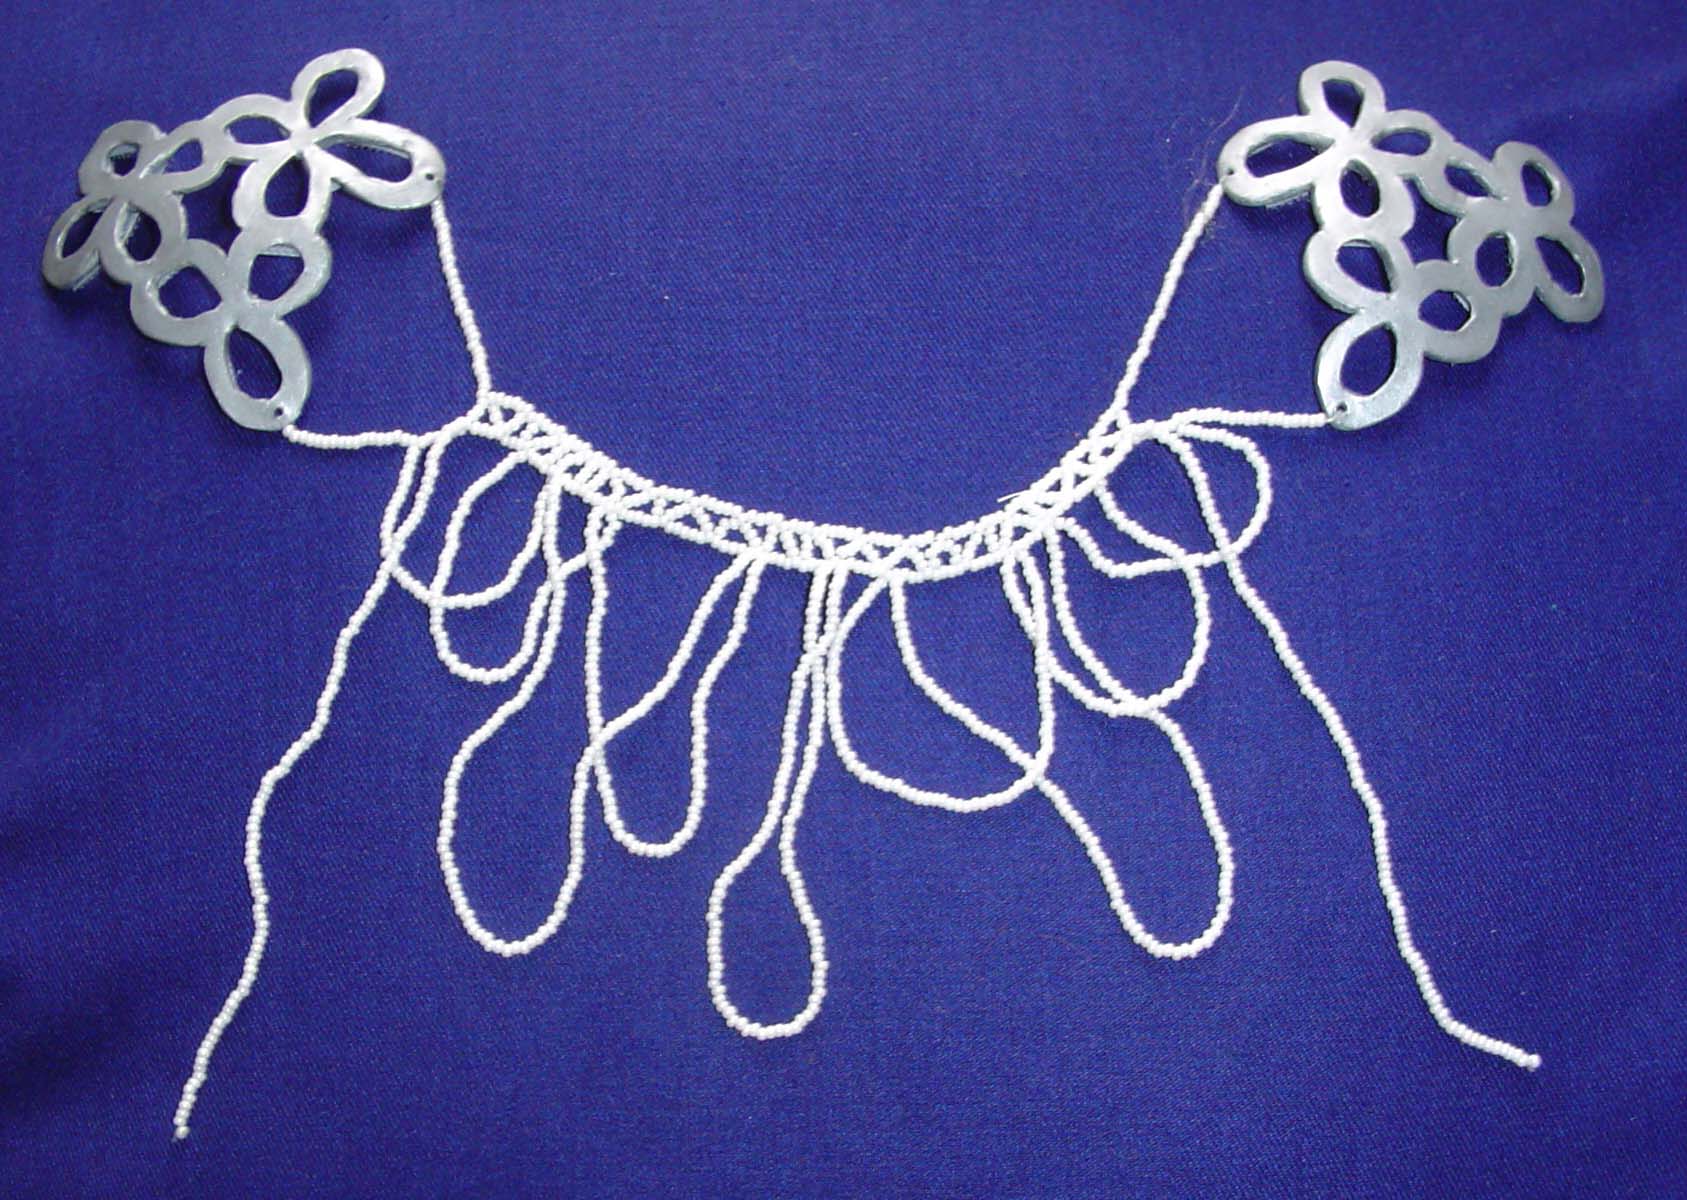
Now you just need to create the
“loops and lengths” seen in the pattern. To make a length you string on
the number of beads required, then go back through all but the bottom
bead (the last one you strung on). To make a loop, simply string on
enough beads, then pass through another bead on the bottom of the arc in
the right spot. Use your triangles and the pattern to guide where to
place them. The middle “double loop” is created by passing back through
a single bead partway up. Congrats,
you’ve finished the hard part! |
 |
To secure your thread, I just sort of
travel back through some beads, tie a knot, travel through more, tie
some more knots…you could use the superglue again to secure the end and
the knots. |
And you’re done! Now you just need find a rugged
ranger to give your heart to!
Angel Dress | Chase Outfit | Bridge Dress | Farewell Dress | Dream Gown | Hope Dress | Requiem Outfit | Mourning Gown | Cranberry Gown | Blood Red Dress | Coronation Gown | Midnight Cloak | Arch Dress | Lavender Bead Dress | Rose Dress | Battle Outfit | White Weta Gown | Arwen's Things
LOTR Home | Up
This page was last updated
04/22/08
|