![]()
![]()
|
|
|
|
|
|
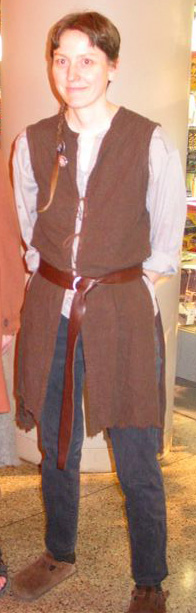
Sarah S. - Massachusetts, USAStrider, "wearable test"
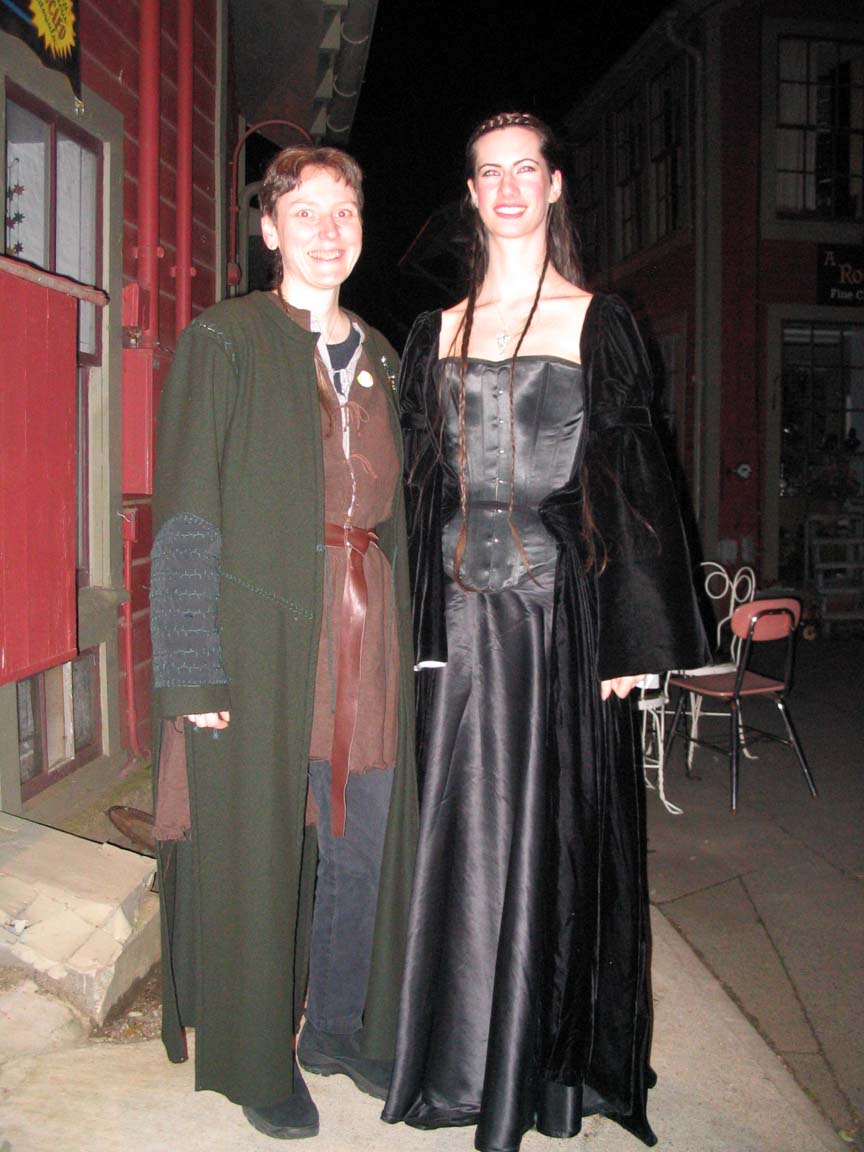
I made the string tie for the keyhole out of braided cotton string, in light gray/silvery gray color. (also from my stash, I used to crochet string bags) If I get around to retrofitting with the sleeve vents, I'll make more string for the sleeves. I made the vest out of a dark brown linen/rayon fabric that I had in my stash, and again I only had one day to make it. I used Butterick 6836 (2000) as my jumping-off point, making the front and back panels longer, and placing a seam in the center back instead of a fold. I rolled the side cut edges to the outside to simulate the binding, and bound the center front with long straight-grain strips. The neckline and armscyes I bound with bias. The center back is just seamed above the waist, the edges serged separately, pressed open, and stitched down below the waist. I made the string ties for the front again from the braided cotton string (it's carpet warp, but also good for crochet), and again because of time pressure I only made three-strand braids rather than the four-strands we see in the original. I used the same stuff to lace up the sides, just threading it through the bound edges with a chenille needle. I marked the places first so they'd be evenly spaced between the waist and armpit. If I recall correctly, I started each braid with two yards of string, which took-up to about 60" when braided, and one braid was enough to lace up both sides, the other made the front ties. To give it the right patina, I used scissors to hack off the bottom edges of the panels unevenly, and then washed and drip-dried, without ironing. I think it reads so well because the color is good, and the bottom edges came out just right. And linen/rayon drapes so nicely. The belt is just a strip of garment leather, and a single d-ring. Again, it had to come out of stash and be fast. The coat is based on Simplicity 5574(2003), the men's doublet (still in print), combining a small body with x-small sleeve and armscye (which also took some width out at the side, the way the xs armscye comes off the shoulder point). I dropped the center back, front and side lines straight down from the tops, and moved the sleeve seam from the back (correct for Elizabethan) to the underarm (correct for Strider). I also flared the very end of the sleeve a little. And corrected the slope of the front waist after modifying the cf and side. The fabric I used was a dark olivey wool blend. I couldn't afford to commit leather to a test, or to something I might only get a couple chances to wear. I did splurge on the wool, that was not in my stash already, but I felt lucky to find the right color, after seeing the original in Boston. I cut a lot of 1 1/2" bias strips to bind the center front, armscyes, sleeve underarms and shoulders, and one wider bit for the neckline. I also removed an inch of width from the center front, so the coat wouldn't cover the rest of the costume so much. (Aragorn never closes it anyway) And I was able to save some fabric by eliminating seam allowances everywhere I was going to bind with bias. The skirts I made straight rectangles, although watching the bit on the extras dvd where Viggo is testing the costume and drawing his sword, it looks like the skirts are a little bit flared. Next time. In this case, I placed the center backs of the skirts at the selvages, so I could turn those in as facings, where the cb panels are overlapped. Binding the edges: Press bias strips in half lengthwise. Trim away any seam allowance (if not already cut without it) from edges to be bound. Sew bias to garment piece, tucking cut edge of garment piece into fold of bias. Trim close to stitching, but not so close as to let it fall apart! Then I braided a *lot* of black carpet warp to lace it up with! I had to start with fairly long pieces (2 yds, four lengths for the four laced up "seams") so I could get all the way across a shoulder, or down a sleeve, in one pass. I threaded it with the chenille needle again, but the thicker fabric meant I had to pull each stitch through with a pair of pliers. Kind of messed up the needles, but needles are cheap. I didn't bother marking the points: too many, not enough time, so I just eyeballed and did ok. On the sleeve underarms I adjusted the extra string to hang from the wrists evenly. For finishing touches, I oversewed the center back and waist seams with slanty stitches that echoed the lacing (seen on the original in Boston), and put a black fabric patch on the right sleeve forearm, oversewing that all over with blanket stitch and feather stitch, just to suggest the intricate texture of the original. I used a single strand of the carpet warp, which was easy to sew with, and on the sleeve patch, I left knots on the outside to add texture. After I finished, I noticed that the edge of the patch ought to be bound like the edges of the garment pieces. Next time. The pants are just my black jeans (which I also made) and I wish I had boots, or any other accessories!
This page was last updated 11/21/09
|