


|
|
Decorating a Bow with Clay - Legolas' Lothlorien Bow
Justin takes you step by step to applying special clay to a bow to
decorate it. It does take time and practice to get to this level of
art. However, it's a great technique to decorate any bow or any other
prop that needs a flexible design.
(click to expand the images)
To create Legolas' bow, check out the
design images here.
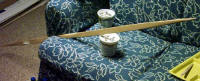 |
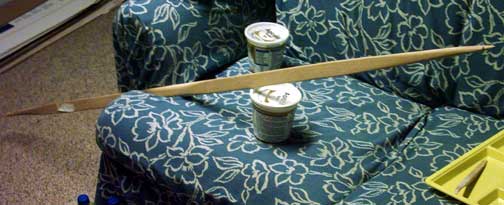
Step 1: Find a way to keep your bow still while working
on it. I use the corner of my couch and a tub of apoxie sculpt... this
allows both tips to be in the air so my designs will not get messed up
by touching the ground. If you have kids, be careful... they will run
by and bump the bow and mess up your designs! |
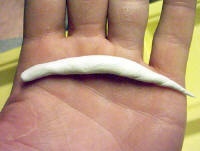 |
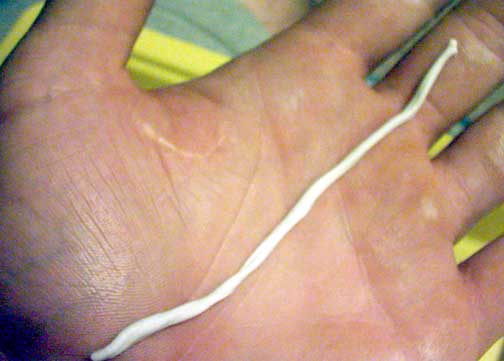
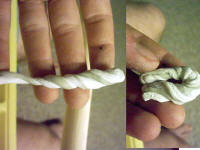
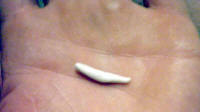
Step 2: You need real clean hands or else this apoxie
sculpt will pick up all the little dirt and hairs. First wash your
hands, then mix together a small amount of the sculpt and roll it
between your hands, the stickyness of the sculpt will get the gunk out
of the pores in your hands. Discard the dirty apoxie. |
 |
Step 3: Find yourself a tool to use when sculpting. I
made mine out of wood, but you can buy real cheap sculpting tools at any
craft store. I dont bother to clean the old sculpt off, I just make a
new one from wood as needed. Aves studio does carry a cleaning solution
for this purpose.
www.Avesstudio.com |
 |
Step 4: When using this apoxie sculpt, be sure to mix
thoroughly 50:50. This clay does not require heating to cure, it is an
air hardening clay, workable time is approx 2 hours + or - depending on
your climate. A little trick I have learned. I make bows, which
requires the leaf designs to be applied on bending wood. To achieve
this I found if you mix 75:25, the apoxie sculpt, when cured, remains
semi flexible and will bend with the bow. Make sure the 75% is the
green part. |
 |
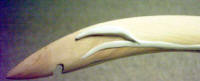
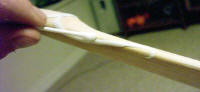
Step 5: The first step to making the lothlorien leaf
design is to roll out some apoxie in the palm of your hand. You'll
notice it is a little sticky to work with the first 30 min or so, but
then it gets easier to work with. If its to sticky, dip your finger in
some water and then work with it. When rolling out the vine, it doesn
not have to be perfect, it will be shaped and perfected in the next few
steps. |
 |
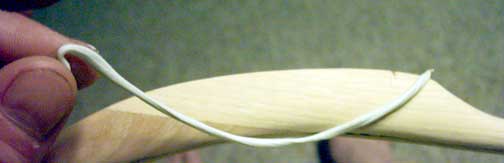
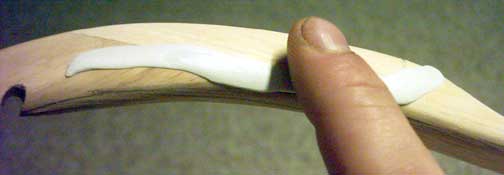
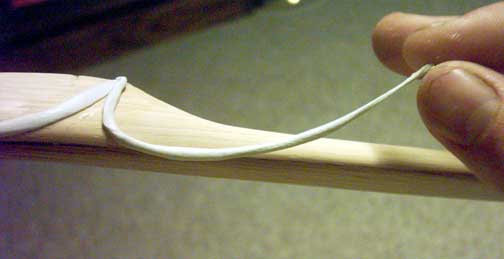
Step 6: Apply the vine to your bow by sticking one end
of it to the wood, and then just laying it on top of the wood. Get as
close as you can to your desired position. *helpful hint, once one end
of it is stuck, you can stretch the length of the vine longer by pulling
slightly. |
 |
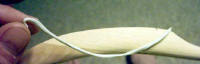
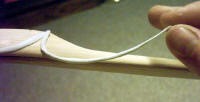
Step 7: In this step you must flatten the vine like a
pancake. This is important to do. Use your finger to rub it flat,
causing the clay to really get into the pores of the wood. If you skip
this step your leaves will probably just pop off after you are finished.
By doing this the sculpt becomes one with the bow. *Also dip your
finger in water to get it smooth. |
 |
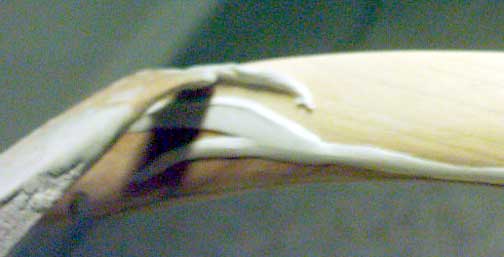
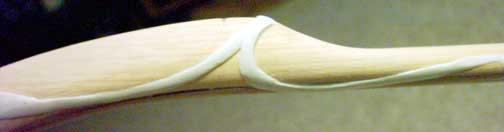
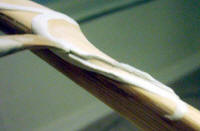
Step 8: So now that your vine is flattened, you can
shape it. This part is really easy, just use your sculpting tool to
remove sculpt from either side of the vine. I always tip my sculpting
tool in water too, it will leave cleaner, smoother lines. |
 |
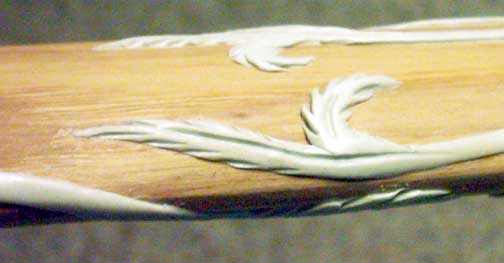
Step 9: After you cut the rough shape of your vine or
leaf, you must remove the waste without damaging the vine. To do so,
move the sculpting tool back and forth along the leaf, slowly pushing
the waste away from the main vine. |
 |
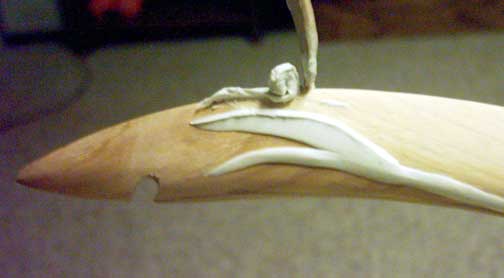
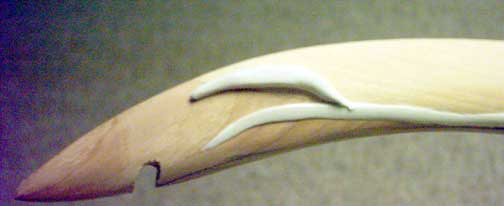
Step 10: Once the waste is a fair distance away, use
your tool to roll up the extra and pull off the bow. It may take a few
tries to get this right, but practice makes perfect. |
 |
Step whenever: You can add extra leaves any time in any
postion by just rolling up some more sculpt in your hand and pressing it
into the wood. Use the same process as stated above. |
 |
|
 |
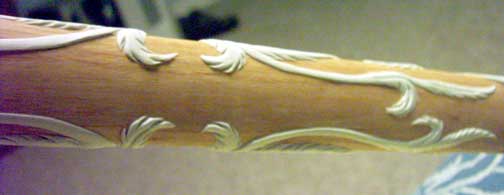
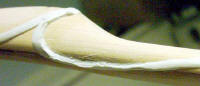
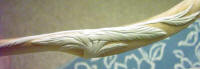
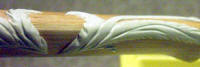
Pictures of more vines being applied, I always put this
one on second. Again, go through the same steps. Flatten, Shape,
remove waste. |
 |
|
 |
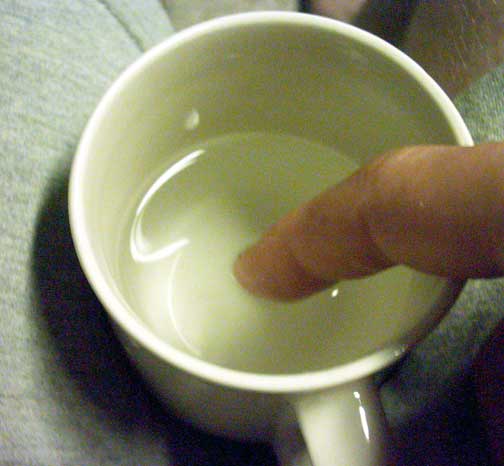
You'll notice along the way you will get rough spots
from using your sculpting tool. An easy remedy is to have a cup of
water handy and a q-tip. Dip the q-tip in the water and run it along the
edge of the vine or leaf. It will pick up any unwanted sculpt. then dip
your finger again in the water and run it along the length of the vine.
This will make it nice and smooth. . |
 |
|
 |
|
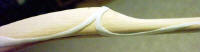 |
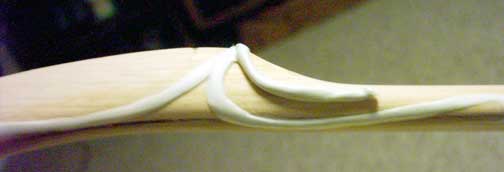
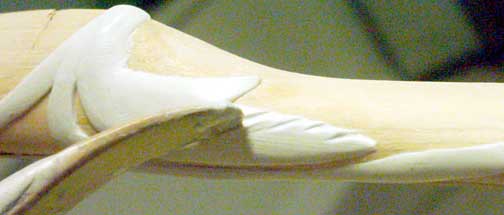
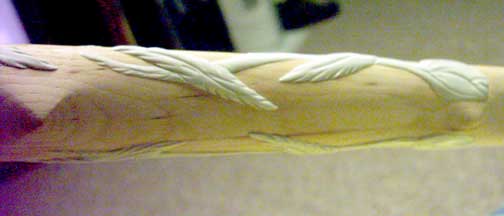
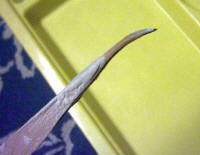
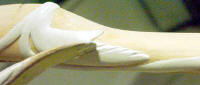
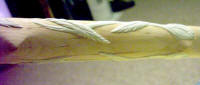
If done correctly you should get a smooth design like
such:
|
 |
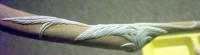
Now you just keep adding leafs using the same method: |
 |
|
 |
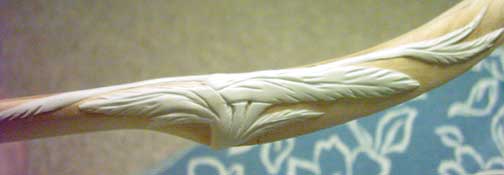
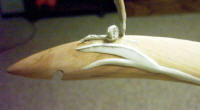
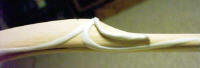
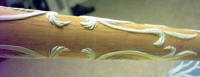
I usually do this step last. When the clay is almost
dry, I wet the suclpting tool and press it into the apoxie, creating all
the intricate leaf designs. |
 |
| To get different angles, I just use the very tip to rotate the
bow so I can do leaves on the front of the bow, the back, pretty
much every angle. |
| I hope you enjoyed my tuturoial. All my products are
available for sale on www.bowstick.com I also do custom orders,
so if you have a design in mind, shoot me an email and we can make
it.
bowstickarchery@rcn.com |
To get different angles, I just use the very tip to rotate the bow so
I can do leaves on the front of the bow, the back, pretty much every
angle.
|
 |
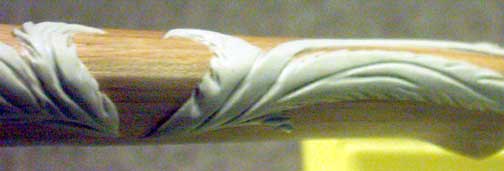
By using all the above techniques, you can get very
intricate designs around the tips of your lothlorien bow, or around then
handle.
|
 |
|
 |
|
 |
|
 |
|
 |
|
Justin makes and decorates bows from scratch. Find out more about
his work and where to get supplies to build your own bow <here>.
Join the
Bowyers Den to ask bow building questions
Pattern Modification & Tips | Fabric Techniques | Fabric Embellishment | All About Armor | Leather Working | Vambraces to Gloves | Weapon Tips | Shoe Tips | Metalwork and Crowns | Working with Clay | Casting Belt Buckle | Casting Small Props | Pipe Making Tips
LOTR Home | Up | Clay Tips | Decorating & Painting | Molding Clay | Baking & Curing Clay | Metal Clay | Clay Leaf Broach | Decorating a Bow | A Rosette
This page was last updated
11/21/09
|